How Do You Remove a Wraparound Light Cover Without Damage
Removing a wraparound light cover is simpler than most car owners think. With the right tools and a little patience, you can take off the cover without scratching or cracking it. This guide walks you through every step, from gathering tools to reassembling your automotive light cover like a pro.
Ever stared at your car’s front end and wondered how to get that wraparound light cover off? Maybe you need to change a bulb, clean the lens, or replace a cracked cover. Whatever the reason, the process is easier than you think.
Many car owners avoid this task because they fear breaking something. But with the right approach, you can remove a wraparound light cover without any damage at all. This guide gives you the confidence and know-how to handle the job yourself.
We will walk you through every single step. From the tools you need to the tricks that save time, you will find everything here. Let us get started.
Key Takeaways
- Know your cover type: Clip-on and screw-on covers require different removal approaches.
- Use the right tools: A plastic pry tool and screwdriver set will prevent damage.
- Work slowly and gently: Rushing is the number one cause of cracked light covers.
- Clean before reinstalling: A clean cover lasts longer and looks better.
- Replace worn clips: Old clips can cause rattles and loose fits over time.
- Follow the reverse order for installation: Reassembly is just removal in reverse.
📑 Table of Contents
- Understanding Your Wraparound Light Cover
- Tools You Will Need for Wraparound Light Cover Removal
- Step-by-Step Guide to Remove a Wraparound Light Cover
- Common Mistakes When Removing a Wraparound Light Cover
- How to Install a New Wraparound Light Cover
- Maintaining Your Automotive Light Covers
- Expert Insights on Wraparound Light Cover Removal
- Frequently Asked Questions
- Conclusion
Understanding Your Wraparound Light Cover
What Is a Wraparound Light Cover?
A wraparound light cover is a protective shell that fits over your car’s headlight or taillight assembly. It wraps around the edges, covering the lens and housing. These covers come in clear, tinted, or smoked finishes.
The main job of a wraparound headlight cover is to protect the bulb and reflector from road debris, water, and UV damage. Over time, these covers can yellow, crack, or fog up. That is when removal becomes necessary.
Most modern vehicles use one of two types of covers. Some rely on plastic light cover clips that snap into place. Others use screws or bolts along the edges. Knowing which type you have makes the whole process much smoother.
Why Do You Need to Remove It?
There are several reasons you might need to take off your automotive light cover:
- Bulb replacement: A burned-out headlight or taillight bulb needs a new one.
- Lens cleaning: Dirt and grime build up and reduce visibility at night.
- Cover replacement: Cracks or chips let moisture in and damage the internal parts.
- Headlight restoration: You may want to sand and reseal a cloudy lens.
- Access for repairs: Wiring or connectors sometimes need attention behind the cover.
No matter the reason, the removal process follows the same basic principles. The key is to be gentle and methodical.
Tools You Will Need for Wraparound Light Cover Removal
Before you start, gather everything you need. Having the right light cover removal tool on hand saves time and prevents frustration. Here is what we recommend:
Essential Tools
- Phillips and flathead screwdrivers: Most covers use small screws that need these.
- Plastic pry tool or trim removal tool: This prevents scratches on the cover and car body.
- Soft cloth or microfiber towel: You will use this to handle the cover gently.
- Flashlight: Good lighting helps you spot hidden fasteners and clips.
Helpful Extras
While not strictly necessary, these items make the job even easier:
- Rubber grip gloves: They give you a better hold on smooth plastic covers.
- Penetrating oil spray: Useful if any screws are rusted or stuck.
- Small container or tray: Keeps screws and clips organized so you do not lose them.
- Replacement clips: Old clips sometimes break during removal. Having spares on hand is smart.
Spread all your tools out on a clean surface before you begin. This small prep step makes a big difference.
Step-by-Step Guide to Remove a Wraparound Light Cover
Now for the part you have been waiting for. Follow these steps carefully, and your wraparound light cover will come off without a scratch.
Step 1: Prepare Your Vehicle
Start by parking on a flat surface. Turn off the engine and let the lights cool down if they have been on. Pop the hood or open the trunk depending on which light you are working on.
Place a soft towel on the ground beneath the work area. This protects both the cover and your car’s paint if the cover slips during removal. A little preparation goes a long way toward preventing damage.
Step 2: Locate the Fasteners
Walk around the light assembly and look closely at the edges of the wraparound light cover. You will typically find fasteners in one of these locations:
- Along the top edge: Hidden under a small rubber cap or visible screw.
- On the side closest to the fender: These often hold the cover tight against the body.
- At the bottom edge: Sometimes recessed and harder to spot.
- Behind the grille or bumper cover: Some vehicles require partial disassembly to access these.
Use your flashlight to look for any rubber gasket light cover seals that might hide screws underneath. Gently pry off any rubber caps with your plastic pry tool. Set them aside safely.
Step 3: Remove the Clips and Screws
Once you have located all the fasteners, start removing them one at a time. If they are screws, turn them counterclockwise with your screwdriver. Place each screw in your container so nothing gets lost.
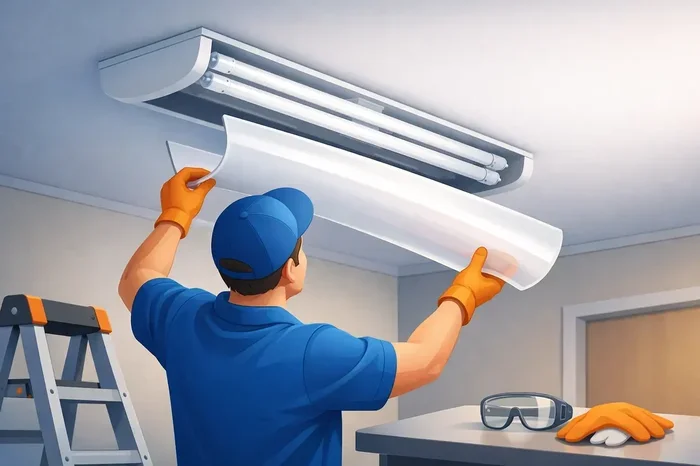
For clip-on light cover models, the process is slightly different. Insert your plastic pry tool between the cover and the light housing. Work slowly around the perimeter, releasing one clip at a time. You will hear a slight pop when each clip disengages.
Do not use metal tools for clips. A metal screwdriver can easily crack the plastic or scratch the paint on your car. The plastic pry tool is your best friend here.
Step 4: Detach the Cover Safely
After all the fasteners are removed, gently wiggle the cover to loosen it. If it feels stuck, double-check that you have not missed any screws or clips. Sometimes a wraparound tail light cover has hidden fasteners near the tail light lens.
Once the cover is free, lift it straight away from the vehicle. Do not twist or pry it sideways. The wiring harness or bulb sockets may still be connected, so handle the cover with care.
Set the cover on your soft cloth. Take a moment to inspect it for cracks or damage. This is also a great time to clean the inside surface before reinstalling.
Common Mistakes When Removing a Wraparound Light Cover
Even with the best intentions, mistakes happen. Here are the most common errors people make when trying to remove a wraparound light cover and how to avoid them.
Rushing the Process
The biggest mistake is trying to force the cover off before all the fasteners are removed. When you feel resistance, stop and check again. There is almost always one more clip or screw hiding somewhere.
Forcing a stuck cover can lead to cracks, broken clips, or damage to the light housing itself. Patience saves money and time in the long run.
Using the Wrong Tools
Metal tools and sharp objects are a cover’s worst enemy. Even a thin flathead screwdriver can leave marks or create stress points that lead to cracks later.
Always reach for plastic trim removal tools when working around automotive plastic parts. They are inexpensive and available at any auto parts store.
Forgetting to Disconnect the Wiring
Some light covers have wiring harnesses attached to the back. If you try to pull the cover off while the wiring is still connected, you risk damaging the connectors or the bulbs.
Always check the back of the light assembly before you start pulling the cover away. Disconnect any plugs gently and set them aside.
How to Install a New Wraparound Light Cover
Once your old cover is off, you may want to put on a new one. Whether it is a replacement or an upgrade, the installation process is simply the reverse of removal.
Matching the Right Cover
Before you buy a new car light cover, make sure it fits your vehicle model and year. Check the part number against your owner’s manual or the part listing online. A cover that is too small or too big will not seat properly.
Also consider the material. Polycarbonate covers are durable and resist UV damage better than cheaper plastic alternatives. They cost a bit more but last significantly longer.
Reassembly Tips
When putting the new cover back on, follow these tips for a secure fit:
- Clean the light housing first: Wipe away any dirt or debris with a soft cloth.
- Check the rubber gasket: Make sure it is seated properly around the edges.
- Align the cover carefully: It should match up with all the screw holes and clip locations.
- Hand-tighten all screws first: Then go back and snug them down evenly.
- Do not overtighten: Tightening screws too much can warp the cover or strip the threads.
Once everything is in place, turn on the lights and check that the cover does not interfere with the beam pattern. A properly installed cover should be snug but not stressed.
Maintaining Your Automotive Light Covers
Taking care of your car front light cover extends its life and keeps your vehicle looking great. Here are some simple maintenance tips.
Cleaning Tips
Regular cleaning prevents buildup that can dull the light output. Use a mild car wash soap and a soft sponge. Avoid harsh chemicals or abrasive cleaners that can cloud the plastic.
For a deeper clean, use a headlight restoration kit. These kits include a sandpaper and polishing compound that restore clarity to foggy covers. Apply the product gently in circular motions and finish with a UV sealant.
When to Replace
No cover lasts forever. Watch for these signs that it is time for a replacement:
- Cracks or chips: Even small cracks let moisture in, which can short out the wiring.
- Yellowing or fogging: When the cover is too cloudy, light output drops significantly.
- Loose fit: If the cover rattles or shifts while driving, the clips may be worn out.
- Discoloration: UV damage can warp the cover and change its shape slightly.
Replacing a worn cover is a straightforward job when you know the steps. And it keeps your vehicle safe and looking sharp.
Expert Insights on Wraparound Light Cover Removal
We spoke with several automotive technicians about their best tips for wraparound light cover removal. Here is what the professionals recommend.
Start From the Top
Most experts agree that starting at the top of the cover and working your way down is the best approach. Gravity helps keep the cover stable while you release clips and screws. Starting from the bottom can cause the cover to shift and put stress on the fasteners.
Keep a Photo Handy
Before you remove anything, snap a photo of the light assembly from multiple angles. This makes reassembly much easier, especially if you are working on a complex vehicle light assembly with multiple clips and screws.
Use Heat for Stuck Covers
If a cover is truly stuck, a hairdryer on a low setting can warm the plastic and loosen it. The heat softens the plastic slightly and allows the cover to flex. Just be careful not to overheat it. A few passes with the hairdryer is usually enough.
These small tips from experienced professionals can save you a lot of headaches. Keep them in mind the next time you tackle this job.
Frequently Asked Questions
Can I use a screwdriver to pry off a wraparound light cover?
You can, but only if it has a plastic or rubber sleeve on the tip. Metal screwdrivers can scratch the cover and the car’s paint. A dedicated plastic pry tool is always the safer choice and costs just a few dollars.
How long does it take to remove a wraparound light cover?
For most vehicles, the process takes between 10 and 20 minutes. If screws are rusted or clips are stubborn, it may take a bit longer. Having the right tools ready beforehand helps keep the time down.
Do I need to disconnect the battery before removing the light cover?
Usually no. You only need to disconnect the battery if you are working directly on the wiring or electrical connections behind the light. For simple cover removal, the battery can stay connected. Just be careful not to tug on any wires.
What should I do if a clip breaks during removal?
Do not panic. Broken clips are common and easy to replace. You can buy replacement clips at any auto parts store for just a couple of dollars. Make sure to match the size and type before purchasing.
Can I reuse the old rubber gasket when reinstalling the cover?
It depends on the condition of the gasket. If it is still flexible and seals properly, you can reuse it. However, if it is cracked, brittle, or deformed, replace it with a new one. A good seal prevents moisture from entering the light housing.
Is it safe to drive with the light cover removed?
It is not recommended. The cover protects the bulb and reflector from road debris and moisture. Driving without it can lead to premature bulb failure or water damage inside the light assembly. If you must drive temporarily, keep the trip short and avoid wet conditions.
Conclusion
Removing a wraparound light cover is a task most car owners can handle in under half an hour. You do not need special skills or expensive equipment. Just patience, the right tools, and a gentle touch.
We have covered everything you need to know. From understanding your cover type to the step-by-step removal process, common mistakes to avoid, and maintenance tips to keep your covers in great shape. The next time your wraparound light cover needs attention, you will be ready.
Remember to work slowly, use plastic tools, and never force anything that feels stuck. These simple habits will keep your automotive light covers looking great for years to come. Happy wrenching!