Harley-Davidson Torque Specifications Chart For Every Bike
The Harley-Davidson Torque Specifications Chart is an essential tool for every owner who wants to keep their bike running right. Correct torque settings prevent stripped bolts, engine damage, and unsafe rides. Whether you ride a Sportster, Dyna, or Touring model, knowing the right torque values saves time and money. This guide covers torque specs for nearly every Harley model on the road today. You will learn how to use a torque wrench safely and avoid the most common mistakes riders make.
If you own a Harley-Davidson, you already know that these bikes are built to last. But lasting power only comes with proper care. One of the most overlooked parts of Harley-Davidson maintenance is checking and setting the correct torque specifications on every bolt and fastener. A loose bolt can rattle your ride. An over-tightened bolt can crack a casing or strip a thread. Either way, you end up with an expensive repair bill.
The Harley-Davidson Torque Specifications Chart exists to take all the guesswork out of the equation. This chart gives you the exact foot-pound or Newton-meter values for every single bolt on your bike. Whether you are a weekend warrior or a daily rider, having this chart at your side makes motorcycle maintenance faster, safer, and far more confident. In this guide, we break down the chart, explain why it matters, and show you how to use it the right way.
Key Takeaways
- Correct torque matters: Over-tightening or under-tightening bolts can cause serious engine damage on Harley-Davidson motorcycles.
- Every model needs different specs: The Harley-Davidson torque specifications chart varies by engine type, model year, and component.
- A torque wrench is essential: You cannot guess torque values accurately without the right tool.
- Common mistakes are avoidable: Most torque errors come from skipping the service manual or using worn tools.
- Safety first: Following the correct bolt torque settings keeps you and your bike safe on every ride.
- Regular checks help: Re-checking torque on critical bolts after the first 50 miles extends your engine life.
📑 Table of Contents
- Why Torque Specifications Matter for Harley-Davidson Bikes
- Understanding the Harley-Davidson Torque Specifications Chart
- Torque Specs by Harley-Davidson Model
- How to Use the Torque Specifications Chart Correctly
- Common Mistakes to Avoid When Torquing Harley Bolts
- Expert Tips for Maintaining Accurate Torque Specs
- Conclusion
Why Torque Specifications Matter for Harley-Davidson Bikes
Every bolt on a Harley-Davidson motorcycle has a specific torque value. That value is not random. Engineers calculate it based on the material, thread size, and purpose of each fastener. When you follow the Harley-Davidson torque specs exactly, you get a secure joint that can handle vibration, heat, and road stress.
What Happens When You Ignore Torque Specs
Skipping the correct torque settings leads to real problems. Here is what can go wrong:
- Over-tightening: This stretches or breaks bolts. It can also warp metal surfaces, especially on cylinder heads and crankcases.
- Under-tightening: Loose bolts vibrate free over time. A loose cylinder head bolt, for example, can cause a catastrophic engine failure.
- Cross-threading: Forcing a bolt without the right torque can damage threads permanently.
- Gasket leaks: Incorrect torque on head bolts often leads to oil or coolant leaks.
These are not just theoretical risks. Many Harley-Davidson repair stories start with a bolt that was either too tight or too loose. The torque specifications chart exists so you never have to learn these lessons the hard way.
The Role of a Torque Wrench
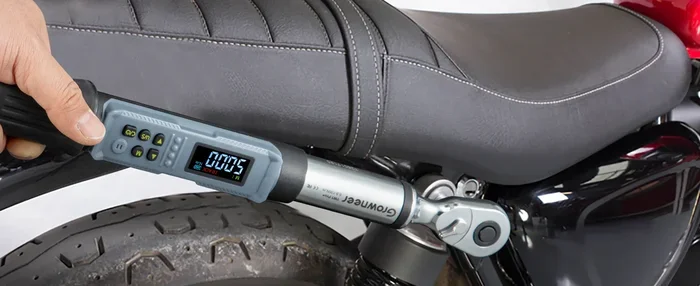
You cannot get accurate motorcycle bolt torque by feel. A torque wrench is the only reliable tool for this job. A click-type torque wrench is the most popular choice for Harley-Davidson owners. It clicks when you reach the exact value. This prevents guesswork and protects your engine. Digital torque wrenches offer even more precision, but a basic click wrench works perfectly for most bike bolt tightening tasks.
Quick Tip: Always calibrate your torque wrench at least once a year. A poorly calibrated wrench gives you false readings, which defeats the entire purpose.
Understanding the Harley-Davidson Torque Specifications Chart
The Harley-Davidson torque specifications chart is organized by engine model, component, and bolt location. It sounds complicated, but it is actually very straightforward once you know how to read it. Let us break it down.
How the Chart Is Structured
Most Harley-Davidson engine torque settings charts list the following information:
- Component name: Cylinder head, crankcase, cam cover, flywheel, etc.
- Bolt size: Measured in millimeters or inches.
- Torque value: Given in foot-pounds (ft-lbs) or Newton-meters (Nm).
- Sequence: The order in which to tighten bolts. This is critical for even pressure distribution.
- Re-torque specs: Some components need re-tightening after a break-in period.
When you open a Harley-Davidson service manual, the torque chart is usually in the engine assembly section. You can also find torque specifications Harley Davidson in aftermarket repair guides and online resources. The official service manual is always the most accurate source.
Common Torque Units You Will See
The chart uses two main units of measurement:
- Foot-pounds (ft-lbs): This is the most common unit for Harley-Davidson torque values. Most American riders are familiar with this measurement.
- Newton-meters (Nm): This unit is used in some international service manuals and aftermarket guides.
Always double-check which unit your wrench uses before you start tightening. Mixing up ft-lbs and Nm can lead to serious errors.
Torque Specs by Harley-Davidson Model
Different Harley-Davidson models have different engine designs, and each design has its own torque specifications. Below we cover the most popular model families and their key torque values.
Sportster Torque Specifications
The Sportster line has been a Harley staple since the 1950s. These bikes use the famous Evolution engine (Evo) and the newer Revolution Max engine. Here are the key torque settings Sportster riders need to know:
- Cylinder head bolts: 65 ft-lbs (88 Nm), tightened in a specific sequence from the center outward.
- Cam cover bolts: 10 ft-lbs (14 Nm). These are small bolts, so over-tightening is a common mistake.
- Flywheel bolts: 60 ft-lbs (81 Nm). These bolts are torqued in stages for even pressure.
- Intake manifold bolts: 18 ft-lbs (24 Nm).
- Exhaust flange bolts: 22 ft-lbs (30 Nm).
Dyna and Softail Torque Specifications
The Dyna and Softail families use the Milwaukee-Eight engine, which is larger and more powerful than the Sportster engine. Torque values for these models are higher:
- Cylinder head bolts: 75 ft-lbs (102 Nm) for the Milwaukee-Eight 107 and 114 engines.
- Cam chain tensioner bolt: 25 ft-lbs (34 Nm).
- Primary cover bolts: 35 ft-lbs (47 Nm).
- Transmission bolts: 28 ft-lbs (38 Nm).
- Rear axle nut: 150 ft-lbs (203 Nm).
Touring and Road King Torque Specifications
Touring models like the Road King, Street Glide, and Road Glide carry more weight and face more wind resistance. Their engine torque settings reflect the durability needed for long-distance riding:
- Cylinder head bolts: 75 ft-lbs (102 Nm) for the Milwaukee-Eight engine.
- Engine mount bolts: 85 ft-lbs (115 Nm).
- Frame swing arm bolts: 95 ft-lbs (129 Nm).
- Axle pinch bolts: 45 ft-lbs (61 Nm).
- Touring model specific: Always check the service manual for accessory mounting torque values, as these vary by year and trim.
Comparison Table: Key Torque Values Across Models
| Component | Sportster (Evo) | Dyna/Softail (M-E 107) | Touring (M-E 114) |
|---|---|---|---|
| Cylinder Head Bolts | 65 ft-lbs | 75 ft-lbs | 75 ft-lbs |
| Cam Cover Bolts | 10 ft-lbs | 12 ft-lbs | 12 ft-lbs |
| Flywheel Bolts | 60 ft-lbs | 65 ft-lbs | 65 ft-lbs |
| Primary Cover Bolts | 30 ft-lbs | 35 ft-lbs | 35 ft-lbs |
| Rear Axle Nut | 100 ft-lbs | 150 ft-lbs | 150 ft-lbs |
Note: These values are approximate and based on common factory specifications. Always refer to your specific model year service manual for the exact Harley-Davidson torque specifications chart values.
How to Use the Torque Specifications Chart Correctly
Having the chart is only half the battle. You also need to know how to apply it properly. Many motorcycle maintenance mistakes happen during the tightening process, not because of wrong values but because of wrong technique.
Step-by-Step Torque Procedure
Follow these steps every time you work on bolt torque settings:
- Clean all threads: Remove dirt, grease, and old thread locker from bolt holes before you start.
- Hand-start all bolts: Thread every bolt by hand first to avoid cross-threading.
- Follow the sequence: The torque specifications chart includes a tightening sequence. Always follow it. Tightening bolts in a random order creates uneven pressure.
- Tighten in stages: For critical bolts like head bolts, tighten in multiple passes rather than going straight to the final value.
- Use the torque wrench at slow speed: Fast, jerky motions can give you inaccurate readings.
- Re-check after the first ride: Some bolts need re-torquing after the initial break-in period. Check your service manual for these details.
Break-In Period Re-Torque Checklist
After you install a new engine or major component, re-check torque at these intervals:
- After the first 50 miles
- After 500 miles
- After 1,000 miles
- After the initial service interval
This practice ensures that everything stays tight as the engine settles into its new components. It is one of the best habits you can build for long-term Harley-Davidson reliability.
Common Mistakes to Avoid When Torquing Harley Bolts
Even experienced riders make mistakes with motorcycle bolt torque. Here are the most common errors and how to avoid them.
Using the Wrong Torque Wrench
Not all torque wrenches are created equal. A cheap wrench with a worn scale gives you wrong values every time. Invest in a quality torque wrench motorcycle from a trusted brand. Your Harley-Davidson engine is worth the investment.
Ignoring the Lubrication Factor
Here is something many riders do not know: torque values assume a certain level of lubrication on the threads. Dry bolts need different torque values than oiled or anti-seize coated bolts. Always check whether your service manual specifies dry or lubricated tightening. This small detail makes a big difference in accuracy.
Skipping the Sequence
Some riders tighten all bolts to the final value one at a time. This is wrong. The tightening sequence ensures even pressure across the surface. Skipping it can warp the cylinder head or create uneven compression. Always follow the sequence listed in the Harley-Davidson torque specifications chart.
Forgetting to Re-Check
Vibration from riding loosens bolts over time. A bolt that is perfectly torqued today might be loose after 100 miles. Make periodic torque checks part of your regular motorcycle service routine. This is especially important for bolts on the engine, wheels, and handlebars.
Expert Tips for Maintaining Accurate Torque Specs
Getting the right torque every time comes down to a few simple habits. Here is what the pros do to stay on point.
Keep Your Tools Clean and Calibrated
Dirt and debris inside your torque wrench affect its accuracy. Store it in a case, and have it professionally calibrated annually. A well-maintained torque wrench is your best friend for Harley-Davidson maintenance.
Use Anti-Seize on the Right Bolts
Anti-seize compound prevents bolts from seizing up over time. But not every bolt needs it. The service manual will tell you which bolts should have anti-seize and which should be dry. Applying anti-seize where it is not recommended changes the friction and therefore the torque values.
Document Your Work
Keep a maintenance log for your bike. Write down the date, the bolts you torqued, and the values you used. This makes future Harley-Davidson repair sessions faster and helps you track any issues before they become serious problems.
When in Doubt, Consult the Manual
The internet has a lot of advice, but the official Harley-Davidson service manual is the ultimate authority. If a forum post or YouTube video gives you a torque setting that contradicts the manual, trust the manual. Engineers design those specs specifically for your engine.
Conclusion
The Harley-Davidson torque specifications chart is more than just a list of numbers. It is a guide to protecting your investment and keeping your bike running strong for thousands of miles. Every bolt on your Harley-Davidson motorcycle has a purpose, and every purpose has a precise torque value. When you respect those values, you avoid costly repairs, prevent dangerous failures, and enjoy a smoother, more reliable ride.
Whether you are wrenching on a Sportster, Dyna, Softail, or Touring model, the principles remain the same. Use the right tool, follow the sequence, and always double-check your work. The torque specifications are your roadmap to proper maintenance, and following them is one of the easiest ways to show your bike the care it deserves.
Keep this guide handy. Print out the Harley-Davidson torque specifications chart for your model and tape it inside your tool bag. Your future self, and your engine, will thank you.
Frequently Asked Questions
Where can I find the official Harley-Davidson torque specifications chart for my model?
The official Harley-Davidson torque specifications chart is available in your bike’s service manual. You can order a physical copy from a Harley-Davidson dealer or download a digital version from the Harley-Davidson website. The manual includes torque values for every single bolt on your motorcycle, organized by engine model and component.
Can I use an impact wrench to tighten Harley-Davidson bolts?
No. An impact wrench does not measure torque, and it can easily over-tighten bolts. Always use a torque wrench for motorcycle bolt torque applications. Impact wrenches are useful for loosening stuck bolts, but for final tightening, a calibrated torque wrench is the only reliable option.
How often should I re-check torque on my Harley-Davidson?
You should re-check critical bolts after the first 50 miles of riding and again at the 500-mile service interval. After that, make periodic torque checks part of your regular maintenance schedule, especially before long trips. Vibration from riding naturally loosens bolts over time.
What happens if I over-tighten a bolt on my Harley engine?
Over-tightening stretches or breaks bolts, warps metal surfaces, and can damage threads permanently. On a Harley-Davidson engine, over-tightening cylinder head bolts can warp the head and cause compression loss. Always follow the exact torque settings Harley Davidson values in the service manual.
Do torque values change between different Harley-Davidson engine types?
Yes, absolutely. The Evolution engine, Milwaukee-Eight engine, and Revolution Max engine all have different torque specifications. Even within the same engine family, values can change between model years. Always refer to the torque specifications chart specific to your engine and model year.
Is anti-seize compound safe to use on Harley-Davidson torque bolts?
It depends on the bolt and what the service manual specifies. Some bolts require anti-seize, while others should be torqued dry. Anti-seize changes the friction on threads, which affects the actual torque value applied. Always follow the lubrication instructions in the official Harley-Davidson torque specifications chart for each specific bolt.