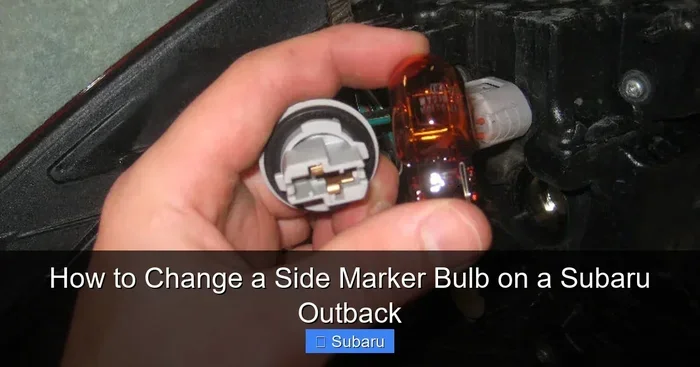
How to Change the Side Marker Bulb on a Subaru Outback
Changing the side marker bulb on a Subaru Outback is a simple DIY job you can finish in under 15 minutes. This guide shows you exactly how to access the bulb, remove the old one, and install a new clearance light without any special tools. You’ll save money, keep your Outback looking sharp, and stay road-legal with just a few basic steps.
Your Subaru Outback has a small but important light on the side of the body. This is the side marker bulb, also called a clearance light. It tells other drivers where your vehicle is, especially at night or in bad weather. When that little bulb goes dark, your Outback loses a layer of safety and style. The good news is that swapping in a new bulb takes only minutes and costs just a few dollars.
Many owners feel nervous about working on their car’s lights. They worry about breaking clips or finding the right part. This guide removes that worry. You will learn how to change the side marker bulb on a Subaru Outback from start to finish. I’ll walk you through the tools you need, the exact steps, and common mistakes to avoid. By the end, you’ll feel confident doing this simple repair yourself.
Whether you drive a 2015 Outback or a 2023 model, the process is very similar. I’ll point out differences where they exist. You’ll also find quick tips and expert insights along the way. So grab a flashlight and let’s get started with your Subaru Outback bulb replacement.
Key Takeaways
- Use the right bulb: Check your Outback’s manual for the correct bulb type and wattage before you start.
- Gather simple tools: A Phillips screwdriver, a flat trim tool, and a clean cloth are all you need.
- Access from the front wheel well: The side marker bulb is easiest to reach by removing a small access panel behind the front wheel.
- Avoid forcing parts: Plastic clips and lens covers break easily if you push too hard.
- Test before reassembly: Always turn on the new bulb to confirm it works before you put everything back together.
- Consider LED upgrades: LED bulbs last longer and shine brighter than standard halogen side markers.
📑 Table of Contents
- Understanding the Side Marker Bulb on Your Subaru Outback
- Tools and Materials You’ll Need
- How to Change the Side Marker Bulb on a Subaru Outback
- Common Mistakes to Avoid During Bulb Replacement
- When to Seek Professional Help for Your Subaru Outback
- Final Thoughts and Maintenance Tips for Your Outback
Understanding the Side Marker Bulb on Your Subaru Outback
The side marker light is a small, often amber or clear, lens on the front and rear corners of your Outback. On the front, it sits near the headlight assembly. On the rear, it’s close to the tail light. These lights are not turn signals, but they do serve as clearance lights. They help other drivers judge your vehicle’s width and position in low-light conditions.
What Does the Side Marker Do?
Side marker bulbs are required by law in most places. They make your Outback visible to others, especially from the side. A burnt-out bulb can make your vehicle harder to see, which increases the risk of a fender bender. The bulb itself is usually a small wedge-base or bayonet-base type. It draws very little power, so it rarely blows a fuse. But when it does fail, the light goes out completely.
Which Subaru Outback Models Use This Bulb?
Almost every generation of the Outback uses a similar side marker setup. The 2010–2014 models, the 2015–2019 models, and the 2020–2024 models all have accessible side marker assemblies. The bulb type may vary slightly. For example, many 2015–2019 Outbacks use a W5W or 194 bulb, while earlier models might use a different wedge base. Always check your owner manual to confirm the exact bulb type for your year.
Tools and Materials You’ll Need
Before you begin, gather everything you need. You won’t need expensive specialty tools. A few household items will do the job perfectly.
Recommended Bulb Options
When you buy a replacement side marker bulb, you have two main choices: OEM (original equipment manufacturer) and aftermarket. Both work well, but they differ in price and availability. Here is a quick comparison to help you decide.
| Type | Pros | Cons | Average Price |
|---|---|---|---|
| OEM Bulb | Exact fit, guaranteed compatibility, often covered under warranty | Higher price, limited availability at some stores | $5–$10 each |
| Aftermarket Bulb | Lower cost, wide selection, easy to find online | Quality varies, may not last as long | $2–$6 each |
| LED Upgrade Bulb | Brighter light, longer lifespan, modern look | Pricier, may require a resistor to avoid hyperflash | $8–$20 each |
Other Essential Tools
- Phillips-head screwdriver – for removing any screws holding the access panel.
- Flat plastic trim tool – helps pop clips without scratching the paint.
- Clean microfiber cloth – keeps the new bulb free of oil and dirt.
- Flashlight or headlamp – gives you a clear view inside the wheel well.
- Replacement bulb – match the part number from your manual.
Quick Tip: Always wear clean gloves or use a cloth when handling the new bulb. The oil from your skin can create hot spots on a halogen bulb and shorten its life. For LED bulbs, this is less of a concern, but clean handling still helps.
How to Change the Side Marker Bulb on a Subaru Outback
Now comes the hands-on part. I’ll break the Subaru Outback bulb replacement into clear, easy steps. You can do this on a level surface in your driveway or garage. The whole process takes about 10 to 15 minutes per side.
Step 1: Access the Side Marker Assembly
Open the hood and locate the front side marker. On most Outbacks, you’ll find it near the headlight bucket, toward the front of the fender. To get a better view, you can partially remove the front wheel. Turn the steering wheel left or right to expose the wheel well. Look for a small plastic access panel on the inner fender. This panel often has a few Phillips screws or push clips holding it in place.
Use your Phillips screwdriver to remove the screws. If there are push clips, gently pry them out with your flat trim tool. Set the screws and clips in a safe spot so you don’t lose them. Once the panel is off, you’ll see the back of the side marker lens and the bulb socket.
Step 2: Remove the Old Bulb
Unplug the wiring harness from the back of the bulb socket. It’s a simple push-and-pull connector. Grasp the socket firmly and twist it counterclockwise about a quarter turn. The socket will release from the lens housing. Carefully pull the old bulb straight out of the socket. Do not force it. If it feels stuck, gently wiggle it side to side until it loosens.
Expert Insight: Take a photo of the old bulb and socket before you remove anything. This makes it much easier to match the new bulb’s orientation. It also helps if you need to describe the setup to a friend or mechanic.
Step 3: Install the New Bulb
Take your new side marker bulb out of its packaging. Hold it by the plastic base only. Never touch the glass part. If you accidentally touch the glass, wipe it clean with a microfiber cloth and a little rubbing alcohol. Let it dry completely before proceeding.
Insert the new bulb into the socket, matching the base orientation to the original. Push it in gently until it clicks or seats fully. Then, align the socket tabs with the holes in the lens housing and push the socket back in. Give it a slight clockwise twist to lock it in place. Reconnect the wiring harness by pressing it firmly onto the socket until you hear a click.
Step 4: Test and Reassemble
Before you put the access panel back on, turn on your Subaru Outback ignition. Walk around to the side marker and confirm the new bulb lights up. If it doesn’t, double-check the wiring harness connection. A loose connector is the most common cause of a non-working bulb after replacement.
Once you confirm the bulb works, turn off the ignition. Replace the access panel, lining up the clips or screws. Tighten the screws firmly but do not overtighten. Push the clips in until they snap securely. Repeat the entire process for the other side marker if needed.
Common Mistakes to Avoid During Bulb Replacement
Even simple jobs can go wrong if you rush. Here are the most common mistakes people make when replacing their side marker bulb, and how to avoid them.
Using the Wrong Bulb Type
This is the number one error. A bulb that is slightly too large or too small won’t seat properly. It can also cause electrical issues or blow a fuse. Always check the part number on the old bulb before you buy a replacement. The owner manual lists the correct bulb wattage and type for every Outback model year. If you’re unsure, bring the old bulb to an auto parts store and match it up.
Forcing the Lens or Trim Pieces
The side marker lens and the inner fender panel are held on with plastic clips. These clips are designed to pop in and out with gentle pressure. If you use a metal tool or push too hard, you can crack the lens or break the clip. A cracked lens allows water to enter, which can cause rust and electrical shorts. Use the plastic trim tool and work slowly. If a clip feels stuck, spray a little silicone lubricant around it and try again.
Forgetting to Check the Fuse
In rare cases, a burnt-out bulb is not the real problem. A blown fuse in the fuse box can cut power to the side marker circuit. If you install a new bulb and it still doesn’t light up, check the fuse. The fuse box cover usually has a diagram showing which fuse controls the side markers. Replace a blown fuse with one of the exact same amperage rating.
When to Seek Professional Help for Your Subaru Outback
Most owners can handle a side marker bulb swap without any issues. But there are times when it makes sense to visit a professional. Knowing these situations can save you from bigger headaches.
Electrical Issues Beyond the Bulb
If you notice that the side marker flickers, dims, or works intermittently, the problem may be in the wiring or the socket itself. Corroded connectors can cause poor contact. A professional mechanic can inspect the wiring harness and clean or replace the socket safely. Attempting to repair complex electrical issues yourself can void warranties or cause further damage.
Broken Lens or Water Damage
If the side marker lens is cracked or chipped, a simple bulb change won’t fix the problem. Water can seep into the assembly and damage the reflector and socket. A broken lens should be replaced entirely. This is a slightly more involved job that may require removing the entire side marker assembly. If you’re not comfortable doing that, a shop can handle it quickly.
Warranty Considerations
If your Subaru Outback is still under the manufacturer’s bumper-to-bumper warranty or an extended warranty, check the terms before doing any electrical work yourself. Some warranties cover bulb replacements as part of routine maintenance. Doing the work yourself could void coverage for related parts. When in doubt, call your dealer and ask.
Final Thoughts and Maintenance Tips for Your Outback
Replacing the side marker bulb on your Subaru Outback is one of the easiest and most satisfying DIY repairs you can do. It keeps your vehicle safe, legal, and looking great. With the right bulb, a few simple tools, and a little patience, you can finish the job in the time it takes to watch a short video.
Keeping Your Side Markers Bright
Good maintenance keeps your lights shining their best. Wipe the side marker lenses with a soft cloth and a mild glass cleaner every few months. This removes road grime and bugs that can dull the light output. Check both side markers and all other exterior lights once a month. A quick walk-around your Outback takes just a couple of minutes and can prevent a surprise failure at an inconvenient time.
Upgrading to LED Side Markers
If you want a brighter, longer-lasting option, consider an LED side marker bulb. LED bulbs use less energy and can last for decades. They also give a modern, crisp look to your Outback. When upgrading, make sure the LED bulb is compatible with your vehicle’s electrical system. Some LED bulbs require a small resistor to prevent a hyperflash issue on the turn signal circuit, though side markers usually don’t have that problem. Read the product instructions carefully before installation.
Quick Tip: Keep a spare side marker bulb in your garage or trunk. Having one on hand means you can fix a burnt-out light the same day, instead of waiting for a parts store to open or scheduling a shop visit.
Now you know exactly how to change the side marker bulb on a Subaru Outback. You have the steps, the tools, and the tips to do it right. Go ahead and give it a try. Your Outback will thank you with a bright, reliable light that keeps you safe on every drive.
Frequently Asked Questions
What type of bulb does a Subaru Outback side marker use?
Most Subaru Outback models use a W5W or 194 wedge-base bulb for the side marker. Some older or special editions may use a different type. Always check your owner manual or the part number on the old bulb to be sure you buy the correct replacement.
Can I use an LED bulb for my Subaru Outback side marker?
Yes, you can use an LED side marker bulb as an upgrade. LEDs are brighter, last much longer, and draw very little power. Make sure the LED bulb matches the base size and orientation of your original bulb. No extra wiring is usually needed for side marker LEDs.
How long does it take to change the side marker bulb?
A single side marker bulb change takes about 10 to 15 minutes. If you are replacing both the front and rear side markers, plan for about 30 minutes total. The process is straightforward once you know the steps.
Is it hard to access the side marker bulb on a Subaru Outback?
No, it is not hard. The side marker is easily reached by removing a small access panel behind the front wheel well. You only need a Phillips screwdriver and a plastic trim tool. Most owners can do it without any help.
Will changing the side marker bulb void my Subaru warranty?
Replacing a side marker bulb yourself does not typically void the warranty. It is considered routine maintenance. However, if you damage the wiring or lens during the process, that could affect coverage. Always refer to your warranty documents if you are unsure.
Why did my side marker bulb burn out so quickly?
A bulb that burns out quickly may be due to a faulty voltage regulator, a loose ground connection, or using the wrong bulb wattage. Check that the replacement bulb matches the OEM specifications. If the problem continues, have a mechanic inspect the electrical system.