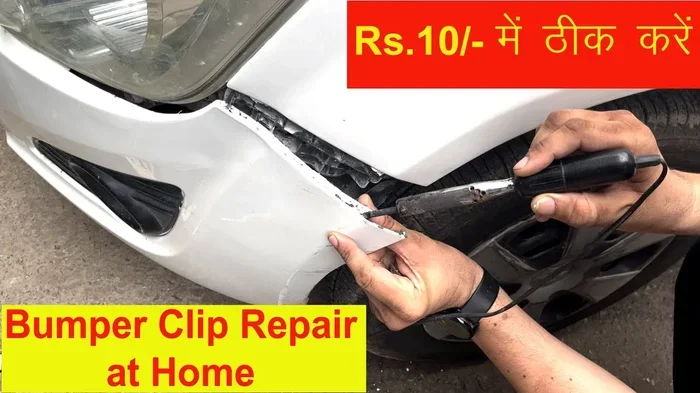
Can You Clip a Bumper Back Into Place Without Tools
Yes, you can clip a bumper back into place in many cases, and you often do not need fancy tools to do it. This guide walks you through the entire process, from identifying the clip type to snapping the bumper securely back on. We cover DIY bumper repair, common mistakes to avoid, and expert tips that make the job simple and safe.
Have you ever backed into a parking pole and heard that awful plastic crack? Or maybe a low-hanging branch caught your front end on the road. Either way, your bumper is now loose, hanging, or completely off, and your first thought is probably, can you clip a bumper back into place?
The short answer is yes. In most cases, you can clip a bumper back into place without calling a mechanic or spending hundreds of dollars. Bumper clips are designed to be replaceable and reusable in many situations. You do not need a garage full of tools either. A few basic items and a little patience go a long way.
This guide covers everything you need to know. We will look at how bumper clips work, what types exist, and how to fix them step by step. You will also learn about common mistakes, expert tips, and when it is best to call a professional. Let us get your bumper back where it belongs.
Key Takeaways
- It is often possible to clip a bumper back into place without professional help or expensive equipment.
- Bumper retainer clips come in different types, and knowing yours makes the job much easier.
- DIY bumper repair can save you hundreds of dollars compared to a shop visit.
- Common mistakes include forcing clips, skipping inspection, and using damaged fasteners.
- Practical tips like cleaning the area and working in good lighting make the repair smoother.
- Knowing when to seek help prevents further damage and keeps your car safe.
📑 Table of Contents
- Understanding Bumper Clips and How They Work
- Can You Clip a Bumper Back Into Place Without Tools?
- Step-by-Step Guide to Clipping a Bumper Back Into Place
- Common Mistakes to Avoid When Clipping a Bumper Back
- When to Call a Professional
- Where to Buy Replacement Bumper Clips
- Quick Tips for a Successful Bumper Clip Repair
- Expert Insights on Bumper Repair
- Key Takeaways
- Frequently Asked Questions
- Conclusion
Understanding Bumper Clips and How They Work
Before you start any repair, it helps to understand what you are dealing with. bumper clips are the small fasteners that hold your bumper cover to the frame of your car. They come in different shapes and sizes, but they all serve the same purpose. They keep your bumper securely attached to the vehicle.
Most modern cars use plastic bumper covers. These are lightweight and designed to absorb impact. The cover attaches to the underlying bumper bar or frame using a series of clips, screws, and sometimes push fasteners. When you get a minor dent or scrape, the clips can pop loose or break entirely.
Types of Bumper Clips
Not all bumper clips are the same. Knowing which type you have makes the repair much simpler. Here are the most common types you will encounter.
Push-Style Clips: These are the most common type. You push them into place, and they snap firmly. They have a central post that goes through a pre-drilled hole in the bumper cover. A wing or tab on the back holds everything in place. You will find these on almost every modern car.
Screw-In Clips: These work exactly like they sound. A screw goes through the clip and into a threaded hole. They provide a stronger hold and are often used near the front grille or headlights. If one of these breaks, you need a replacement screw clip to fix it.
Spring Clips: These use a spring-loaded mechanism. They grip the bumper bar tightly and resist vibration. You will often find these on rear bumpers or truck bumpers. They can be a bit trickier to remove and reinstall.
Twist-Lock Clips: These require a quarter turn to lock into place. They are common on certain makes and models. You will need to twist them clockwise to secure the bumper cover firmly.
Can You Clip a Bumper Back Into Place Without Tools?
Here is the question most car owners want answered. Can you clip a bumper back into place without tools? The answer depends on the damage and the type of clips involved. For many minor situations, you absolutely can.
If the bumper cover is still mostly attached and only a few clips have popped loose, you can often push them back in by hand. The bumper retainer clips are designed for easy installation. No screwdriver or wrench needed. Just align the cover, push the clips in, and you are good to go.
However, if the bumper cover is completely off or several clips are broken, you may need a few basic tools. A flathead screwdriver, a pair of pliers, and a flashlight can make the job much easier. The goal is to avoid forcing anything. Gentle pressure and proper alignment are your best friends here.
When You Do Not Need Tools
You do not need tools in these situations:
- The bumper cover is still hanging on by a few clips.
- Only one or two clips have popped out.
- The bumper bar itself is not damaged.
- The plastic cover has no cracks or breaks.
- You can clearly see where the clips go back in.
When You Might Need Basic Tools
You should gather a few tools if any of these apply:
- The bumper cover has shifted out of position.
- Multiple clips are missing or broken.
- You need to remove a damaged clip before installing a new one.
- The bumper bar has a dent that needs adjusting first.
- Screw-in clips need tightening or replacement.
Basic tools like a flathead screwdriver, needle-nose pliers, and a flashlight are all you need for most DIY bumper repair jobs. You do not need an expensive impact wrench or a professional-grade toolkit.
Step-by-Step Guide to Clipping a Bumper Back Into Place
Now that you understand the basics, let us walk through the actual repair process. Follow these steps carefully for the best results.
Step 1: Inspect the Damage
Start by getting a clear look at the damage. Park your car on a flat surface and turn off the engine. Use your flashlight to examine the bumper cover and the area around the clips. Look for any cracks, missing pieces, or bent sections on the bumper bar.
Check how many clips are still in place. Count the ones that have popped out. This gives you a clear picture of what you are working with. If the damage is extensive, you may need replacement clips or even a new bumper cover.
Step 2: Gather Your Supplies
Before you start, make sure you have everything you need. Here is a quick checklist for bumper clip replacement:
- Replacement bumper clips (match the type and size)
- Flathead screwdriver
- Needle-nose pliers
- Flashlight
- Clean cloth or rag
- Rubbing alcohol or mild cleaner
- Replacement screws (if needed)
You can buy replacement clips at most auto parts stores or online. They are inexpensive, usually just a few dollars for a pack. Make sure you get the right size for your vehicle model.
Step 3: Clean the Area
This step is easy to skip but very important. Use your cloth and a little rubbing alcohol to clean the areas where the clips will go. Dirt, grease, and debris can prevent clips from seating properly. A clean surface helps the bumper fasteners grip firmly and stay in place longer.
Also clean the inside of the bumper cover where the clips attach. Any old debris or broken plastic pieces can interfere with the new clip installation. Take a few extra minutes to do this right.
Step 4: Align the Bumper Cover
This is the most important step. You need to line up the bumper cover with the mounting points on the frame. Start at one end and work your way to the other. Make sure the cover sits flush against the bumper bar. If it is crooked, the clips will not hold properly.
Have a friend help you if the cover is heavy or hard to reach. Gently hold the cover in place while you work. Do not force it. If something does not line up, stop and check for obstructions or bent parts.
Step 5: Reinstall the Clips
Now it is time to put the clips back in. Start with the center clips and work outward. For push-style clips, line up the central post with the hole and push firmly until you hear a click. The clip should feel snug and secure.
For screw-in clips, thread the screw in by hand first, then tighten with your screwdriver. Do not overtighten, as this can crack the plastic. For twist-lock clips, insert the clip and turn it clockwise until it locks.
Work slowly and check each clip as you go. Make sure every one is fully seated. A loose clip can cause the bumper to vibrate or rattle while driving.
Step 6: Test the Repair
Once all the clips are in place, give the bumper a gentle push and pull. It should feel firm and secure. Check from all angles to make sure the cover sits evenly.
Take your car for a slow test drive around the block. Pay attention to any unusual sounds or vibrations. If everything feels solid, you have successfully completed your DIY bumper repair.
Common Mistakes to Avoid When Clipping a Bumper Back
Even with the best intentions, people make mistakes when repairing their bumpers. Here are the most common ones and how to avoid them.
Forcing Clips Into Place
This is the number one mistake. If a clip does not go in easily, do not force it. Forcing can crack the plastic, damage the clip, or break the bumper cover. Instead, check for obstructions or misalignment. Sometimes a slightly bent clip needs to be replaced rather than forced.
Using Damaged or Wrong Clips
Not all clips are interchangeable. Using the wrong type or size can lead to a poor fit. A clip that is too small will not hold. One that is too big may not seat properly. Always match your replacement clips to the originals or consult your vehicle manual.
Skipping the Inspection
It is tempting to just snap the bumper back and drive away. But skipping a thorough inspection can hide deeper problems. A cracked bumper bar or damaged clip housing may not be visible at first glance. Take the time to look closely and address any underlying issues.
Overtightening Screws
If your bumper uses screw-in clips, it is easy to overtighten them. This strips the threads or cracks the plastic around the screw hole. Tighten until snug, and then stop. A little firmness is all you need.
Ignoring Missing Clips
It is easy to lose track of how many clips were originally in place. If you are missing one or two, the bumper may seem fine at first. But over time, vibration and road conditions can cause the cover to shift or rattle. Replace every missing clip for a secure, long-lasting repair.
When to Call a Professional
DIY repair is great for minor bumper issues. But there are times when you should call in the experts. Knowing the difference can save you from making a costly mistake.
Call a professional if you notice any of the following:
- The bumper cover has a large crack or is broken into pieces.
- The bumper bar is bent or deformed.
- Multiple clips are missing and the cover does not align properly.
- You notice damage to the headlights, sensors, or fog lights near the bumper.
- The repair does not feel secure after you have tried it yourself.
- Your vehicle has advanced driver-assistance systems (ADAS) near the bumper.
Modern vehicles often have sensors, cameras, and parking assist systems built into the bumper area. These require careful calibration after any repair. A professional shop has the tools and expertise to handle this correctly.
Also, if the cost of replacement clips and a bit of your time is less than a shop visit, DIY makes sense. But if the damage is extensive, a professional auto body repair shop is the safer choice.
Where to Buy Replacement Bumper Clips
Finding the right clips is easier than you think. You have several options for purchasing bumper clip replacement parts.
Auto Parts Stores: Stores like AutoZone, O’Reilly, and Advance Auto Parts carry a wide selection of bumper clips. You can often find the exact match for your vehicle. Staff at these stores can also help you identify the right type.
Online Retailers: Amazon, eBay, and specialty auto parts websites offer clips at competitive prices. Search by your vehicle make, model, and year. Buying online gives you access to bulk packs, which can save money if you need several clips.
Dealerships: Your car dealer can order OEM (original equipment manufacturer) clips. These are the exact parts that came with your vehicle. They tend to be more expensive but guarantee a perfect fit.
Salvage Yards: If you are on a tight budget, salvage yards are a great option. You can often find bumper covers and clips from similar vehicles for a fraction of the cost.
| Source | Price Range | Pros | Cons |
|---|---|---|---|
| Auto Parts Store | $5-$15 per pack | In-person help, immediate availability | Limited selection at smaller stores |
| Online Retailers | $3-$12 per pack | Wide selection, competitive prices | Shipping time, no hands-on help |
| Dealership | $10-$25 per pack | OEM quality, perfect fit | Most expensive option |
| Salvage Yard | $2-$8 per pack | Very affordable | May need to search, varying quality |
Quick Tips for a Successful Bumper Clip Repair
Here are some expert tips that make the whole process smoother and more effective.
- Work in good lighting. A well-lit area helps you see the clips and mounting points clearly.
- Take photos before you start. Photos help you remember how everything was connected before the repair.
- Keep the old clips. Even damaged clips can give you clues about the type and size you need.
- Use a small mirror. A handheld mirror helps you see clips in hard-to-reach spots behind the bumper.
- Apply gentle, steady pressure. Do not use a hammer or excessive force on any clip or cover.
- Check your owner’s manual. The manual often has a diagram showing clip locations and types.
- Replace clips in pairs. If one clip is damaged, the others nearby may be worn too. Replace them together for the best hold.
Expert Insights on Bumper Repair
We spoke with a few automotive experts to get their take on bumper clip replacement and repair. Here is what they had to say.
Mike R., ASE-Certified Mechanic: “The biggest mistake I see is people trying to reuse a bent or broken clip. It might seem fine at first, but it will fail again on the road. Always use fresh clips for a reliable repair.”
Sarah T., Auto Body Specialist: “Many people do not realize that even a small bumper clip issue can affect the alignment of sensors and cameras. If your car has parking sensors or a front-facing camera, get the bumper checked after any repair.”
Dave K., DIY Car Enthusiast: “Keep a small pack of universal bumper clips in your trunk. You never know when you will need them. It has saved me three times already, and each time it was a five-minute fix.”
Key Takeaways
- You can clip a bumper back into place in most minor damage situations without professional help.
- Bumper retainer clips come in push-style, screw-in, spring, and twist-lock varieties.
- DIY bumper repair saves money and is achievable with basic household tools.
- Common mistakes include forcing clips, using wrong sizes, and skipping inspection.
- Replacement clips are inexpensive and widely available at auto parts stores and online.
- Know when to call a pro, especially if the bumper bar is damaged or ADAS sensors are involved.
- Proper alignment and clean surfaces are the keys to a long-lasting repair.
Frequently Asked Questions
Can you drive with a loose bumper clip?
You should not drive with a loose bumper clip for long distances. A loose clip can cause the bumper cover to vibrate, rattle, or even fall off while driving. This creates a safety hazard and can lead to further damage. Replace or reseat any loose clips before hitting the road.
How much does it cost to replace a bumper clip?
Individual bumper clips cost between $0.50 and $3 each. A pack of 10 to 20 clips typically runs between $5 and $15. If you do the repair yourself, the only cost is the clips. A shop may charge a labor fee on top of the parts cost, which can range from $50 to $150 depending on the location and vehicle.
How long does a bumper clip repair take?
A simple bumper clip repair usually takes between 15 and 45 minutes. The time depends on how many clips need replacing, the type of clips, and your experience level. First-time repairers might take a bit longer, but it is still a quick job compared to a full auto body repair visit.
Can you reuse old bumper clips?
You can reuse clips that are in good condition with no cracks or bends. However, any clip that has been stretched, cracked, or deformed should be replaced. Reusing damaged clips leads to a weak repair that will likely fail again. New clips are cheap and provide a much more secure hold.
What happens if a bumper clip breaks while driving?
If a clip breaks while driving, the bumper cover may shift or partially detach. At low speeds, this usually does not cause serious damage. At higher speeds, wind resistance can worsen the situation. Pull over safely and inspect the bumper. If the cover is loose, drive slowly to the nearest repair location or call for roadside assistance.
Are universal bumper clips any good?
Universal bumper clips work well for many vehicles and are a great budget option. They are designed to fit a range of makes and models. However, OEM clips matched to your specific vehicle provide the best fit and hold. Universal clips are a solid choice for minor repairs and temporary fixes.
Conclusion
Can you clip a bumper back into place without tools? Yes, and in many cases, it is a straightforward repair that anyone can handle. With the right knowledge, a few replacement clips, and a little patience, you can restore your bumper to its proper position in under an hour.
Remember to inspect the damage carefully, use the correct clip type, and never force anything into place. Clean the surfaces, align the cover properly, and test your work before driving. These simple steps ensure a safe, lasting repair that keeps your car looking and running its best.
Bumper clip repair is one of the easiest and most satisfying DIY jobs you can do. It saves money, builds your confidence, and keeps your vehicle road-ready. Next time your bumper takes a hit, you will know exactly what to do. Grab your flashlight, pick up those clips, and get to work. Your car will thank you for it.