How Do You Clean the Inside of a Car Windscreen Effectively
Knowing how to clean the inside of a car windscreen is essential for safe driving and clear visibility. Interior windscreen haze builds up from off-gassing, dust, and condensation, making night driving dangerous. This guide covers the best products, step-by-step methods, and pro tips to keep your glass spotless. You will learn how to remove stubborn grime without scratching or streaking. With the right approach, your windscreen stays crystal clear all year long.
Have you ever noticed a hazy film on the inside of your windscreen? It is one of those sneaky problems that builds up slowly. You might not notice it at first, but one evening when the sun hits your glass just right, the glare hits you hard. That is when you realize your how do you clean the inside of a car windscreen question has been waiting too long. Dirty interior glass is more than just an eyesore. It affects your visibility, your safety, and the overall look of your car. This guide walks you through everything you need to know about cleaning the inside of your windscreen the right way.
Whether you are dealing with a light film or heavy buildup, the solutions here will help. We cover the best products, the simplest DIY methods, and the mistakes most people make. By the end, you will feel confident tackling any interior windshield cleaning job. Let us get started.
Key Takeaways
- Regular cleaning prevents haze: Cleaning the inside of your windscreen every two weeks stops buildup before it becomes a problem.
- Microfiber cloths are essential: They trap dirt without scratching and leave no lint behind on glass surfaces.
- DIY solutions work great: A mix of vinegar and water or isopropyl alcohol offers a cheap, effective cleaning option.
- Avoid common mistakes: Using paper towels or harsh chemicals can cause streaks and damage your glass over time.
- Prevention is key: Dashboard protectants and proper ventilation reduce interior windshield fog and grime buildup.
- Know when to call a pro: Deep haze or chemical etching may require professional detailing services for safe removal.
📑 Table of Contents
- Why Does the Inside of Your Windscreen Get Dirty?
- Best Products for Windscreen Cleaning
- Step-by-Step Guide to Clean the Inside of a Car Windscreen
- Common Mistakes to Avoid
- Pro Tips for Long-Lasting Cleanliness
- Comparison: DIY vs. Professional Windscreen Cleaning
- Quick Tips for Windscreen Cleaning Success
- Conclusion
Why Does the Inside of Your Windscreen Get Dirty?
The Science Behind Interior Windshield Haze
Your car interior is constantly off-gassing. That means materials like plastic, vinyl, and adhesives release tiny particles into the air. These particles settle on your glass and form a sticky film. Over time, this film hardens and becomes harder to remove. Heat and humidity speed up this process. That is why cars parked in the sun often develop haze faster.
Another factor is condensation. When warm air meets cool glass, moisture forms. This moisture traps dust and oils from your dashboard and clothing. The result is a cloudy, foggy layer that no amount of outside wiping fixes. Understanding this process helps you tackle the root cause, not just the symptoms.
Common Culprits That Cause Buildup
Several things contribute to dirty interior glass:
- Dashboard off-gassing: Plastic components release volatile organic compounds that coat your glass.
- Clothing fibers: Your clothes shed tiny fibers every time you get in and out of the car.
- Dust and pollen: These airborne particles settle on damp glass and stick to the film.
- Condensation: Humidity creates a moist surface that attracts and holds dirt.
- Chemical residue: Air fresheners, sunscreens, and lotions leave oily deposits on glass.
Knowing what causes the buildup helps you choose the right cleaning method. It also helps you prevent future haze from forming.
Best Products for Windscreen Cleaning
Commercial Glass Cleaners
The market is full of glass cleaners, but not all are created equal. For interior windshield cleaning, you want a product that cuts through grease without leaving streaks. Spray-based cleaners work well, but make sure they are ammonia-free for interior use. Ammonia can damage vinyl and plastic surfaces near your glass.
Some top-rated options include dedicated automotive glass cleaners that are formulated for car interiors. These products often come with spray bottles designed for easy reach inside your vehicle. Look for cleaners that specifically mention streak-free cleaning on the label.
DIY Cleaning Solutions
You do not need expensive products to get great results. A simple DIY glass cleaning solution works wonders for windscreen cleaning inside your car:
- Vinegar and water: Mix equal parts white vinegar and distilled water in a spray bottle. This cuts through grease and removes mineral deposits.
- Isopropyl alcohol solution: Combine one part isopropyl alcohol with one part water. This evaporates quickly and leaves no residue.
- Dish soap mix: A few drops of mild dish soap in a cup of warm water works for light buildup.
These solutions are affordable and effective. They give you control over what touches your car interior. Just make sure to test any solution on a small, hidden area first.
Step-by-Step Guide to Clean the Inside of a Car Windscreen
What You Need Before You Start
Gather your supplies before you begin. Having everything ready makes the process faster and smoother. Here is your checklist:
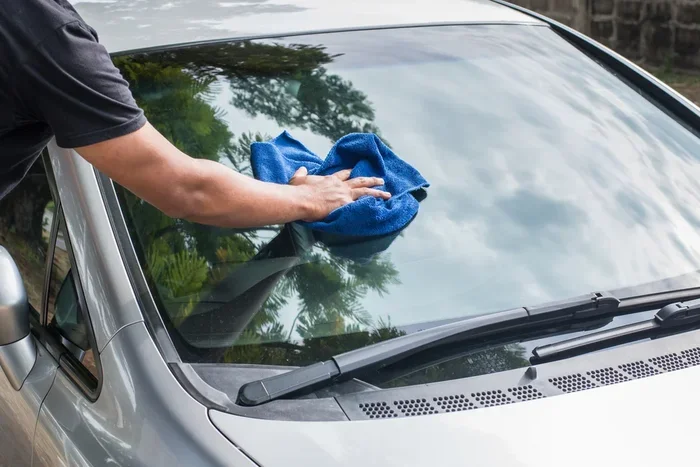
- Microfiber cloths: You need at least two. One for applying cleaner and one for buffing dry.
- Your chosen cleaning solution: Either a commercial cleaner or a DIY mix.
- A spray bottle: For DIY solutions or to dilute commercial cleaners.
- A detailing brush: Helps remove loose dust from corners and edges.
- A vacuum with a narrow nozzle: Sucks up loose particles before you wipe.
- Tinted glass cleaner (optional): If your windscreen has a tint strip at the top.
Using the right tools matters a lot. Paper towels leave lint and can scratch glass. Cotton t-shirts leave fibers behind. Microfiber cloths are the gold standard for streak-free cleaning on automotive glass.
The Cleaning Process
Follow these steps for the best results when you clean the inside of your car windscreen:
Step 1: Vacuum the glass surface. Use your narrow nozzle attachment to remove loose dust and debris. Pay attention to the edges and corners where particles collect. This prevents scratching during the wipe-down.
Step 2: Spray your cleaner. Spray your solution onto the microfiber cloth, not directly onto the glass. Spraying on the glass can cause drips onto your dashboard and interior trim. A lightly damp cloth gives you better control.
Step 3: Wipe in circular motions. Start from the top of the windscreen and work your way down. Use gentle, overlapping circles. This pattern helps you see which areas you have already cleaned and which still need attention.
Step 4: Flip and buff dry. After the initial wipe, flip your cloth to a dry side. Buff the glass in the same circular pattern. This removes any remaining moisture and prevents streaks.
Step 5: Inspect and repeat if needed. Hold the glass at different angles to check for spots. If you see haze or streaks, repeat the process on those areas. A second pass usually does the trick.
Step 6: Clean the edges. Use a smaller cloth or a detailing brush to clean the rubber seal and edges where grime builds up. These areas are easy to miss but affect overall clarity.
This method works for light to moderate buildup. For heavy haze, you may need to repeat the process or use a stronger solution.
Common Mistakes to Avoid
Even with the best intentions, people make mistakes that harm their windscreen or reduce cleaning effectiveness. Here are the most common errors:
- Using paper towels: They are too abrasive for glass. They scratch the surface and leave behind fibers that create more haze.
- Spraying cleaner directly on glass: This causes drips onto your dashboard. The cleaner can damage plastic and vinyl over time.
- Using household cleaners with ammonia: Ammonia fumes are harsh in an enclosed car. It also dries out and cracks vinyl and plastic trim.
- Cleaning in direct sunlight: The cleaner evaporates too fast, leaving streaks and residue before you can wipe it off.
- Not using enough pressure: Light wiping does not remove hardened haze. You need firm, consistent pressure with a clean cloth.
- Skipping the drying step: Air drying leaves water spots and mineral deposits that dull your glass.
Avoiding these mistakes saves you time and protects your car interior. A little care goes a long way in maintaining clear visibility driving conditions.
Pro Tips for Long-Lasting Cleanliness
How to Prevent Future Buildup
Cleaning is only half the battle. Prevention keeps your windscreen clear between sessions. Here are proven strategies:
- Use a dashboard protectant: Apply a non-greasy protectant to your dash after cleaning. This reduces off-gassing and slows haze formation.
- Ventilate your car: Crack your windows when parked to reduce humidity and condensation buildup inside.
- Avoid smoking inside: Smoke residue coats glass quickly and creates a stubborn film that is hard to remove.
- Keep a microfiber cloth in your car: A quick wipe after long trips removes oils and fingerprints before they build up.
- Apply anti-fog treatment: A rain-repellent or anti-fog product on the interior glass reduces condensation and makes future cleaning easier.
How Often Should You Clean Your Interior Windscreen?
For most drivers, cleaning every two weeks is ideal. If you live in a humid climate or drive frequently in dusty conditions, aim for once a week. Cars with heavy interior use or pets may need more frequent cleaning. Pay attention to how your glass looks and feels. If it starts to look hazy or feel rough, it is time for a cleaning session.
When to Seek Professional Help
Sometimes, home cleaning is not enough. If you have tried multiple methods and still see haze, the film may be chemically etched into the glass. Deep chemical etching from off-gassing or sun damage requires professional automotive glass maintenance. A professional detailer has access to industrial-grade glass polish tools that can restore clarity safely.
You should also seek help if you notice scratches alongside haze. Scratching the glass while trying to remove deep buildup can make the problem worse. A professional assessment saves you from costly glass replacement.
Comparison: DIY vs. Professional Windscreen Cleaning
| Factor | DIY Cleaning | Professional Cleaning |
|---|---|---|
| Cost | Low ($5-$20 per session) | Moderate ($50-$150 per session) |
| Time Required | 15-30 minutes | 30-60 minutes |
| Effectiveness for Light Haze | Excellent | Excellent |
| Effectiveness for Heavy Haze | Good with repeated effort | Excellent in one session |
| Convenience | High (do it at home) | Requires appointment |
| Risk of Damage | Low if done correctly | Very low |
| Tools Required | Cloths, cleaner, vacuum | None (they bring everything) |
Most drivers find that regular DIY maintenance keeps their windscreen in great shape. Professional cleaning is best reserved for deep haze or when you want a thorough detail before a long road trip.
Quick Tips for Windscreen Cleaning Success
- Always use distilled water in your DIY solutions. Tap water leaves mineral spots on glass.
- Work in the shade or in a garage. Direct sunlight dries cleaner too fast.
- Use separate cloths for applying cleaner and for buffing dry.
- Wash your microfiber cloths after each use. Dirty cloths scratch glass and spread grease.
- Clean your wipers too after cleaning the glass. Dirty wipers re-soil a clean windscreen quickly.
- Keep your car interior dust-free by vacuuming regularly. Less dust means less grime on glass.
Conclusion
Learning how do you clean the inside of a car windscreen is one of the simplest and most valuable car maintenance skills you can develop. A clean interior windscreen improves your visibility, enhances safety, and keeps your car looking great. The methods in this guide work for every driver, regardless of experience level.
Start with the basics. Grab a microfiber cloth and a simple cleaning solution. Follow the step-by-step process. Avoid the common mistakes. And build a routine that keeps your glass clear year-round. Prevention through regular automotive glass maintenance saves you time and effort in the long run.
Your windscreen is your window to the road. Keep it clean, keep it clear, and drive with confidence every time you hit the highway. A few minutes of care each week makes all the difference for clear visibility driving and a safer journey.
Frequently Asked Questions
Can I use a regular household glass cleaner on my car windscreen?
Some household cleaners work, but many contain ammonia or harsh chemicals that damage car interior plastics and vinyl. Stick to ammonia-free automotive glass cleaners or a simple vinegar and water mix for safe windscreen cleaning inside your car.
Why does my windscreen get dirty so quickly on the inside?
Off-gassing from dashboard plastics, condensation, dust, and oils from clothing all contribute to rapid buildup. Hot, humid climates make it worse. Regular cleaning and using a dashboard protectant slow down the process significantly.
Is it safe to clean my windscreen in direct sunlight?
No, direct sunlight causes the cleaning solution to evaporate too quickly. This leaves streaks, residue, and water spots. Always clean your interior glass in the shade or inside a garage for the best results.
How do I remove a stubborn haze that normal cleaning cannot fix?
Stubborn haze may require a stronger solution like pure isopropyl alcohol or a dedicated glass polish product. Apply it with a microfiber cloth and moderate pressure. If the haze persists, professional detailing may be needed to avoid scratching the glass.
How often should I clean the inside of my car windscreen?
Every two weeks is ideal for most drivers. If you live in a humid area, drive frequently, or have pets, weekly cleaning works better. Watch for haze buildup and clean as soon as you notice any cloudiness on your interior windshield.
Can I use a paper towel to clean my car windscreen?
It is best to avoid paper towels. They are abrasive and leave behind fibers that create more haze. Microfiber cloths are the safest and most effective choice for streak-free cleaning on automotive glass surfaces.