How Do You Reset the Check Engine Light on a Toyota
Resetting the check engine light on a Toyota is simple once you know the right steps. Whether you use an OBD-II scanner, disconnect the battery, or address the root cause, this guide covers every method. Learn how to reset the check engine light on a Toyota safely and keep your car running strong.
Key Takeaways
- Identify the root cause first: Always diagnose why the check engine light came on before attempting a reset.
- Use an OBD-II scanner: This is the easiest and most reliable way to clear diagnostic trouble codes on any Toyota model.
- Battery disconnection works: Disconnecting the negative battery terminal for 15-30 minutes can reset the light on older Toyota models.
- Don’t ignore persistent lights: If the light returns after resetting, there is likely an underlying problem that needs professional attention.
- Check simple fixes first: A loose gas cap or recently performed service can trigger the light and may need a simple reset.
- Know your Toyota’s OBD port location: The OBD-II port is usually found under the dashboard on the driver’s side.
- Resetting is not a permanent fix: Clearing the code without fixing the problem will only cause the light to return.
📑 Table of Contents
- How Do You Reset the Check Engine Light on a Toyota?
- Why Does the Check Engine Light Come On?
- How to Reset the Check Engine Light Using an OBD-II Scanner
- How to Reset the Check Engine Light by Disconnecting the Battery
- Resetting After Fixing the Problem
- Common Mistakes to Avoid When Resetting
- When to See a Professional Mechanic
- How to Prevent Future Check Engine Light Issues
- Toyota Models and Reset Specifics
- Understanding Diagnostic Trouble Codes
- Quick Tips for a Successful Reset
- Conclusion
How Do You Reset the Check Engine Light on a Toyota?
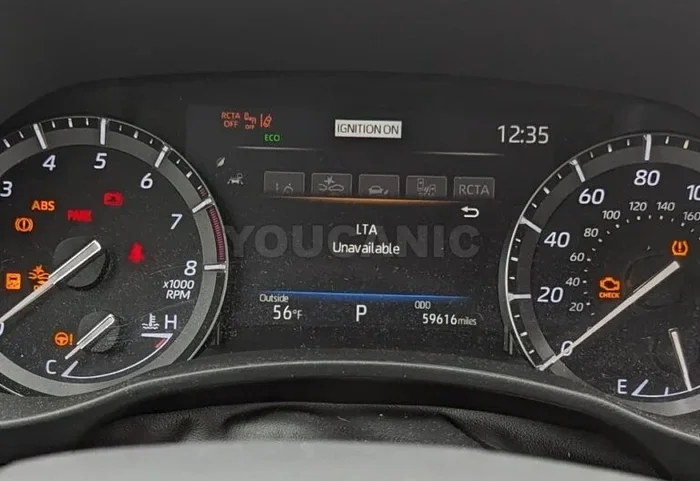
That little orange or yellow light popping up on your Toyota dashboard can send chills down your spine. You are driving along, everything feels fine, and suddenly — check engine light flashes on. What do you do next? Don’t panic just yet. In most cases, you can reset the check engine light on a Toyota without heading straight to the mechanic. This guide walks you through every method, so you can tackle this common issue like a pro.
Whether you drive a Toyota Corolla, Camry, RAV4, or Tacoma, the process is largely the same. We will cover everything from using an OBD-II scanner to the old-school battery disconnect method. By the end, you will know exactly how to clear that warning light and what to do if it comes back.
Why Does the Check Engine Light Come On?
Before you jump into resetting the light, it helps to understand why it turned on in the first place. The check engine light is part of your Toyota’s onboard diagnostics system, known as OBD-II. This system constantly monitors your engine and emissions components. When it detects something off, it stores a diagnostic trouble code (DTC) and lights up your dashboard.
Common Reasons for the Check Engine Light
- Loose or missing gas cap: This is one of the most common and easiest fixes. A poor seal lets fuel vapors escape and triggers the sensor.
- Oxygen sensor failure: The O2 sensor measures exhaust gases. A bad sensor hurts fuel economy and emissions.
- Catalytic converter issues: This component reduces harmful emissions. When it fails, your Toyota needs immediate attention.
- Mass airflow sensor problems: A dirty or faulty MAF sensor affects how your engine breathes and runs.
- Spark plug or ignition coil issues: Worn spark plugs cause misfires that trigger the warning light.
- EGR valve malfunction: The exhaust gas recirculation valve helps reduce emissions. If it sticks, your engine performance drops.
- Recent service or maintenance: Sometimes a routine oil change or tire rotation can trigger the light temporarily.
Understanding the root cause matters because resetting the check engine light on a Toyota without fixing the problem will only make the light return. Think of it like putting tape over a smoke detector — the alarm stops, but the fire is still there.
How to Reset the Check Engine Light Using an OBD-II Scanner
The most effective and popular method is using an OBD-II scanner. This handheld device plugs into your Toyota’s diagnostic port and communicates with the onboard computer. It reads trouble codes and clears them with the push of a button.
Step-by-Step Guide
- Locate the OBD-II port: In most Toyotas, the port sits under the dashboard on the driver’s side. Look near the steering column, beneath the fuse box cover, or behind a small plastic panel. You may need to remove a cover to access it.
- Plug in the scanner: Connect the OBD-II scanner’s 16-pin plug into the port. It should click or fit snugly into place.
- Turn the ignition to ON: Do not start the engine. Just turn the key to the “ON” position or press the start button without pressing the brake. The scanner should power on automatically.
- Read the codes: Follow the scanner’s instructions to read the stored diagnostic trouble codes. Write them down or use the scanner’s app to save them. These codes tell you exactly what triggered the check engine light.
- Clear the codes: Once you have noted the codes, select the option to clear or erase them. The scanner will send a command to the Toyota’s computer to reset the system.
- Turn off the ignition: Remove the scanner, turn the ignition off, and wait a few seconds. Start the engine again. The check engine light should be off.
Choosing the Right OBD-II Scanner
You have two main options: a basic handheld scanner or a Bluetooth/Wi-Fi scanner that pairs with your phone. Budget-friendly handheld scanners from brands like Actron, Launch, or Innova work great for basic code reading and clearing. If you want more detailed data and live diagnostics, a Bluetooth OBD-II adapter paired with apps like Torque or OBD Fusion gives you a richer experience.
Quick Tip: Even the cheapest OBD-II scanner will do the job for a simple reset. Save your money unless you plan to do deep diagnostics regularly.
How to Reset the Check Engine Light by Disconnecting the Battery
If you do not have an OBD-II scanner, you can try the battery disconnect method. This approach works by cutting power to the Toyota’s onboard computer, which forces a full system reset. It is a simple Toyota check engine reset technique that has worked for decades.
Step-by-Step Guide
- Park your Toyota safely: Make sure the car is in park (automatic) or neutral (manual) with the parking brake engaged.
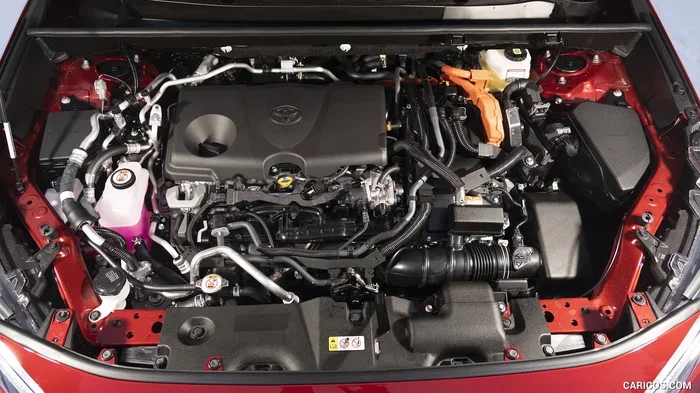
- Locate the battery: Open the hood and find the battery. It is usually on the driver’s side, but some newer Toyotas place it under the rear seat or trunk area.
- Disconnect the negative terminal: Use a wrench to loosen the nut on the negative (black) battery terminal. Carefully remove the cable and tuck it away from the battery so it cannot accidentally reconnect.
- Wait 15 to 30 minutes: This waiting period is crucial. It gives the computer enough time to fully power down and reset. Some people wait longer, but 30 minutes is usually sufficient.
- Reconnect the negative terminal: Place the cable back on the negative terminal and tighten the nut securely.
- Start the engine: Turn the key to start. The check engine light should now be off. If it stays on, you may need to drive a few cycles for the system to relearn and clear the code.
Important Cautions
- Disconnecting the battery can reset your radio presets, clock, and sometimes power window calibration.
- On newer Toyota models with complex electronics, this method may not always work.
- Some drivers report that the check engine light returns after a few days if the underlying issue was not addressed.
- Always reconnect the negative terminal first when putting the battery back together.
Resetting After Fixing the Problem
Sometimes the best check engine light fix is not a reset at all — it is repairing what caused the light to come on. Once you have replaced a faulty part, cleared the code, and confirmed the repair, the light should stay off. Here is how to handle the post-repair reset process.
After Replacing an Oxygen Sensor
After installing a new O2 sensor, start the engine and let it idle for a few minutes. Drive your Toyota for about 10-15 miles. If the light does not return, the repair was successful. If it comes back, double-check the sensor installation and consider using an OBD-II scanner to see if a new code appears.
After Tightening or Replacing the Gas Cap
A loose gas cap is a sneaky culprit. After tightening it (or buying a replacement), drive your Toyota for several trips. The EVAP system needs time to re-pressurize and confirm the seal is good. On some Toyotas, the light goes off after just one successful drive cycle. On others, it may take up to a week of normal driving.
After a Routine Service
If your mechanic performed service and triggered the light accidentally, ask them to clear the codes using their shop equipment. A simple drive cycle after the service usually confirms the system is back to normal.
Common Mistakes to Avoid When Resetting
Resetting a check engine light seems straightforward, but many people make avoidable mistakes. Here are pitfalls to watch out for on your Toyota check engine reset journey.
Resetting Without Diagnosing
This is the biggest mistake. Clearing the code without understanding why it appeared means the underlying problem persists. Your Toyota will just re-trigger the light within days or weeks. Always read and record the diagnostic trouble codes first.
Using the Wrong Scanner
Not all OBD-II scanners support every Toyota model or every code type. Some older or cheaper scanners cannot read manufacturer-specific codes. Make sure your scanner is compatible with your Toyota’s year and model before relying on it.
Driving Aggressively After the Reset
After clearing codes, your Toyota’s computer enters a relearning phase. Driving gently for the first 50 miles helps the system recalibrate properly. Hard acceleration, high speeds, and heavy loads during this period can confuse the system and trigger the light again.
Ignoring Pending Codes
Sometimes your Toyota stores a pending diagnostic trouble code before it sets the actual check engine light. If you scan the system and see pending codes, address them early. This proactive approach prevents the warning light from ever turning on.
When to See a Professional Mechanic
Not every check engine light situation is a DIY fix. Some scenarios demand professional help. Knowing when to call in the experts saves you time, money, and potential safety risks.
Warning Signs That Require a Mechanic
- The light is flashing, not steady: A flashing check engine light usually indicates a severe misfire. Continuing to drive can damage your catalytic converter, leading to an expensive repair.
- Multiple lights appear at once: If the check engine light shows alongside the ABS, airbag, or oil pressure warning, your Toyota has a serious multi-system issue.
- Unusual smells or sounds: Burning smells, grinding noises, or hissing sounds paired with the warning light point to mechanical problems that need a trained eye.
- The light returns after resetting: If you cleared the code and it came back within a few drive cycles, the problem is real and ongoing. A mechanic with advanced diagnostic tools can pinpoint it.
- Poor performance: Rough idling, stalling, power loss, or significant drops in fuel economy all signal issues beyond a simple reset.
What to Expect at the Shop
A mechanic will hook your Toyota up to a professional-grade diagnostic machine. This equipment reads deeper into the codes than most consumer scanners. They may also perform visual inspections, test specific sensors, and run emissions checks. The diagnosis usually takes 30 to 60 minutes, and many shops offer free code reading.
How to Prevent Future Check Engine Light Issues
The best check engine light repair is the one you never have to do. Regular maintenance and smart driving habits keep your Toyota’s diagnostics system happy. Here are proven prevention strategies.
Follow the Maintenance Schedule
Toyota provides a detailed maintenance schedule in your owner’s manual. Sticking to recommended oil changes, spark plug replacements, air filter swaps, and fluid flushes keeps components in top shape. Neglecting routine service is the number one path to diagnostic trouble codes and expensive repairs.
Check Your Gas Cap Regularly
Inspect your gas cap every few months. Look for cracks, warping, or a worn rubber seal. A tight, intact cap prevents fuel vapor leaks and keeps the EVAP system running smoothly. Replacing a gas cap costs just a few dollars but prevents an annoying check engine light.
Use Quality Fuel and Oil
Cheap fuel can contain impurities that foul sensors and clog injectors. Stick to reputable gas stations. Similarly, use the oil weight and type recommended by Toyota. Quality fluids protect engine components and keep sensors reading accurately.
Address Small Problems Early
Do not ignore minor issues like slight power loss, a drop in miles per gallon, or unusual noises. Small problems snowball into big ones fast. Early intervention keeps your Toyota reliable and prevents the dreaded check engine light from ever appearing.
Keep a Diagnostic Scanner on Hand
Owning a basic OBD-II scanner empowers you to check codes anytime. It takes the guesswork out of dashboard warnings. Many affordable Bluetooth scanners connect directly to your phone, giving you instant access to your Toyota’s health data.
Toyota Models and Reset Specifics
Different Toyota models have slight variations in the reset process. Here is a quick breakdown for popular models.
Toyota Corolla Check Engine Light Reset
The Corolla has a standard OBD-II port located under the driver-side dashboard. Both the scanner and battery disconnect methods work reliably. Corollas from 2000 onward all support OBD-II diagnostics. The check engine light on a Corolla often comes from emissions-related sensors, so oxygen and MAF sensors are common culprits.
Toyota Camry Check Engine Light Reset
Similar to the Corolla, the Camry uses the same OBD-II port location and reset methods. Camrys from 2002 onward are fully OBD-II compliant. Older Camry models sometimes need a longer battery disconnect time — try 45 minutes for best results on pre-2000 models.
Toyota RAV4 Check Engine Light Reset
The RAV4’s OBD-II port is slightly harder to access in some model years due to a covered panel. Check behind the lower dashboard trim on the driver’s side. The battery disconnect method works well on RAV4s, especially for clearing codes after a check engine light repair involving the EVAP system.
Toyota Tacoma Check Engine Light Reset
Tacoma trucks are known for their durability, but their check engine light can still come on from sensor issues or aftermarket modifications. The OBD-II port sits under the dash near the steering column. Tacoma owners should pay special attention to oxygen sensors and catalytic converter readings since truck use often involves heavy loads and towing.
Understanding Diagnostic Trouble Codes
When your Toyota stores a diagnostic trouble code, it follows a standardized format. Understanding these codes gives you a head start on identifying the problem.
How to Read DTCs
Each code starts with a letter followed by four digits. Here is what they mean:
- P codes: Powertrain issues (engine, transmission, emissions)
- B codes: Body control issues (airbags, climate control, electrical accessories)
- C codes: Chassis issues (brakes, suspension, steering)
- U codes: Network communication issues (computer bus, wiring)
The second digit tells you if the code is generic (0) or manufacturer-specific (1). The third digit narrows down the system: 1 for fuel and air, 2 for fuel injection, 3 for ignition, 4 for auxiliary emissions, 5 for vehicle speed and idle, and 6 for computer output circuits.
Example: Code P0301 means a misfire detected in cylinder 1. This is a generic code that applies to all OBD-II vehicles, including every Toyota model.
Knowing these codes helps you decide whether a DIY reset the check engine light on a Toyota approach is appropriate or if professional help is needed.
Quick Tips for a Successful Reset
- Always read codes first: Write down every DTC before clearing anything. This information is invaluable for future diagnosis.
- Use quality parts: When replacing sensors or components, use OEM or high-quality aftermarket parts. Cheap parts often trigger new codes.
- Perform a drive cycle: After any repair or reset, drive your Toyota through a full drive cycle. This allows the onboard computer to relearn and confirm the fix.
- Keep your OBD-II scanner handy: A scanner is a great investment for any Toyota owner. It pays for itself the first time it saves you a diagnostic fee.
- Check for recalls: Sometimes a check engine light issue stems from a known defect. Visit Toyota’s official website and enter your VIN to check for open recalls.
- Document everything: Keep a log of codes, repairs, and dates. This history helps you and any mechanic who works on your Toyota in the future.
Conclusion
Learning how to reset the check engine light on a Toyota is a valuable skill every Toyota owner should have. Whether you use an OBD-II scanner, disconnect the battery, or address the root cause directly, you now have the knowledge to handle this situation confidently. Remember to always diagnose before you reset, and never ignore a persistent light. Your Toyota is built to last, and with proper care and attention, that check engine light will stay where it belongs — off. Take action today, and keep your ride running smoothly for miles to come.
Frequently Asked Questions
Can I drive my Toyota with the check engine light on?
If the light is steady and you notice no unusual behavior, short-distance driving is generally safe. However, a flashing check engine light signals a serious issue like a misfire, and you should stop driving immediately. Always diagnose the code first to understand the severity before deciding to drive.
How long does it take to reset the check engine light on a Toyota?
Using an OBD-II scanner, the reset takes just 5 to 10 minutes. The battery disconnect method requires 15 to 30 minutes of waiting time plus a few minutes for reconnection. Driving cycles after a repair can take 1 to 3 days for the system to fully relearn and confirm the light stays off.
Will disconnecting the battery reset all warning lights on my Toyota?
Disconnecting the battery resets the onboard computer and clears stored codes, which turns off the check engine light. However, it also resets non-critical warnings like tire pressure monitors and maintenance reminders. Critical safety lights like airbag or brake warnings should never be ignored or reset without professional diagnosis.
Is it safe to use a cheap OBD-II scanner on my Toyota?
Yes, basic OBD-II scanners are safe to use on any Toyota model. They simply read and clear standardized codes from the onboard computer. However, very cheap scanners may not read manufacturer-specific codes, which can limit your diagnosis. A mid-range scanner from a trusted brand gives you the best balance of price and capability.
What does it mean when the check engine light comes on and off on a Toyota?
An intermittent check engine light usually indicates an intermittent fault, such as a loose connection, a sensor that works sometimes but fails at other times, or an EVAP system issue from temperature changes. Have the codes read as soon as possible, even if the light turns off, because the stored history codes will still reveal the problem.
How much does it cost to diagnose a check engine light at a mechanic?
Most independent mechanics and auto parts stores offer free code reading. If you need a full diagnostic, expect to pay between $50 and $150 depending on your location and the complexity of the issue. Dealerships typically charge a bit more but have Toyota-specific training and equipment that can be valuable for complex problems.