Is It Hard to Replace a Battery Yourself Easy Guide
Replacing your own battery is easier than most people think. With the right tools and a little confidence, you can swap out a dead battery in under 30 minutes. This guide walks you through every step so you feel safe and prepared.
Have you ever stared at a dead battery and wondered if you could handle the swap yourself? The short answer is no, it is not hard to replace a battery yourself. Many people avoid the idea because they think it requires mechanical skills or expensive tools. In reality, most battery swaps are simple and straightforward.
This guide breaks down the entire process in plain language. You will learn what tools you need, the exact steps to follow, and how to stay safe. By the end, you will feel confident enough to grab a wrench and do it yourself. Let us walk through this together.
Key Takeaways
- DIY battery replacement saves money: You avoid labor fees and learn a valuable skill.
- Basic tools are all you need: A wrench, gloves, and a memory saver are enough to start.
- Safety comes first: Always disconnect the negative terminal first and wear protective gear.
- Know when to call a pro: Some vehicles and situations need professional help.
- Recycling matters: Old batteries must be disposed of properly at a recycling center.
📑 Table of Contents
- Why You Should Consider DIY Battery Replacement
- Tools and Supplies You Will Need
- Step-by-Step Battery Replacement Guide
- Common Mistakes to Avoid During Battery Replacement
- Safety Tips Every DIYer Should Know
- When to Call a Professional Instead
- Proper Disposal and Recycling of Old Batteries
- How to Extend Your New Battery Life
- Understanding Battery Types and Ratings
- Final Thoughts on DIY Battery Replacement
Why You Should Consider DIY Battery Replacement
Replacing a battery on your own offers real benefits. First, it saves you money. Many repair shops charge between $50 and $100 for a simple battery swap. That is just the labor cost. When you do it yourself, you only pay for the new battery.
Second, you learn something new. Understanding how your battery works helps you spot problems early. You will know what to look for when your car struggles to start. This knowledge gives you confidence every time you open the hood.
Third, it is convenient. You do not need to wait for an appointment or drive to a shop. You can handle the job in your driveway or garage. It takes less time than you might expect. Most people finish in 15 to 30 minutes.
The Cost Savings Are Real
Let us talk numbers. A typical battery replacement at a shop costs around $100 to $200. The battery itself might be $50 to $120. The rest is labor. When you do it yourself, you skip the labor fee entirely. That is money back in your pocket.
Over time, these savings add up. If you replace your battery every three to five years, you could save $200 or more over the life of your car. That is a nice bonus for a task you can do in half an hour.
Building Confidence for Other Repairs
Once you replace a battery successfully, you might feel inspired to tackle other small jobs. Changing a flat tire, swapping a fuse, or adding windshield fluid all follow a similar logic. Each small win builds your mechanical confidence. You start to see your car differently.
This is how people become more self-sufficient. They start with something simple like battery replacement and gradually take on bigger projects. The skills you gain carry over. You become a more informed car owner.
Tools and Supplies You Will Need
Before you start, gather everything you need. Having the right tools makes the job smooth and safe. You do not need a fancy garage full of equipment. Just a few basic items will do the trick.
Essential Tools for the Job
- Wrench set: A 10mm or 13mm wrench works for most battery terminals.
- Battery terminal cleaner: This tool removes corrosion from the cable ends.
- Protective gloves: Rubber or latex gloves protect your hands from acid and grime.
- Safety glasses: Shield your eyes from any sparks or dripping fluid.
- Memory saver: This device keeps your radio and computer settings intact.
- New battery: Make sure it matches your vehicle specifications.
- Battery terminal spray: This prevents future corrosion after installation.
Nice-to-Have Extras
You do not need these items, but they make the job easier. A voltage tester helps you check the new battery before installation. A battery charger is useful if your new battery needs a top-off. A wire brush cleans corroded terminals quickly. A trickle charger maintains battery health during long storage periods.
Keep a rag or paper towels nearby too. Batteries can leak fluid, and you want to wipe things down before closing the hood. A battery carry handle makes lifting the old battery safer, since they weigh 30 to 50 pounds.
Step-by-Step Battery Replacement Guide
Now for the part you have been waiting for. Here is exactly how to replace a battery yourself. Follow these steps carefully, and you will have a working battery in no time.
Step 1: Park Safely and Turn Off the Engine
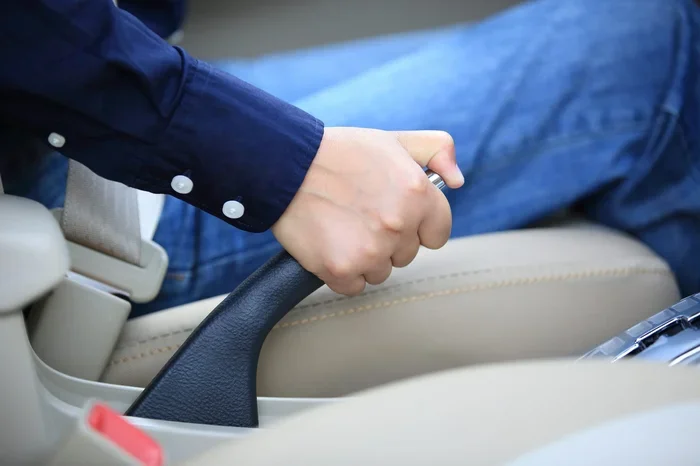
Find a flat, stable surface to work on. Turn off the engine and remove the keys from the ignition. Engage the parking brake. This prevents the car from rolling and keeps you safe while you work.
Let the engine cool down for a few minutes. Hot engines and hot battery components are a burn risk. Give everything time to settle before you touch anything under the hood.
Step 2: Locate the Battery
Open the hood and find the battery. In most cars, it sits in a corner of the engine bay. It is a rectangular box with two cables attached. The positive cable usually has a red cover or a plus sign. The negative cable has a black cover or a minus sign.
Some vehicles hide the battery under a seat or in the trunk. Check your owner manual if you cannot find it. Knowing the location before you start saves you frustration.
Step 3: Disconnect the Negative Terminal First
This is the most important safety step. Always disconnect the negative terminal first. Use your wrench to loosen the nut on the negative cable clamp. Once loose, carefully twist and pull the clamp off the battery post.
Secure the disconnected cable away from the battery. You do not want it to accidentally touch the terminal again. This prevents short circuits and sparks. The negative cable is the ground cable, so disconnecting it first keeps you safe.
Step 4: Disconnect the Positive Terminal
Now repeat the process for the positive terminal. Loosen the nut, twist the clamp, and pull it off. Again, keep this cable away from the battery. Both cables should be completely detached before you move on.
If your battery has a hold-down clamp or bracket, remove that too. This usually requires one more bolt. Set the bracket aside in a safe place. You will need it later to secure the new battery.
Step 5: Remove the Old Battery
Batteries are heavy. Lift with your legs, not your back. Use both hands to grip the battery securely. If you have a battery carry handle, use it. Some batteries have a plastic lip on one side that helps you lift.
Set the old battery on a flat surface or a piece of cardboard. Be careful not to tip it. Batteries contain sulfuric acid, and tipping can cause leaks. Handle it gently and keep it upright at all times.
Step 6: Clean the Battery Tray and Terminals
Before installing the new battery, clean the tray. Use a rag to wipe away any dirt or corrosion. Check the cable ends too. If they look green or white and crusty, use a battery terminal cleaner or a wire brush to scrub them smooth.
Clean connections make better electrical contact. This helps your new battery perform at its best. Take a moment to inspect the cable ends. If they are damaged or severely corroded, consider replacing them.
Step 7: Install the New Battery
Place the new battery in the tray. Make sure the positive and negative terminals match the cable positions. The positive cable goes to the positive post. The negative cable goes to the negative post. This matters for safety and proper function.
Reinstall the hold-down bracket or clamp. Tighten it snugly but do not over-tighten. You want the battery secure and stable. It should not wiggle or shift when you push on it.
Step 8: Connect the Positive Terminal First
Now reverse the disconnection order. Connect the positive terminal first. Place the clamp over the positive post and tighten the nut with your wrench. Make sure it is tight enough that the clamp does not move.
Then connect the negative terminal. Tighten the nut securely. Apply a small amount of battery terminal spray to both terminals. This coating prevents future corrosion and keeps connections clean.
Step 9: Test the New Battery
Start the engine and let it run for a few minutes. Everything should start up normally. Check your dashboard for any warning lights. If the check engine light stays on, there may be an issue unrelated to the battery.
Use a voltage tester to confirm the battery is charging properly. A healthy reading is between 13.7 and 14.7 volts. If the reading is lower, the alternator may need attention. This is a quick check that gives you peace of mind.
Common Mistakes to Avoid During Battery Replacement
Even simple jobs have pitfalls. Knowing what to avoid keeps you safe and prevents damage. Here are the most common mistakes people make during DIY battery replacement.
Forgetting to Use a Memory Saver
Modern cars have computers that store settings. When you disconnect the battery, those settings can reset. Your radio presets, clock, power windows, and even engine idle settings may need reprogramming. A memory saver plugs into the cigarette lighter or OBD port and keeps power flowing.
Without one, you might spend an hour resetting everything. Some cars even need a special code to unlock the radio. A memory saver costs under $20 and saves you a lot of hassle. It is one of the best investments for DIY car maintenance.
Connecting Terminals in the Wrong Order
Always connect the positive terminal first and disconnect it last. Reversing this order can cause sparks or short circuits. The negative cable connects to the car’s frame and ground. If you connect it first and then touch a wrench to metal, you create a spark.
This mistake can damage sensitive electronics in your car. It can also cause the battery to spark, which is dangerous near battery acid fumes. Follow the correct order every single time. It becomes second nature after a few repetitions.
Ignoring Corrosion on Terminals
White or green buildup on battery terminals is corrosion. It blocks the electrical connection and causes starting problems. If you just slap a new battery on top of corroded cables, the problem continues. Always clean terminals before installing the new battery.
You can buy a battery terminal cleaner tool for a few dollars. A wire brush works too. Some people use a mixture of baking soda and water to dissolve corrosion. Just make sure the terminals are clean and dry before connecting the new battery.
Buying the Wrong Battery Size
Not all batteries fit all cars. Battery size, terminal placement, and cold cranking amps vary by vehicle. Check your owner manual or look up the correct part number before you buy. Installing the wrong battery can damage your electrical system.
Big box stores often have battery fit guides on their shelves. You can also ask a staff member to help you find the right match. Taking five minutes to verify the size saves you from returns and frustration.
Safety Tips Every DIYer Should Know
Safety is not optional when working with batteries. They contain corrosive acid and can produce flammable hydrogen gas. Taking precautions protects you and your vehicle.
Wear Protective Gear
Always wear rubber gloves and safety glasses. Battery acid can cause chemical burns on contact. Even a small splash on your skin needs immediate rinsing with water. Gloves and glasses create a barrier that keeps you safe.
Wear closed-toe shoes too. A heavy battery can fall and injure your foot. Avoid wearing jewelry that could touch both terminals at once. Metal jewelry conducts electricity and can cause burns or ignite sparks.
Work in a Well-Ventilated Area
Batteries release hydrogen gas, which is flammable. Never smoke or use open flames near a battery. Work in a garage with the door open or outdoors. Good ventilation disperses any gas buildup and keeps the air safe to breathe.
If you smell sulfur or rotten eggs near the battery, move away immediately. That smell means the battery is venting gas. Do not attempt to work on it until the area is properly ventilated. Your nose is actually a useful safety tool in this case.
Keep Tools Organized
Loose wrenches or tools near the battery can cause short circuits. Place them on a clean cloth or in a tool bag. Never let a metal wrench touch both terminals at the same time. This creates a direct electrical path that can spark, melt tools, or damage your car’s electrical system.
Keep a fire extinguisher nearby just in case. It is a small precaution that gives you peace of mind. You do not need one for every battery swap, but it is smart to have one in your garage anyway.
When to Call a Professional Instead
DIY battery replacement works for most cars, but not every situation. Knowing when to call a professional saves you time and prevents costly mistakes. Here are situations where you should skip the DIY route.
First, consider your vehicle type. Some luxury cars and hybrid vehicles have complex battery systems. Hybrid batteries sit in the trunk or under the seat and can carry thousands of volts. These systems require specialized training and equipment. Leave those to the pros.
Second, think about your physical comfort level. If you feel unsure or nervous, that is okay. There is no shame in paying someone $50 to do a job you are not comfortable with. A professional mechanic has experience and insurance. They know how to handle unexpected problems.
Third, consider the location of the battery. Some batteries sit in tight spaces where a person cannot fit. You might need to remove parts of the engine bay just to access the battery. In these cases, a professional has the right tools and space to work efficiently.
Finally, if your new battery keeps dying, there is an underlying problem. A faulty alternator, parasitic draw, or damaged wiring could be the real culprit. A professional can diagnose these issues with specialized tools. Sometimes the battery is not the problem at all.
Proper Disposal and Recycling of Old Batteries
Never throw an old car battery in the trash. Car batteries contain lead and sulfuric acid, which are toxic to the environment. Most states and countries have laws requiring proper battery disposal. Recycling is both the legal and the responsible thing to do.
Take your old battery to an auto parts store. Many stores like AutoZone, O’Reilly, or Advance Auto Parts accept old batteries for recycling. Some even offer a core charge refund when you buy a new battery. This refund offsets part of your new battery cost.
You can also check your local recycling center for household hazardous waste drop-off days. These facilities handle batteries safely and ensure the materials are recovered. Lead, plastic, and acid are all recyclable components of a car battery.
If you are unsure where to bring your old battery, call your local waste management office. They can point you to the nearest approved recycling location. It takes a few minutes to find the right spot, and it keeps harmful materials out of landfills.
How to Extend Your New Battery Life
You just invested in a new battery. You want it to last as long as possible. A few simple habits can extend battery life by years. These tips keep your battery healthy and your car starting strong.
- Drive your car regularly: Short trips don’t fully recharge the battery. Take longer drives when possible to let the alternator do its job.
- Turn off accessories before shutting off the engine: Lights, radio, and air conditioning draw power. Letting them run while the engine is off drains the battery faster.
- Check terminals every few months: Look for corrosion or loose connections. Clean them early before they become a problem.
- Use a trickle charger for stored vehicles: If a car sits unused for weeks, a trickle charger maintains the battery charge without overcharging.
- Keep the battery clean: Wipe away dirt and grime from the battery case. Dirt can create a slow discharge path across the terminals.
- Get your battery tested annually: Many auto parts stores test batteries for free. This catches weak batteries before they leave you stranded.
These habits take minimal effort but pay off big. A well-maintained battery lasts three to five years on average. Neglected batteries often fail after just one or two years. The choice is simple. Spend five minutes on maintenance and save hundreds on premature replacements.
Understanding Battery Types and Ratings
Not all batteries are created equal. Understanding the basics helps you choose the right replacement. Let us break down the most common types and what the numbers mean.
Standard flooded lead-acid batteries are the most common. They are affordable and widely available. They require occasional maintenance like checking fluid levels. Most everyday cars use this type.
Absorbed Glass Mat (AGM) batteries are a step up. They are sealed, maintenance-free, and handle deep discharges better. They cost more but last longer. Many modern cars with start-stop systems require AGM batteries.
Cold Cranking Amps (CCA) is the rating that matters most in cold weather. It measures how well a battery starts an engine in low temperatures. If you live in a cold climate, choose a battery with a high CCA rating. The owner manual lists the recommended CCA for your vehicle.
Reserve Capacity tells you how long the battery can power your car if the alternator fails. A higher reserve capacity gives you more time to get to a safe location. Both CCA and reserve capacity appear on the battery label. Match these numbers to your vehicle specifications.
Final Thoughts on DIY Battery Replacement
So, is it hard to replace a battery yourself? The honest answer is no. It is one of the simplest and most rewarding DIY car maintenance tasks you can do. With basic tools, a little preparation, and this guide, you can handle the job in under half an hour.
The benefits go beyond just saving money. You gain confidence, knowledge, and self-reliance. You become the person friends and family call when their car won’t start. That kind of empowerment is worth more than any savings.
Start small. Gather your tools, find a safe workspace, and follow the steps outlined in this guide. Your first battery replacement might feel intimidating, but it gets easier every time. Soon you will wonder why you ever paid someone else to do it.
Remember to dispose of your old battery properly and take steps to keep your new one healthy. With a little care and attention, your DIY battery replacement will serve you well for years. You have got this.
Frequently Asked Questions
Can I replace my car battery without any mechanical experience?
Absolutely. Battery replacement is one of the easiest car maintenance tasks. You do not need any mechanical background. As long as you can follow step-by-step instructions and use basic tools, you can do it. This guide walks you through everything clearly and simply.
How long does it take to replace a car battery yourself?
Most people finish the job in 15 to 30 minutes. The actual time depends on your vehicle and how corroded the old terminals are. If the cables are tight or corroded, it might take a bit longer. But even in those cases, you should be done within an hour.
What happens if I connect the battery cables in the wrong order?
Connecting cables in the wrong order can cause sparks, short circuits, or damage to your car’s electronics. Always disconnect the negative terminal first and connect the positive terminal first. This order protects you and your vehicle from electrical damage.
How do I know if my new battery is compatible with my car?
Check your owner manual for the correct battery group size, CCA rating, and terminal placement. You can also look up your vehicle on the battery retailer’s website. Matching these specifications ensures the new battery fits and works properly.
Is it safe to touch a car battery with bare hands?
It is generally safe to touch a dry battery with bare hands. However, battery acid and corrosion can irritate your skin. Always wear rubber gloves to protect yourself. If you get battery acid on your skin, rinse it immediately with plenty of water.
Can a dead battery be recharged instead of replaced?
Sometimes. If the battery is simply discharged from leaving lights on, a battery charger can bring it back. However, if the battery is old or deeply damaged, recharging will not fix it. A voltage tester helps you determine whether the battery can be saved or needs replacement.
=== CONCLUSION ===
Replacing a battery yourself is easier, safer, and more affordable than most people believe. You have learned the tools needed, the exact steps to follow, and how to avoid common mistakes. This knowledge puts you in control of your vehicle’s maintenance.
The next time your battery dies, do not panic. Gather your wrench, gloves, and new battery. Follow the steps in this guide. You will have a working battery in under 30 minutes. Is it hard to replace a battery yourself? Not anymore. Not for you.
Start your first DIY battery replacement today. The confidence and savings you gain are well worth the effort. Share this guide with a friend who might need it too. Together, you can both become more self-sufficient car owners.