Car Drawing Black and White Simple Guide for Beginners
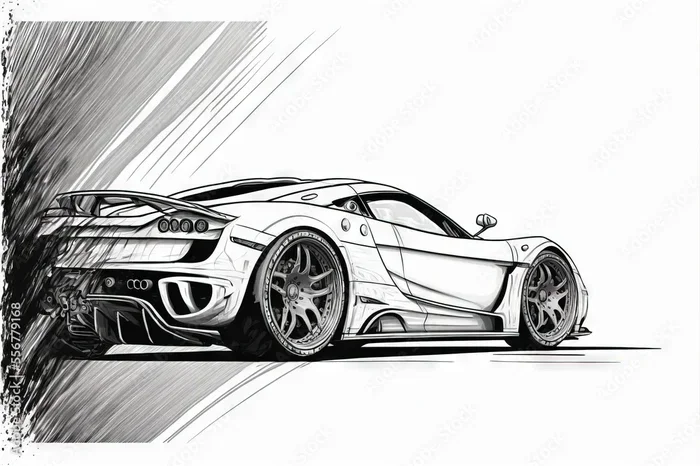
Car drawing black and white is one of the best ways for beginners to build strong foundational art skills. This guide covers everything from basic tools and shapes to advanced shading techniques. You will learn how to sketch realistic cars using just a pencil and paper. Black and white car drawing removes the distraction of color and helps you focus on form, proportion, and detail. By the end, you will have the confidence to create your own monochrome car illustrations from scratch.
There is something timeless about a car drawing black and white. Strip away the color, and you are left with pure form, clean lines, and the raw beauty of automotive design. Whether you are a complete beginner or someone who has picked up a pencil for the first time in years, learning to draw cars in black and white is a rewarding journey.
Car sketching in monochrome has been a cornerstone of automotive design for decades. Famous car designers use black and white drawing techniques to sketch new models before a single color is added. The beauty of this approach is that it forces you to understand shape, light, and shadow instead of relying on color to do the heavy lifting.
If you have ever stared at a sleek car and thought, “I wish I could draw that,” this guide is for you. You do not need expensive supplies or years of experience. You just need a pencil, some paper, and the willingness to practice. Let us dive into the world of pencil drawing car art and get you started on your creative journey.
Key Takeaways
- Start with basic shapes: Every great car sketch begins with simple geometric forms that guide your overall structure.
- Black and white drawing builds core skills: Working in monochrome trains your eye for light, shadow, and proportion.
- The right tools matter: A few quality pencils, a good eraser, and smooth paper can make a huge difference.
- Shading is the secret to realism: Techniques like hatching and cross-hatching add depth and dimension to your car sketches.
- Avoid common beginner mistakes: Rushing, pressing too hard, and ignoring proportions are the top pitfalls to watch out for.
- Practice consistently: Regular short sessions beat long infrequent ones when building your car drawing skills.
- Reference images are invaluable: Using real car photos as guides accelerates your learning and improves accuracy.
📑 Table of Contents
- Why Car Drawing Black and White Is the Perfect Starting Point
- Essential Tools and Materials for Car Drawing
- Step-by-Step Guide to Drawing a Car in Black and White
- Shading and Texture Techniques That Make Car Drawings Pop
- Common Mistakes Beginners Make in Car Drawing
- Tips to Improve Your Car Drawing Skills Fast
- Conclusion
Why Car Drawing Black and White Is the Perfect Starting Point
Many beginners jump straight into colorful digital art or painting. But there is a strong case for starting with black and white car illustration. When you remove color from the equation, you are left with only the essentials. You must think about shape, proportion, perspective, and light.
It Builds Strong Foundational Skills
Drawing cars for beginners is much easier when you work in grayscale. Color can be distracting. It tempts you to focus on hue and saturation instead of the underlying structure of the vehicle. When you draw in black and white art, you train your brain to see edges, contours, and value changes. These are the same skills that make any artist better, regardless of what medium they eventually work in.
It Requires Minimal Supplies
One of the best things about car sketching in black and white is how accessible it is. You do not need a fancy tablet or expensive paints. A single pencil, a good eraser, and a sheet of paper are all you need to start. This makes it one of the most affordable hobbies you can pick up. You can practice car drawing black and white anywhere, at any time, without any setup.
It Produces Elegant, Timeless Results
There is a classic beauty to monochrome car art that color simply cannot replicate. A well-executed line art car sketch has a certain sophistication. It looks clean, intentional, and refined. Many professional automotive designers and artists prefer black and white drawing for its elegance and versatility. Your sketches can be used for personal enjoyment, social media, or even as part of a design portfolio.
Essential Tools and Materials for Car Drawing
Before you start your first car drawing black and white session, let us talk about what you need. The good news is that you do not need much. The right tools will make the process smoother and more enjoyable.
Pencils: Your Best Friend
A standard graphite pencil set is all you need to begin. Here is a simple breakdown of what to look for:
- HB Pencil: Great for light outlines and basic shapes. It is your everyday workhorse pencil.
- 2B Pencil: Softer and darker. Perfect for adding mid-tones and initial shading.
- 4B or 6B Pencil: Very soft and dark. Use these for deep shadows and bold contrasts in your automotive drawing.
You do not need every pencil grade available. Starting with an HB, a 2B, and a 4B will cover about 90 percent of what you need for pencil drawing car projects.
Paper Matters More Than You Think
Not all paper is created equal. For car sketching, you want smooth paper that accepts graphite without too much texture. A standard sketchpad with medium-weight paper works perfectly. Avoid very thin paper, as it can buckle when you erase. A slightly textured paper can add interesting effects to your black and white drawing, but smooth paper is best for beginners.
Erasers and Other Extras
A kneaded eraser is a game-changer for car drawing black and white. It lifts graphite gently without tearing the paper. A standard pink eraser works well for removing heavier marks. You might also want a blending stump or a soft tissue for smoothing out your shading. These small tools make a big difference in the quality of your automotive sketch.
| Tool | Purpose | Budget Option |
|---|---|---|
| HB Pencil | Light outlines and basic shapes | Any standard school pencil |
| 2B Pencil | Mid-tone shading and details | Staedtler Mars Lumograph 2B |
| 4B Pencil | Deep shadows and bold lines | Faber-Castell 4B |
| Kneaded Eraser | Lifting graphite and creating highlights | General’s Kneaded Eraser |
| Sketchpad | Drawing surface | Strathmore 400 Series Sketch Pad |
| Blending Stump | Smoothing shading and gradients | Any affordable blending stump set |
Step-by-Step Guide to Drawing a Car in Black and White
Now let us get to the fun part. This step-by-step walkthrough will guide you through your first car drawing black and white project. Follow along slowly, and do not worry about perfection. Every sketch you complete makes you better.
Step 1: Start with Basic Shapes
Every car outline drawing begins with simple geometry. Look at any car, and you will see rectangles, ovals, and triangles combined together. Start by lightly sketching a rectangle for the main body. Add an oval or curved shape for the cabin area. Draw two smaller rectangles for the wheels. These basic shapes are the skeleton of your car illustration.
Keep your lines light at this stage. You are not trying to make anything look final. You are just mapping out the proportions. Use a ruler if you need help with straight lines, but try to keep things loose and natural. Car design sketch work is all about capturing the essence of the vehicle, not creating a technical blueprint.
Step 2: Refine the Outline
Once your basic shapes are in place, start connecting them. Smooth out the lines where the body meets the cabin. Round off the corners where needed. This is where your line art car starts to take shape. Go over your outline with slightly firmer pressure, but still keep it light enough to erase later.
Pay close attention to the car’s proportions. Are the wheels the right size compared to the body? Is the cabin too long or too short? This is the time to fix any issues. A car drawing black and white that has good proportions will look realistic even without color or fine details.
Step 3: Add Key Details
Now it is time to bring your automotive drawing to life with details. Add the windows, the door lines, the headlights, and the bumper shapes. Keep referring to your reference image or real car. Notice how the lines flow and curve. Every car has its own personality, and your pencil sketch car should reflect that.
Do not try to add every single detail at once. Focus on the major elements first. You can always add more later. A common mistake in drawing cars for beginners is adding too much detail too early, which leads to a messy and confusing sketch.
Step 4: Begin Shading
Shading is what transforms a flat car outline drawing into a three-dimensional black and white drawing. Start with the areas that receive the least light. These are usually underneath the car, inside the wheel wells, and along the sides that face away from your light source.
Use the side of your pencil for broad, smooth shading. Build up the tones gradually. It is much easier to add more graphite than to remove it. If you press too hard too early, you will leave deep grooves in the paper that are hard to fix. Light, repeated strokes are the key to beautiful monochrome car art.
Step 5: Refine Shadows and Highlights
Now go back and refine your shading. Use your kneaded eraser to lift graphite and create highlights. The areas where light hits the car directly should be the lightest. The areas in shadow should be the darkest. This contrast is what gives your car drawing black and white its depth and realism.
Step back and look at your work from a distance. Does it look three-dimensional? Are the shadows consistent? Make adjustments as needed. This final refinement stage is where car sketching goes from good to great.
Shading and Texture Techniques That Make Car Drawings Pop
Shading is the single most important skill in black and white drawing. Without color, shading is what creates the illusion of form, texture, and material. Let us explore some techniques that will elevate your automotive sketch work.
Hatching and Cross-Hatching
Hatching means drawing parallel lines in the same direction to create shade. Cross-hatching adds a second set of lines going in a different direction. Together, these techniques allow you to build up tone gradually. They work especially well for showing the metal texture of a car body. Try hatching along the curve of the fender to follow the shape of the vehicle.
Blending for Smooth Gradients
Cars have smooth, curved surfaces that demand smooth shading. Use a blending stump or a soft tissue to spread your graphite around. This creates seamless gradients from dark to light. Blending is essential for car drawing black and white because it mimics the way light rolls across a polished car surface.
Stippling for Subtle Texture
Stippling is the technique of creating tone with tiny dots. It takes patience, but it produces beautiful results. Stippling works well for showing texture on car interiors, tires, or fabric seats. It is a slower technique, but it adds a unique quality to your line art car work.
Using Negative Space
Negative space is the empty area around and between objects. In car sketching, clever use of negative space can define shapes without drawing every line. For example, the shadow between two wheels or the bright area on a hood can do more to define the car than a dozen outlines. Mastering negative space is a hallmark of skilled black and white art.
Common Mistakes Beginners Make in Car Drawing
Even the most talented artists make mistakes when they start. The key is knowing what to avoid. Here are the most common pitfalls in car drawing black and white and how to fix them.
Pressing Too Hard
This is the number one mistake among beginners. When you press too hard, you dent the paper and make it nearly impossible to erase cleanly. Light, confident strokes produce much better results. Think of your pencil as a delicate tool, not a chisel. Your pencil drawing car will look more refined when you use gentle pressure.
Skipping the Basic Shapes
It is tempting to jump straight into details. But skipping the basic shapes almost always leads to proportion problems. Always start with simple forms. Block out the body, the cabin, and the wheels before you add any details. This foundation makes every subsequent step much easier and more accurate.
Ignoring the Light Source
Without a clear light source, your black and white drawing will look flat and inconsistent. Decide where your light is coming from before you start shading. Keep all shadows on the same side. Consistency in lighting is what makes a car illustration look professional and believable.
Overworking the Drawing
There is such a thing as too much detail. When you keep adding lines and shading without stepping back, the drawing starts to look muddy and confused. Know when to stop. Sometimes a few well-placed lines and a clean shadow are more powerful than a heavily worked drawing. This is especially true in monochrome car art, where simplicity often wins.
Tips to Improve Your Car Drawing Skills Fast
Want to get better at car drawing black and white quickly? These practical tips will accelerate your progress and help you see real improvement in a short time.
Draw from Reference Photos
Never underestimate the power of using reference images. Find clear photos of cars from the side, front, and rear. Study how the light falls on the body. Use these photos as guides for your automotive sketch work. You are not copying; you are learning how real cars look and how light interacts with their surfaces.
Set a Timer for Quick Sketches
Try setting a timer for 10 or 15 minutes and sketch a car as fast as you can. This exercise forces you to focus on the most important shapes and lines. It builds confidence and helps you develop a feel for car drawing black and white. You can do several of these quick sketches in one sitting, which builds momentum and skill.
Practice Different Car Types
Do not limit yourself to one kind of car. Draw sedans, SUVs, sports cars, trucks, and classic cars. Each type has different proportions and character. Exploring variety makes you a more versatile car sketching artist and prevents your work from becoming repetitive.
Study Automotive Design
Learn about the basic principles of automotive design. Understand how wheels, body panels, and windows relate to each other. The more you know about how cars are built, the better your black and white drawing will look. Watch design videos, read about car history, and visit car shows if you can. All of this feeds directly into your art.
Review Your Work Critically
After each drawing session, take a honest look at what you created. What went well? What would you do differently? This habit of self-review is one of the fastest ways to improve. Keep your old sketches and compare them over time. You will be amazed at how quickly your car outline drawing skills develop.
Conclusion
Car drawing black and white is one of the most rewarding skills you can develop as an artist. It is accessible, elegant, and incredibly satisfying. From your very first basic shapes to your most detailed shaded sketch, every step forward is a step toward mastery. The techniques you learn in monochrome will strengthen every other area of your art, whether you eventually move to color or digital work.
Remember that every professional artist started exactly where you are now. They made mistakes, they drew imperfect sketches, and they kept going. The same will be true for you. Pick up your pencil, choose a reference photo, and start your first car drawing black and white today. The journey of a thousand miles begins with a single sketch, and your next drawing could be the one that changes everything.
Keep it simple, keep it consistent, and most importantly, keep enjoying the process. The world of automotive drawing is waiting for you. Grab your pencil and start creating.
Frequently Asked Questions
What pencils do I need to start car drawing black and white?
You only need three pencils to get started: an HB for light outlines, a 2B for mid-tone shading, and a 4B for deep shadows. These three grades cover everything you need for pencil drawing car projects. You can buy a basic set of graphite pencils for just a few dollars.
Is car drawing black and white easier than drawing in color?
Many beginners find black and white drawing easier because it removes the complexity of color. You only need to focus on shape, proportion, and light and shadow. This makes it an ideal starting point for drawing cars for beginners who want to build strong foundational skills before tackling color.
How long does it take to learn car drawing black and white?
You can create a decent car sketch within a few hours of practice. However, developing a consistent, realistic style takes weeks or months of regular practice. The key is to draw a little bit every day rather than long sessions once in a while. Short, consistent practice sessions yield the fastest results.
Can I use a pen instead of a pencil for car drawing black and white?
Absolutely. Pen work is a popular choice for line art car illustrations. The main difference is that pen does not allow for easy erasing, so you need more confidence in your lines. Many artists start with pencil and transition to pen as their skills grow. Both tools produce excellent monochrome car art.
What kind of paper is best for car drawing black and white?
Smooth, medium-weight paper is ideal for automotive drawing. A standard sketchpad with at least 80lb or 100lb weight works great. Avoid very thin paper that wrinkles when you erase. If you want to add heavy shading, choose a slightly thicker paper that can handle more graphite without falling apart.
Should I use a reference photo when drawing cars in black and white?
Yes, using a reference photo is one of the best ways to improve your car drawing black and white skills. Reference images help you understand proportions, angles, and how light falls on different surfaces. Professional automotive designers use references constantly. There is no shame in using them, and they will dramatically speed up your learning.