Common Car Window Tinting Mistakes You Should Avoid
Common car window tinting mistakes can ruin your look, your comfort, and your wallet. From picking the wrong window tint percentage to ignoring local car tint laws, these errors are easy to make but costly to fix. This guide walks you through every tinting mistake you should avoid so you get a perfect tint job the first time. Learn how to protect your investment and keep your car window film looking flawless for years.
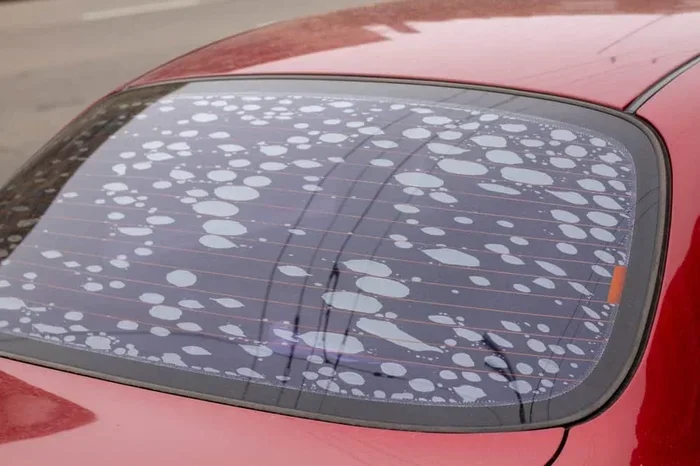
You spent good money on car window tinting. You picked the perfect shade. You imagined cruising down the highway with sleek, dark windows and total privacy. Then, a few weeks later, you notice bubbles in your tint. Or maybe the edges are peeling. The window tint bubbling spreads like a tiny earthquake on your glass. Sound familiar?
Common car window tinting mistakes happen more often than you think. Thousands of car owners make these errors every year. Some rush the process. Some pick the wrong film. Others simply do not know the rules. The good news is that most of these mistakes are completely avoidable. You just need the right guidance.
This article breaks down every tinting mistake you should steer clear of. We will cover everything from choosing the right window tint percentage to understanding car tint laws in your area. By the end, you will know exactly how to get a flawless, long-lasting tint job. No bubbles. No peeling. No regrets.
Key Takeaways
- Wrong tint percentage ruins visibility and comfort: Always pick a window tint percentage that fits your needs and local laws.
- DIY installation often leads to bubbles and peeling: Professional tint installation saves you money and headaches in the long run.
- Ignoring car tint laws can mean fines: Know your legal tint limits before you start.
- Low-quality film fades and bubbles faster: Invest in high-quality tint film for lasting results.
- Bad conditions during application cause major problems: Always apply tint in a clean, climate-controlled space.
- Neglecting aftercare shortens tint life: Follow proper tint curing time and maintenance steps.
📑 Table of Contents
Choosing the Wrong Tint Percentage
One of the biggest common car window tinting mistakes is picking the wrong tint percentage. The tint percentage, also known as visible light transmission or VLT, tells you how much light passes through your glass. A lower number means a darker tint. A higher number means a lighter tint. It sounds simple, but many people get this wrong.
Understanding VLT and Tint Shade
Not all cars need the same tint shade. Your front side windows usually need a lighter tint percentage than your rear windows. Why? Because you need clear visibility for driving. If you go too dark on your front windows, you risk blinding yourself at night. You also risk getting pulled over by police.
Think about your daily driving habits. Do you drive long hours in bright sun? A medium tint percentage can help with heat rejection and UV protection. Do you mostly drive at night or in cloudy areas? A lighter shade keeps things safe and legal. The key is matching the tint shade to your real-life needs.
Picking the Right Percentage for Your Needs
Here is a quick guide to help you choose the right window tint percentage:
- 5% tint: Very dark. Often used on rear window tint only. Almost no light passes through.
- 20% tint: Dark and stylish. Popular for side window tint on rear doors.
- 35% tint: Balanced shade. Good for those who want privacy and comfort.
- 50% tint: Light tint. Blocks UV rays and heat without darkening the glass too much.
- 70% tint: Very light. Almost invisible. Great for subtle heat rejection.
Do not just pick a number because it looks cool on someone else’s car. Your car, your climate, and your driving style all matter. When in doubt, ask a professional tint installation expert for advice. They can help you find the sweet spot between style and safety.
Skipping Professional Installation
Everyone loves a good DIY project. But DIY window tint is one area where cutting corners backfires badly. Many car owners try to save money by applying aftermarket tint themselves. It sounds easy enough. You buy a pre-cut tint kit, spray some soapy water, and squeegee it on. What could go wrong?
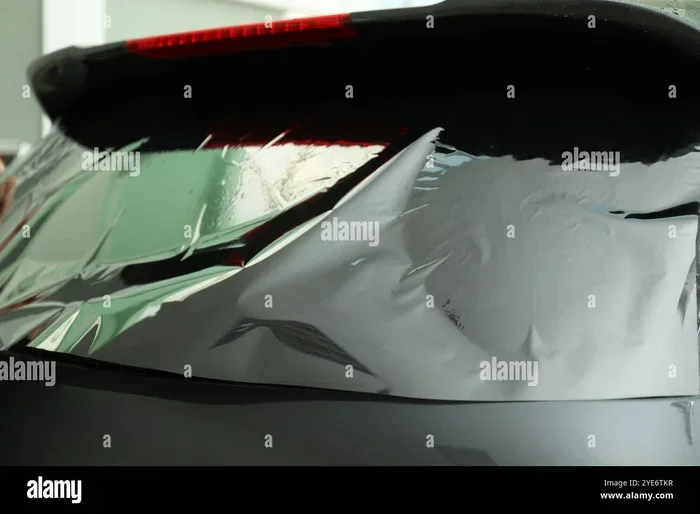
A lot, actually. Common car window tinting mistakes like window tint bubbling, tint peeling, and uneven application are extremely common with DIY jobs. The tint adhesive needs a perfectly clean surface and precise placement. Even a tiny speck of dust trapped underneath can turn into a bubble in tint that ruins the whole look.
DIY vs Professional Tinting
Let us be real about the difference between DIY window tint and professional tint installation:
- DIY tint kits: Cheap upfront, but mistakes are costly. You might end up peeling it off and paying for a redo.
- Professional installation: Costs more at first, but the results last longer. Experts use climate-controlled environments and professional-grade tools.
- Pre-cut kits: Better than generic rolls, but they still require skill to apply without window tint bubbles.
A professional tint installer knows how to handle the tint adhesive properly. They understand tint curing time and how environmental factors affect the process. They also have the right tools to smooth out every edge. If you want a flawless finish, professional tint installation is worth every penny.
What Goes Wrong with Bad Installation
Bad installation leads to a long list of problems. Here are the most common ones:
- Window tint bubbling: Air pockets get trapped under the film. They start small and grow fast.
- Tint peeling: The edges lift and the film starts to separate from the glass.
- Uneven application: Wrinkles and creases create an ugly, uneven look.
- Foggy spots: Moisture gets trapped during application and causes permanent haze.
- Short lifespan: A poorly applied car window film can fail in months instead of years.
Every one of these problems is preventable with proper installation. Do not let a DIY shortcut turn into a costly car window tinting mistake.
Ignoring Local Car Tint Laws
This is a mistake that catches people off guard. You get a beautiful dark tint on your windows. You love the look. You love the privacy. Then you get pulled over. The officer hands you a ticket for violating car tint laws. Suddenly, that cool-looking tint is a headache.
Common car window tinting mistakes often involve ignoring legal tint limits. Every state and country has its own rules about how dark your tint can be and which windows it can cover. These rules exist for safety reasons, and breaking them can lead to fines, failed inspections, and even having to remove your tint entirely.
Why Tint Laws Exist
You might wonder why the government cares about your window tint film. The answer is simple: safety. Dark tint reduces visible light transmission through your windows. That means less light gets into your car. Less light means worse visibility, especially at night or in tunnels. Police officers need to see inside your car during traffic stops. Other drivers need to see you clearly.
Car tint laws also protect you. If you are in an accident, first responders need to see through your windows quickly. A tint that is too dark can slow them down. This is why most places have strict rules about front side windows and windshield tint.
How to Check Your Local Regulations
Before you get your tint done, do your homework. Here is how:
- Check your state’s Department of Motor Vehicles website. Most DMV sites list legal tint limits for each window.
- Ask your tint installer. A reputable shop will know the local rules and make sure your tint shade complies.
- Look up your specific vehicle type. Some rules differ for sedans, SUVs, and trucks.
- Keep documentation. Save your tint certificate and keep it in your car. It proves your tint is legal if you ever get stopped.
Do not assume your tint is legal just because the shop applied it. Common car window tinting mistakes like this one can cost you money and time. Stay informed and stay compliant.
Applying Tint in Bad Conditions
Where and when you apply your tint matters more than most people realize. Common car window tinting mistakes happen when people rush the process or ignore environmental factors. A perfect car window film can turn into a disaster if applied in the wrong conditions.
The Role of Dust and Humidity
Dust is the enemy of a clean tint job. Even a tiny particle of dust between the film and your glass creates a bubble in tint. Professional shops use dust-free environments with special air filtration systems. When you apply tint at home, dust is everywhere. It floats in the air. It sits on your windows. It gets trapped under the film.
Humidity is just as bad. High moisture levels can prevent the tint adhesive from bonding properly to the glass. This leads to window tint bubbling and tint peeling over time. If you live in a humid climate, this is especially important to consider.
Temperature Matters
The temperature of your application space plays a huge role in how well your tint adheres. Too hot, and the tint film can shrink or bubble. Too cold, and the adhesive becomes stiff and does not bond well. The ideal temperature range for applying car window film is between 60 and 80 degrees Fahrenheit.
Professional shops control their environment carefully. They have climate-controlled rooms where temperature and humidity are kept constant. If you are doing a DIY window tint job in your garage on a hot summer day or a cold winter morning, you are setting yourself up for problems. The tint curing time also depends heavily on temperature. A poor environment can extend curing time and weaken the bond.
Always apply tint in a clean, temperature-controlled space. If you do not have one, trust a professional tint installation shop that does.
Picking Low-Quality Film
Not all tint film is created equal. This is one of the common car window tinting mistakes that people make without even realizing it. You see a cheap aftermarket tint kit online for a great price. It looks like a deal. But what you get is a film that fades, bubbles, and peels within months.
Not All Tint Films Are the Same
The price difference between cheap and quality tint film is not just about branding. It comes down to materials and technology. High-quality car window film uses advanced materials like ceramic tint particles or metallized layers that block heat and UV rays effectively. Cheap films often use basic dyes that break down quickly under sunlight.
Here is what you lose with low-quality tint film:
- Poor heat rejection: Cheap film does not block solar heat effectively. Your car stays hot inside.
- Weak UV protection: Your skin and your car interior get damaged by harmful rays.
- Fading and discoloration: Low-quality dye fades quickly, turning your tint purple or orange.
- Short lifespan: A cheap car window film might last one to two years. Quality film lasts five to ten.
- Signal interference: Some cheap metallic tints can interfere with GPS, phone signals, and toll transponders.
What to Look for in Quality Film
When shopping for tint film, look for these features:
- Ceramic or carbon technology: These materials offer excellent heat rejection without signal interference.
- High-grade adhesive: A strong tint adhesive prevents tint peeling and window tint bubbling.
- Warranty: Quality car window film comes with a manufacturer warranty. No warranty is a red flag.
- VLT rating: Make sure the tint percentage matches what you need and what is legal in your area.
- UV protection rating: Look for films that block at least 99% of UV rays.
Investing in the right tint film quality pays off in the long run. You get better performance, longer life, and a better look. Do not let a few dollars saved today turn into a costly car window tinting mistake tomorrow.
Neglecting Aftercare and Maintenance
You got your tint done. It looks amazing. You drive off the lot feeling great. But then you forget about it. You roll your windows down too soon. You use harsh cleaners. You scratch the tint with a rough towel. Before you know it, your car window film is showing signs of wear. This is one of the most overlooked common car window tinting mistakes.
The Tint Curing Process
After installation, your tint needs time to cure. This is the process where the tint adhesive fully bonds to the glass. During tint curing time, the film may look slightly hazy or have small window tint bubbles. This is completely normal. The bubbles usually clear up as the adhesive sets.
Do not roll your windows down for at least three to five days after installation. Some installers recommend waiting up to a week. If you open your windows too early, you can shift the film, create wrinkles, or cause tint peeling at the edges. Patience during this phase is essential.
Common Maintenance Errors
Once your tint has fully cured, you still need to take care of it. Here are maintenance mistakes to avoid:
- Using ammonia-based cleaners: Ammonia breaks down the tint adhesive and can cause the film to deteriorate.
- Using rough towels or paper towels: These scratch the tint surface over time. Use a soft microfiber cloth.
- Ignoring small bubbles: Small bubbles can grow into big ones if left alone. Address them early.
- Parking in direct sunlight all day: Constant extreme heat can weaken the tint adhesive over time.
- Using high-pressure washers near windows: The force can push water under the film and cause window tint bubbling.
Simple care goes a long way. Use gentle cleaners, soft cloths, and give your tint the time it needs to set properly. A little maintenance effort keeps your car window film looking great for years.
Wrapping Up: Avoiding Common Car Window Tinting Mistakes
Common car window tinting mistakes are everywhere, but they are all preventable. The secret is knowing what to look out for and taking the right steps before, during, and after your tint job. From choosing the right window tint percentage to finding a professional tint installation shop, every decision matters.
Do not let tint peeling, window tint bubbling, or legal trouble ruin your investment. Take the time to understand car tint laws, pick quality tint film, and care for your windows after installation. A little effort now saves you a lot of hassle later.
Your car deserves a tint that looks great, performs well, and lasts for years. By avoiding these common car window tinting mistakes, you are setting yourself up for success. Follow the tips in this guide, and your car window film will thank you every time you get behind the wheel.
Frequently Asked Questions
What is the most common car window tinting mistake?
The most common mistake is choosing the wrong window tint percentage. Many people pick a tint that is too dark for their needs or their local laws. This leads to visibility problems, legal issues, and an unhappy driving experience. Always check your legal tint limits before deciding on a tint shade.
Can I apply window tint myself without making mistakes?
You can, but DIY window tint carries a high risk of errors like window tint bubbling and tint peeling. Dust, humidity, and temperature all affect the application. If you are not experienced, professional tint installation is the safer choice. It saves you time, money, and frustration in the long run.
How long does tint curing time take?
Tint curing time typically takes three to seven days for the tint adhesive to fully bond. During this time, you may see small window tint bubbles or a hazy look. This is normal. Avoid rolling your windows down for at least three days to prevent tint peeling and shifting.
Are ceramic tint films worth the extra cost?
Yes, ceramic tint is worth the investment. It offers superior heat rejection, excellent UV protection, and does not interfere with electronic signals. While it costs more than basic dyed films, it lasts longer and performs better. For a quality car window film, ceramic is a top choice.
What happens if my tint is too dark for local laws?
If your tint shade exceeds legal tint limits, you can receive a traffic ticket and be required to remove or lighten the tint. Some states also fail your vehicle inspection. Always confirm your window tint percentage meets local car tint laws before installation.
How can I prevent window tint bubbling?
To prevent window tint bubbling, choose a clean, climate-controlled environment for application. Use high-quality tint film with strong tint adhesive. Avoid rolling windows down too soon after installation. And follow proper maintenance routines to keep the film in great shape for years.