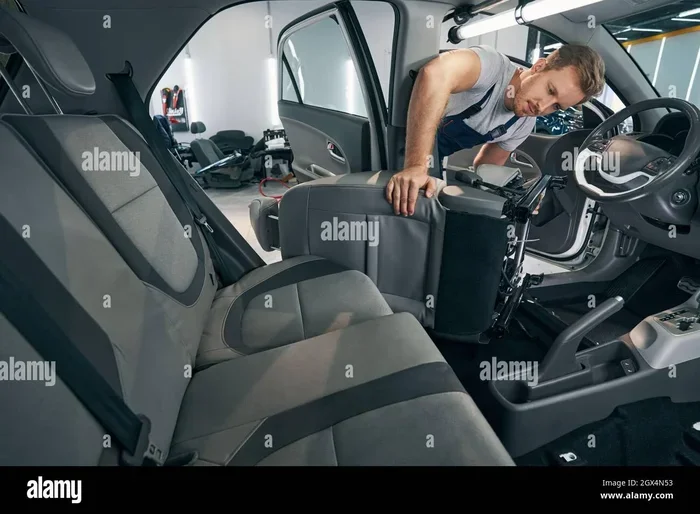
Can I Take the Seats Out of My Car to Deep Clean It
Yes, you can absolutely take the seats out of your car to deep clean it. Removing your car seats gives you access to hidden dirt, crumbs, and allergens trapped underneath. This guide walks you through the entire process safely and easily.
Have you ever looked under your car seats and wondered what kind of mess is hiding down there? Crumbs, dust bunnies, coins, and who-knows-what else can build up over months and months. The good news is that you can take the seats out of my car to clean every single inch of your vehicle’s interior. This is one of the best things you can do for your car’s hygiene and longevity.
Many car owners skip this step entirely. They vacuum the surface and call it a day. But true car interior cleaning goes way deeper than that. When you remove car seats to clean underneath, you unlock spaces that vacuum brushes and surface wipes simply cannot reach. Think about it. Your seats sit on the floor for hours every day. All that dirt, food debris, and moisture sinks right through the gaps. Over time, this creates bad smells, mold, and even pest problems.
This article will show you exactly how to take the seats out of my car to deep clean the entire cabin. We will cover safety steps, tools you need, the removal process, cleaning tips, and how to put everything back together correctly. Whether you drive a sedan, SUV, or truck, the basics stay the same. Let us get started.
Key Takeaways
- Full Access Cleaning: Taking seats out lets you clean areas you can never reach while seats are in place.
- Safety First: Always disconnect the battery and handle electrical connectors with care during seat removal.
- Right Tools Matter: Having the correct sockets, wrenches, and cleaning supplies makes the job much faster.
- Prevent Damage: Follow manufacturer bolt patterns and avoid pulling on wiring harnesses when removing seats.
- Deep Clean Benefits: Removing seats eliminates bacteria, odors, and allergens hiding beneath the seat frame.
- Reinstallation Is Key: Properly reseating and torquing bolts ensures your seats stay secure on the road.
📑 Table of Contents
- Why You Should Remove Car Seats for a Deep Clean
- How to Remove Car Seats Safely
- What You Need to Clean Underneath the Seats
- Step-by-Step Guide to Deep Cleaning Under Car Seats
- Reinstalling Your Car Seats Correctly
- Common Mistakes to Avoid When Removing Car Seats
- Expert Insights on Car Seat Removal and Cleaning
- Key Takeaways
Why You Should Remove Car Seats for a Deep Clean
Access Hidden Dirt and Debris
When your seats stay bolted in place, a thick layer of grime builds up underneath. You cannot see it. You cannot reach it easily. But it is there. Food particles, pet hair, liquid spills, and dust collect in the tight spaces between the seat frame and the car floor. Over weeks and months, this buildup turns into a breeding ground for bacteria and unpleasant odors.
By removing car seats to clean underneath, you expose every hidden corner. You can see the actual state of your car’s floor. This alone is enough to motivate most people to give their vehicle a proper cleaning. The difference is shocking the first time you do it.
Eliminate Stubborn Odors
Bad smells in a car are frustrating. Air fresheners only mask the problem temporarily. The real source of odors often hides beneath the seats. Spilled drinks, pet accidents, and moisture buildup create a perfect environment for mold and mildew. These organisms release foul-smelling gases that no spray can fix.
When you take the seats out of my car to clean thoroughly, you can treat the root cause. You scrub the floor, apply odor-neutralizing solutions, and let everything dry completely. The result is a fresh-smelling cabin that actually smells clean, not just perfumed.
Improve Air Quality Inside the Vehicle
Your car’s interior air quality affects your health more than you might think. Dust mites, pollen, mold spores, and pet dander settle deep into the carpet and under the seats. Every time you drive, these particles circulate through the ventilation system. This can trigger allergies, sneezing, and respiratory irritation.
Deep clean car seats by removing them entirely, and you give yourself a chance to clean the entire floor area properly. You can shampoo the carpet, wipe down the metal frame, and vacuum every crevice. This dramatically improves the air you breathe inside your vehicle every single day.
Extend the Life of Your Car’s Interior
Moisture and dirt that sit under seats for long periods can cause rust on the metal floor pan. They can also degrade the carpet material over time. By keeping the area clean and dry, you protect your car’s interior components from premature wear. This is a simple maintenance step that pays off in the long run.
How to Remove Car Seats Safely
Gather Your Tools Before You Start
Before you begin, make sure you have the right tools on hand. Having everything ready saves you frustration and keeps the process smooth. Here is what you will typically need:
- Socket wrench set (usually 14mm, 17mm, or 19mm bolts depending on your vehicle)
- Ratchet and extension
- Flathead screwdriver
- Trim removal tool (to avoid scratching clips)
- Electrical connector release tool
- Battery wrench or wrench set
- Clean work gloves
- A helper (seats are heavy and awkward to carry)
Every vehicle is slightly different. Check your owner’s manual for the specific bolt size and seat configuration. Some cars have four bolts per seat. Others have six or more. Knowing this in advance prevents surprises.
Disconnect the Battery
Safety comes first. Before you touch anything, disconnect the negative terminal on your car battery. This prevents any electrical shorts while you work. Car seats often have electrical connections for heated seats, seatbelt pretensioners, and sensors. You do not want to accidentally damage any of these components.
Use your battery wrench to loosen the nut on the negative terminal. Pull the cable off and tuck it away from the battery post. This simple step takes ten seconds but protects you and your vehicle.
Unplug Electrical Connectors
Once the battery is disconnected, look under the seat for any wiring harnesses. There is usually at least one connector for the seat heater or electrical adjustments. Press the tab on the connector and gently pull it apart. Do not yank on the wires themselves. Always pull on the connector housing.
If your seat has a seatbelt pretensioner wiring harness, handle it with extra care. These are safety-critical components, and mishandling them can trigger warning lights on your dashboard.
Remove the Bolts
Now for the actual removal. Flip the seat forward or to the side so you can access the mounting bolts on the floor. Most seats have four to six bolts holding them in place. Use your socket wrench to loosen and remove each bolt.
Keep track of the bolts. Put them in a small container or zip-lock bag so you do not lose them. Some bolts are different lengths, and mixing them up during reinstallation can cause problems.
Once all bolts are out, gently lift the seat out of the car. Seats are surprisingly heavy, so ask a friend for help if needed. Set the seat on a clean surface or old blanket to keep it from getting scratched.
What You Need to Clean Underneath the Seats
The Car Floor and Carpet
The floorboard under your seats collects a surprising amount of dirt. Sand, gravel, food crumbs, and liquid spills all settle here. In many vehicles, the carpet is held in place by clips or adhesive. You can usually lift it up to access the metal floor underneath.
When you take the seats out of my car to clean, you can fully remove the carpet if needed. This gives you access to every square inch of the floor. Use a vacuum with a crevice tool to pull out all the loose debris first.
The Seat Frame and Metal Components
The metal frame of the seat itself also needs attention. Dust and moisture collect on the metal, leading to rust over time. Use a damp cloth to wipe down the frame. If you see any rust spots, treat them with a rust converter or fine-grit sandpaper before they spread.
The Seat Belt Retractors
The seat belt retractor mechanism is hidden under the seat. Over time, dirt and debris can get into this mechanism and cause the seat belt to retract slowly or not at all. When you remove the seat, you can access the retractor and clean it properly. A quick blast of compressed air works wonders here.
The Undercarriage and Drain Holes
Cars have drain holes designed to let water escape from the cabin. These holes often get clogged with leaves, dirt, and debris. When the drains are blocked, water pools under the seats and causes mold and musty smells. Check all drain holes and clear them out while you have access.
Step-by-Step Guide to Deep Cleaning Under Car Seats
Step One: Vacuum Everything Thoroughly
Start with a thorough vacuuming session. Use your vacuum cleaner with several attachments. A crevice tool reaches tight gaps. A brush attachment works well on the carpet and fabric surfaces. Go over every inch of the exposed floor, the seat tracks, and the metal frame.
Do not rush this step. Move the vacuum slowly and make multiple passes. The goal is to remove all loose particles before you apply any liquid cleaning solutions.
Step Two: Treat Stains and Spills
If you find stains on the carpet or floor mat, treat them before the general cleaning. Use a stain remover specifically designed for automotive interiors. Apply the product, let it sit for the recommended time, and then blot with a clean cloth.
For stubborn stains on fabric car seats or carpet, a mixture of warm water and mild dish soap works well. Apply it with a soft brush, scrub gently, and blot dry. Avoid soaking the carpet, as excess moisture can lead to mold growth.
Step Three: Shampoo the Carpet and Floor
After treating stains, it is time for a full shampoo. Use an automotive carpet cleaner or a steam cleaner for the best results. Work the solution into the carpet with a brush, then extract the dirty water with a wet/dry vacuum or extractor.
Steam cleaning is especially effective for deep clean car seats and the surrounding carpet. The high heat kills bacteria and loosens embedded dirt. If you do not own a steam cleaner, many auto detailers offer this service at a reasonable price.
Step Four: Clean the Metal Floor and Seat Tracks
With the carpet removed, wipe down the metal floor with an all-purpose automotive cleaner. This removes grease, road grime, and any remaining residue. Pay special attention to the seat tracks where the seat rails slide in. These tracks collect a lot of grit and can cause the seat to stick if not cleaned regularly.
After cleaning, dry the metal surfaces completely with a microfiber cloth. Moisture left on metal leads to rust, which is exactly what you are trying to prevent.
Step Five: Clean the Seat Itself
While the floor area dries, take the opportunity to clean the seat thoroughly. Vacuum the seat fabric or leather. For leather seats, use a dedicated leather cleaner and conditioner. For fabric seats, a upholstery shampoo works best.
Do not forget the seat back, the headrest, and the areas between the seat cushions. These spots trap crumbs and dust that often go unnoticed during regular cleaning.
Step Six: Let Everything Dry Completely
This is a step many people skip, and it causes problems. Before reinstalling the seats, make sure everything is completely dry. Moisture trapped under a seat creates the perfect environment for mold and mildew. Leave the car doors and windows open for a few hours, or use a fan to speed up the drying process.
Reinstalling Your Car Seats Correctly
Align the Seat Rails with the Tracks
When you are ready to put the seats back, lift the seat into position and align the seat rails with the floor tracks. Slide the seat forward or backward until the rails seat fully into the tracks. You should feel a secure click or lock.
Do not force the seat if it does not slide in easily. Check for obstructions, misaligned tracks, or bent rails. Forcing the seat can damage the tracks or the seat frame itself.
Reconnect Electrical Connectors
Before bolting the seat down, reconnect all electrical harnesses. Plug in the seat heater connector, the seat adjustment wiring, and any other electrical connections you disconnected earlier. Make sure each connector clicks into place securely.
Bolt the Seat Down and Torque Correctly
Now insert and hand-tighten all the mounting bolts. Once all bolts are in, use your socket wrench to torque them to the manufacturer’s specification. Over-tightening can strip the floor threads. Under-tightening can leave the seat loose, which is a serious safety hazard.
Reconnect the car battery last. Start the engine and test all seat functions, including heating, adjustment, and seatbelt retraction. Make sure the seat does not move or wobble when you press on it firmly.
Common Mistakes to Avoid When Removing Car Seats
Skipping the Battery Disconnect
This is the most common mistake. Working on a car with the battery connected risks electrical damage. Always disconnect the negative terminal first and wait a few minutes before starting any work.
Losing the Bolts or Hardware
Seat bolts are small and easy to lose. Keep them in a labeled container throughout the process. Some bolts are different sizes, and using the wrong one can damage the threads.
Pulling on Wiring Instead of the Connector
Never tug on wires to disconnect them. Always use the release mechanism on the connector itself. Pulling on wires can break the connection or damage the wiring harness.
Not Letting Things Dry Before Reinstalling
Reinstalling seats over a damp floor traps moisture. This leads to mold, bad smells, and potential rust. Always let the entire interior dry completely before putting seats back in.
Forgetting to Check the Seat Belt Mechanism
The seat belt retractor under the seat needs attention too. A dirty or stuck retractor compromises your safety. Clean and test it before reinstalling the seat.
Expert Insights on Car Seat Removal and Cleaning
Professional detailers recommend removing car seats at least once or twice a year as part of a regular car detailing routine. This frequency keeps buildup from becoming a serious problem. Many detailers also suggest applying a protective fabric or rubber coating to the floor after cleaning. This layer repels moisture and makes future cleanings much easier.
If you have leather car seats, the removal process is the same. However, leather requires conditioning after cleaning to prevent cracking and drying. Use a quality leather conditioner after every deep cleaning session. This keeps the leather soft, supple, and looking great for years.
For vehicles with heated seats, extra care is needed around the electrical connections. Heated seat wires are thin and can be damaged if mishandled. Label each connector before disconnecting it, so you know exactly where everything goes back.
Pet owners benefit the most from seat removal cleaning. Pet hair embeds deep into the carpet and is nearly impossible to remove fully without lifting the seats. A rubber grooming brush works wonders for lifting stubborn pet hair from fabric surfaces before vacuuming.
Key Takeaways
- Full Access Cleaning: Taking the seats out of my car gives you access to hidden dirt, debris, and allergens that vacuuming alone cannot reach.
- Safety Is Essential: Always disconnect the battery, handle electrical connectors carefully, and use the correct tools for bolt removal.
- Right Tools Make It Easy: A socket wrench set, trim removal tool, and vacuum with crevice attachment are all you need to get started.
- Deep Clean Car Seats and Floor: Shampoo the carpet, treat stains, wipe down metal surfaces, and clean the seat belt retractors for a truly fresh interior.
- Let Everything Dry: Moisture left behind leads to mold, rust, and bad odors. Always dry the floor completely before reinstalling seats.
- Reinstall Carefully: Align rails properly, reconnect all electrical harnesses, torque bolts to spec, and test all seat functions before driving.
Taking the seats out of my car to clean is one of the most impactful things you can do for your vehicle’s interior. It transforms a surface-level vacuum into a genuine deep clean. The process takes a bit of effort, but the results are well worth it. Your car smells better, looks better, and stays in better condition for longer.
Whether you are tackling stubborn stains, eliminating odors, or just keeping up with routine maintenance, seat removal opens up a whole new level of cleanliness. You will be amazed at how much dirt and grime was hiding in places you never thought to look. Grab your tools, find a helper, and give your car the deep clean it deserves. Your car interior cleaning routine will never be the same again.
The next time you ask yourself, “Can I take the seats out of my car to clean?” the answer is a confident yes. You have the knowledge, the tools, and the steps to do it right. Start today, and enjoy a fresher, cleaner driving experience tomorrow.
Frequently Asked Questions
Is it safe to remove car seats by myself?
Yes, it is generally safe if you follow the correct steps. Always disconnect the battery first, unplug all electrical connectors gently, and use the right tools for the bolts. Seats are heavy, so having a helper makes the process safer and easier. If you feel unsure at any point, consult your vehicle’s owner manual or a professional mechanic.
What size bolts hold car seats in place?
The bolt size varies by vehicle make and model. Most cars use 14mm, 17mm, or 19mm bolts. Check your owner’s manual or look at the existing bolts before you start. Having the correct socket size ready prevents stripping and frustration during the removal process.
Can I leave car seats out overnight?
You can, but it is not recommended for extended periods. Leaving seats out exposes the electrical connectors and wiring to dust and moisture. If you need to leave them out temporarily for cleaning, cover the exposed areas with a clean cloth. For long-term storage, reinstall the seats or store them in a clean, dry environment.
How often should I remove my car seats for cleaning?
Most experts recommend removing car seats for a thorough cleaning once or twice a year. Pet owners or people who eat in their cars frequently may benefit from doing it more often. Regular seat removal cleaning prevents deep buildup and keeps your car interior fresh and hygienic year-round.
Will removing car seats trigger any warning lights?
Some modern vehicles have seat occupancy sensors or seatbelt tension sensors connected to the seat. If you disconnect these properly and reconnect them correctly, no warning lights should appear. If a light does come on after reinstallation, check that all connectors are fully seated. If the light persists, a quick reset or visit to an auto parts store can usually clear it.
What is the best way to clean under car seats without removing them?
If you cannot remove the seats, use a slim vacuum attachment or a crevice tool to reach under the edges. A flexible detailing brush helps dislodge trapped debris. However, this method only cleans the surface. For a truly thorough clean, removing the seats is the best approach. It gives you complete access to the floor, carpet, and hidden areas where dirt and moisture accumulate.
=== CONCLUSION ===
Taking the seats out of my car to deep clean is one of the most effective things you can do for your vehicle’s interior. It gives you access to hidden dirt, eliminates stubborn odors, and improves the air quality inside your car. With the right tools, a little patience, and the steps outlined in this guide, anyone can do it. Start with disconnecting the battery, remove the bolts carefully, clean every surface thoroughly, and reinstall everything securely. Your car will thank you with a fresher, cleaner, and healthier interior for miles to come.