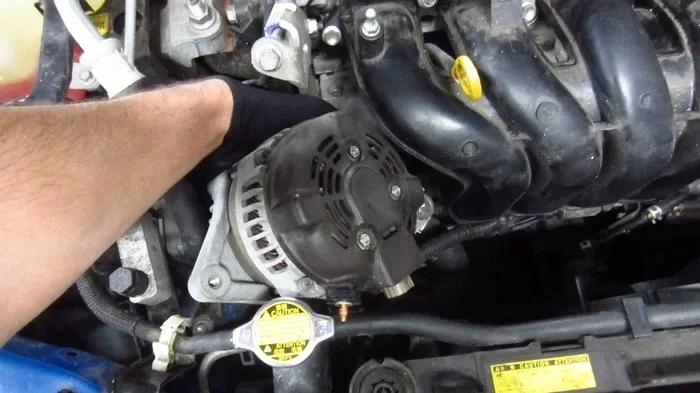
How Long Does It Take to Replace a Toyota Corolla Alternator
Replacing a Toyota Corolla alternator typically takes between 1.5 and 4 hours depending on the model year and engine type. The process involves removing the serpentine belt, unbolting the old unit, and installing a new one. Labor costs range from $100 to $300, while parts add another $200 to $600 for a total alternator replacement cost of $300 to $900.
If you have been driving a Toyota Corolla for a while, you know these cars are built to last. But even the most reliable vehicles need repairs eventually. One common issue Corolla owners face is a failing alternator. The alternator keeps your electrical system running and charges your battery while the engine is on. When it goes bad, you are left dealing with a car that won’t start or keeps dying on the road.
So how long does it actually take to replace a Toyota Corolla alternator? That is the question we are going to answer in detail today. Whether you are planning a DIY repair or budgeting for a trip to the shop, understanding the timeline helps you prepare. We will walk through the steps, the costs, the factors that change the timeline, and plenty of practical tips along the way.
The good news is that this is one of the more straightforward repairs on a Corolla. Most mechanics can handle it without too much hassle. But the exact time depends on several things we will explore below. Let us dive in and give you everything you need to know.
Key Takeaways
- Average Time: Most Corolla alternator replacements take 1.5 to 4 hours at a shop.
- DIY Saves Money: Experienced DIYers can finish the job in under 3 hours at home.
- Cost Range: Total expenses typically fall between $300 and $900 including parts and labor.
- Model Matters: Newer Corollas and hybrid models may take longer due to tighter engine bays.
- Symptoms Matter: A dead battery, dim lights, or warning signals often point to alternator failure.
- Quality Parts: Choosing between OEM and aftermarket alternators affects both price and longevity.
📑 Table of Contents
- How Long Does It Take to Replace a Toyota Corolla Alternator?
- What Factors Affect the Replacement Time?
- Step-by-Step Alternator Replacement Process
- How Much Does It Cost to Replace a Corolla Alternator?
- Common Alternator Problems in Toyota Corollas
- DIY vs Professional Replacement: Which Is Right for You?
- How to Choose the Right Alternator for Your Corolla
- Key Takeaways
- Conclusion
How Long Does It Take to Replace a Toyota Corolla Alternator?
The short answer is somewhere between 1.5 and 4 hours. But the full picture is a bit more nuanced. The time varies based on your specific Corolla model, the engine type, and whether you are doing the work yourself or visiting a mechanic.
At a professional repair shop, most technicians complete the job in about 2 hours on average. On older Corolla models with more room in the engine bay, it can be even faster. On newer models or hybrid versions, the tighter space may add extra time.
If you are a seasoned DIYer, you might finish in about 2 to 3 hours the first time. With practice, some people knock it out in under 90 minutes. The key is having the right tools, a clean workspace, and a good service manual for your specific year.
Timeline by Corolla Generation
Different Corolla generations have different engine layouts that affect how quickly the alternator comes out. Here is a general breakdown:
- E110 and E120 (1997-2006): These older models usually take about 1.5 to 2 hours. The engine bay is more spacious and the alternator is easy to access.
- E130 and E140 (2007-2013): Expect around 2 to 2.5 hours. The engines are a bit more compact but still manageable.
- E150 and E160 (2014-2019): These models take about 2.5 to 3.5 hours due to tighter engine bay packaging.
- E170 and E210 (2020+): Newer Corollas, especially the hybrid versions, can take 3 to 4 hours because of additional components in the way.
These are general estimates. Your actual time may vary based on condition, rust, and whether other parts need removal first.
What Factors Affect the Replacement Time?
Not every alternator replacement goes the same way. Several factors can speed up or slow down the process significantly. Understanding these helps you set realistic expectations.
Engine Type and Layout
The Corolla comes with different engines depending on the year and trim. The 1.8-liter four-cylinder is one of the most common and is relatively easy to work on. However, the 2.4-liter variant or the hybrid powertrain adds complexity. Hybrid models have additional electrical components and a battery pack that can complicate access to the alternator.
If your Corolla has a smaller engine, the alternator is usually more accessible. Larger or hybrid engines may require removing covers, hoses, or other components first.
Condition of the Serpentine Belt and Pulleys
Before you even touch the alternator, you need to deal with the serpentine belt. On older Corollas, the belt may be loose and easy to remove. On newer models, the belt tensioner can be stubborn. If the belt is worn or cracked, you might want to replace it at the same time, which adds to the overall job time.
Rusty or seized bolts are another common issue. Corrosion around the alternator mounting bolts can make removal much harder. Penetrating oil applied ahead of time can save you a lot of frustration.
Your Experience Level
This might be the biggest factor of all. A professional mechanic who does this repair regularly will finish much faster than a first-time DIYer. If you have never done this before, give yourself extra time and be prepared to learn as you go.
Watching a few tutorial videos specific to your Corolla model before starting can make a huge difference. Familiarity with the process cuts the time significantly.
Additional Repairs Needed
Sometimes you discover other issues while the alternator is out. Corroded wiring, a failing voltage regulator, or a worn tensioner pulley might need attention too. If you find these problems during the repair, the job will take longer. This is actually a good thing because you are fixing multiple issues at once.
Step-by-Step Alternator Replacement Process
Knowing the steps helps you understand why the job takes the time it does. Here is a detailed walkthrough of a typical Toyota Corolla alternator replacement.
Step 1: Disconnect the Battery
Safety first. Always disconnect the negative battery terminal before starting any electrical work. This prevents short circuits and protects you and your car’s computer systems. Use a wrench to loosen the clamp and pull the cable off the terminal.
Step 2: Remove the Serpentine Belt
Locate the belt tensioner and use a wrench or serpentine belt tool to release the tension. Slide the belt off the alternator pulley and set it aside. Take a photo of the belt routing before removal so you can reference it when installing the new belt.
Step 3: Disconnect the Electrical Connections
The alternator has one or two electrical connectors attached to it. Unclip or unscrew these carefully. There may also be a wiring harness clip holding the wires in place. Gently release these and set them aside.
Step 4: Remove the Mounting Bolts
The alternator is held in place by two or three bolts. Use a socket wrench to remove them. If any bolt feels stuck, apply penetrating oil and wait a few minutes. Do not force it or you risk breaking the bolt, which makes the job much harder.
Step 5: Extract the Old Alternator
Once all bolts and connections are free, carefully pull the alternator out. It may be tight in there, especially on newer models. Wiggle it gently and work it free. Be careful not to damage nearby components.
Step 6: Install the New Alternator
Place the new alternator in position and hand-tighten the mounting bolts first. Make sure it sits flush and the pulley aligns with the belt. Then tighten all bolts to the manufacturer’s torque specification. Reconnect the electrical connectors and secure them properly.
Step 7: Reinstall the Serpentine Belt
Route the belt back over all the pulleys using your reference photo. Use the tensioner tool to create slack, slide the belt onto the alternator pulley, and release the tensioner. Give the belt a quick spin by hand to make sure it is seated correctly.
Step 8: Reconnect the Battery and Test
Reconnect the negative battery terminal. Start the engine and check that the battery warning light on the dashboard goes off. Use a multimeter to test the voltage at the battery terminals. A healthy alternator should read between 13.5 and 14.5 volts with the engine running.
How Much Does It Cost to Replace a Corolla Alternator?
Cost is a big part of the decision-making process. Let us break down what you can expect to pay for a Toyota Corolla alternator replacement.
Parts Cost
The alternator itself is the main expense. Here is a general cost range:
- OEM Alternator: $350 to $600. OEM parts come directly from Toyota and offer the best fit and reliability.
- Aftermarket Alternator: $150 to $400. Quality aftermarket brands like Denso, Bosch, and Remy are solid alternatives.
- Rebuilt Alternator: $100 to $250. These are remanufactured units and can be a budget-friendly option.
Your choice between OEM and aftermarket depends on your budget and how long you plan to keep the car. For a daily driver, a quality aftermarket unit often works just as well.
Labor Cost
Labor rates vary by region and shop. Here is what you can expect:
- Independent Mechanic: $80 to $150 per hour. Most shops charge for about 2 hours of labor.
- Dealership: $100 to $200 per hour. Dealerships typically charge more but use genuine Toyota parts.
- DIY: $0 in labor. You save the most by doing it yourself.
Total Estimated Cost
Putting it all together, here is a quick cost comparison:
| Option | Parts Cost | Labor Cost | Total |
|---|---|---|---|
| OEM + Dealer Labor | $400 – $600 | $200 – $400 | $600 – $1,000 |
| Aftermarket + Independent Shop | $200 – $400 | $160 – $300 | $360 – $700 |
| Aftermarket + DIY | $200 – $400 | $0 | $200 – $400 |
| Rebuilt + Independent Shop | $100 – $250 | $160 – $300 | $260 – $550 |
These numbers give you a solid range to budget from. Keep in mind that prices vary by location and specific Corolla model year.
Common Alternator Problems in Toyota Corollas
Understanding what goes wrong with alternators helps you catch problems early and avoid being stranded. Here are the most common issues Corolla owners face.
Warning Signs Your Alternator Is Failing
Your car gives you plenty of warning before an alternator completely fails. Watch for these symptoms:
- Battery Warning Light: The red battery-shaped light on your dashboard is the most obvious sign. It usually illuminates when the alternator is not charging properly.
- Dim or Flickering Headlights: If your headlights get dim when you idle and brighten when you rev the engine, the alternator may be struggling.
- Dead Battery: A bad alternator will not charge your battery, leading to frequent jump-starts or a car that will not start.
- Strange Noises: A whining or grinding sound from the engine bay could mean the alternator bearings are worn out.
- Electrical Issues: Power windows slow down, the radio cuts out, or the dash lights flicker when the electrical system is not getting enough power.
Why Alternators Fail on Corollas
Several things cause alternator failure in Toyota Corollas. Age is the most common culprit. Most alternators last between 80,000 and 150,000 miles before they start to wear out. Exposure to moisture can cause internal corrosion. A loose or worn serpentine belt puts extra strain on the alternator. And sometimes, a faulty voltage regulator is the root cause, not the alternator itself.
Can You Drive with a Bad Alternator?
Technically yes, but only for a short time. Your battery will keep the car running, but once it drains, the engine will stall. You risk getting stranded and potentially damaging other electrical components. If you suspect alternator failure, get it checked and replaced as soon as possible.
DIY vs Professional Replacement: Which Is Right for You?
This is one of the most common questions Corolla owners ask. Both options have clear advantages and trade-offs.
When to Go DIY
You should consider replacing the alternator yourself if you have basic mechanical skills and the right tools. You need a socket set, a serpentine belt tool, a multimeter, and a repair manual for your specific Corolla year. The job does not require specialized equipment and it is a great way to learn more about your car.
Doing it yourself saves you the labor cost, which is the biggest expense. It also gives you full control over the parts you use. If you have the time and patience, DIY is a great option.
When to See a Professional
You should visit a mechanic if you are not comfortable working on electrical components or if you do not have the tools. A professional ensures the job is done correctly and safely. Many shops also offer a warranty on their work, which gives you peace of mind.
If your Corolla is still under the factory warranty or an extended service plan, check with your dealer first. The repair might be covered at no cost to you.
Quick Tips for a Smooth Replacement
- Always take photos before disconnecting anything. You will thank yourself during reassembly.
- Clean any corrosion from the battery terminals and alternator connections before reinstalling.
- Check the serpentine belt condition while you are in there. Replace it if it shows signs of wear.
- Use an OEM-spec torque setting for the mounting bolts to avoid over-tightening.
- Test the charging system after installation before driving long distances.
How to Choose the Right Alternator for Your Corolla
Not all alternators are created equal. Choosing the right one for your Toyota Corolla ensures a proper fit and reliable performance.
OEM vs Aftermarket
OEM alternators are made by Toyota or their approved suppliers. They match the original specifications exactly and come with a manufacturer warranty. Aftermarket alternators are made by third-party companies. Many aftermarket brands are excellent and offer solid warranties at a lower price point.
If you plan to keep your Corolla for many years, an OEM unit is a safe bet. If you are on a tighter budget, a reputable aftermarket brand will serve you well.
Check Your Model Year and Engine Code
Toyota Corollas have different alternator part numbers depending on the model year and engine. Always verify the correct part number for your specific vehicle. The owner manual or a parts catalog for your Corolla generation will list the right alternator. Using the wrong unit can lead to fitment issues or inadequate charging output.
New vs Rebuilt
A rebuilt alternator has been disassembled, inspected, and reassembled with new components. These units are significantly cheaper than new ones and can last many more miles. However, the quality of rebuilt units varies widely. Stick with reputable sellers and look for units with a solid warranty.
For critical reliability, a new OEM or quality aftermarket alternator is the best choice. For a budget fix on a high-mileage car, a rebuilt unit can be a smart compromise.
Key Takeaways
- Average Time: Most Corolla alternator replacements take 1.5 to 4 hours depending on the model year and engine.
- DIY Saves Money: Doing it yourself eliminates labor costs, which can save $150 to $400.
- Cost Range: Total expenses typically fall between $300 and $900 including parts and labor.
- Newer Models Take Longer: Tighter engine bays on recent Corolla generations add complexity.
- Spot Warning Signs Early: Dim lights, battery warnings, and strange noises are your best clues.
- Choose Quality Parts: OEM or reputable aftermarket alternators offer the best balance of price and reliability.
Conclusion
Replacing a Toyota Corolla alternator is a repair most owners will face at some point. The good news is that it is one of the more manageable jobs on this popular car. Whether you take it to a shop or tackle it yourself, understanding the timeline and costs helps you make informed decisions.
For most Corolla models, you are looking at about 2 hours of labor at a shop. DIYers should budget 2 to 3 hours for their first attempt. The total cost ranges from around $300 to $900 depending on your parts choice and labor source.
Do not ignore the warning signs of a failing alternator. A dead battery, dim headlights, or a dashboard warning light should prompt you to investigate right away. Catching the problem early saves you from being stranded and prevents damage to other electrical components.
Use this guide to plan your repair, choose the right alternator, and budget accordingly. Whether you go OEM or aftermarket, DIY or professional, you now have the knowledge to handle the job with confidence. Your Corolla will be back to running strong in no time.
Frequently Asked Questions
How much does it cost to replace a Toyota Corolla alternator?
The total cost typically ranges from $300 to $900. Parts cost between $150 and $600 depending on whether you choose OEM, aftermarket, or rebuilt. Labor adds $100 to $300 at most repair shops. DIY repairs save on labor entirely.
Can I drive my Toyota Corolla with a bad alternator?
You can drive short distances on battery power alone, but it is risky. Once the battery drains, the car will stall and you could be stranded. A failing alternator also puts extra stress on other electrical components. Replace it as soon as you notice symptoms.
How long does a Toyota Corolla alternator last?
Most Toyota Corolla alternators last between 80,000 and 150,000 miles. Regular maintenance, clean connections, and a healthy serpentine belt can help extend its lifespan. Driving habits and climate also play a role in longevity.
Is it hard to replace an alternator on a Toyota Corolla?
No, it is one of the more straightforward repairs on a Corolla. Basic mechanical skills and common tools are all you need. The job involves removing the serpentine belt, disconnecting electrical connections, unbolting the old unit, and installing the new one.
Should I replace the serpentine belt at the same time?
If the serpentine belt is more than 5 years old or shows cracks and wear, replacing it alongside the alternator is a smart move. The labor to change the belt is minimal since it is already off during the alternator replacement. It saves you a second visit to the shop.
How can I tell if my alternator or battery is the problem?
A simple test with a multimeter helps. With the engine off, a healthy battery reads around 12.6 volts. Start the engine and recheck. If the voltage is between 13.5 and 14.5 volts, the alternator is working. If it stays below 13 volts, the alternator is likely not charging properly.