How to Safely Remove Paint Protection Film From a Car
Removing paint protection film from your car is easier than you think, but doing it wrong can ruin your paint job. This guide walks you through every step safely, from heating the edges to cleaning up leftover adhesive. You will learn the tools you need, the mistakes to avoid, and how to prep your car afterward so it looks showroom-ready.
Paint protection film has become one of the most popular ways car owners keep their vehicles looking brand new. This clear, durable layer shields your paint from rocks, bugs, road debris, and everyday scratches. But what happens when that film starts to yellow, peel, or simply reach the end of its lifespan?
Taking off paint protection film might seem intimidating. You might worry about pulling off your clear coat or leaving behind sticky residue. The good news is that with the right approach, you can remove PPF safely and keep your paint in excellent shape. This guide breaks down the entire process in simple, easy-to-follow steps.
Whether you installed the film yourself or had a shop do it, you will find everything you need here. We cover the tools, the techniques, and the common pitfalls so you do not have to learn the hard way. Let us get into it.
Key Takeaways
- Heat is your best friend: A heat gun or hair dryer softens the adhesive and makes PPF removal much safer.
- Go slow and steady: Rushing the process increases the risk of damaging your clear coat or leaving residue behind.
- Use the right solvents: Isopropyl alcohol, clay bars, and tar removers help eliminate stubborn adhesive without harming paint.
- Inspect your paint afterward: Always check for swirl marks, scratches, or oxidation once the film is off.
- Reapply protection immediately: Seal your freshly exposed paint with a ceramic coating, wax, or sealant to keep it safe.
- Know when to call a pro: If the film has been on for years or the paint shows damage, a professional paint correction service may be the best call.
📑 Table of Contents
- Why Remove Paint Protection Film?
- Tools and Supplies You Will Need
- Step-by-Step Guide to Removing Paint Protection Film
- Common Mistakes People Make When Removing PPF
- When Should You Call a Professional?
- What Happens to the Paint Underneath PPF?
- Can You Reuse Paint Protection Film?
- How Long Does the Removal Process Take?
- Maintenance Tips After PPF Removal
- Final Thoughts
Why Remove Paint Protection Film?
Paint protection film does a fantastic job defending your vehicle. Over time, however, it can break down. UV rays cause yellowing. Edges start lifting. The adhesive can degrade and leave a mess on your paint. Here are the most common reasons people decide to remove their PPF.
Yellowing and Discoloration
After a few years of sun exposure, clear bra material often turns yellow. This is especially noticeable on dark-colored cars. Yellowed film does not look good, and it can actually highlight the discoloration instead of hiding it. If your PPF has turned an ugly shade, removal is the smart move.
Edge Lifting and Peeling
The edges of paint protection film are the first to show wear. Once they start lifting, moisture and dirt sneak underneath. This can trap grime against your clear coat and cause damage over time. Peeling edges also make the car look neglected rather than protected.
Adhesive Breakdown
The sticky layer that bonds PPF to your car does not last forever. Heat and weather break down the adhesive. When this happens, the film becomes harder to remove cleanly. It may leave behind a residue that is tough to get off. Removing the film before adhesive failure gets too severe makes the whole process much easier.
Preparing for a New Coating
Some car owners remove old PPF to apply a fresh ceramic coating or a new layer of protection. If you want to switch from film to a ceramic coating, you need a clean, bare paint surface. Removing the old film and properly prepping the surface ensures your new coating bonds perfectly.
Tools and Supplies You Will Need
Gathering the right tools before you start saves you a ton of frustration. You do not need anything exotic, but having the correct supplies makes a big difference. Here is what I recommend.
- Heat gun or hair dryer: Heat softens the adhesive and lets you peel the film without pulling up your clear coat.
- Plastic trim removal tool: This helps you lift the edges of the film safely without scratching the paint.
- Isopropyl alcohol (90% or higher): This dissolves adhesive residue without damaging your paint or clear coat.
- Clay bar kit: A detailing clay bar lifts stuck-on adhesive and contamination from the paint surface.
- Tar remover: This solvent-based cleaner tackles the toughest sticky spots left behind by old film adhesive.
- Microfiber cloths: You will need plenty of these for wiping, cleaning, and drying throughout the process.
- Car wash soap and bucket: A good wash before removal ensures no dirt gets trapped under the film during the process.
- Iron or clay bar lubricant: This helps the clay glide smoothly across the paint without causing scratches.
- Paint sealant or wax: You will want to protect your bare paint immediately after removing the film.
Pro tip: Do not use a razor blade or metal scraper to remove PPF. Even with a blade guard, you risk cutting into the clear coat. Stick to plastic tools and heat whenever possible.
Step-by-Step Guide to Removing Paint Protection Film
Now for the main event. Follow these steps in order for the cleanest, safest removal possible. Each step builds on the last, so do not skip ahead.
Step One: Wash the Car Thoroughly
Start with a clean surface. Give your car a full wash using a quality car wash soap. Pay extra attention to the areas where the film meets the paint. Dirt and grit trapped under the edges can scratch your clear coat when you start pulling the film off.
After washing, dry the car completely with a clean microfiber towel. Make sure no water spots remain. You want a completely dry surface before you begin the removal process.
Step Two: Apply Heat to Soften the Adhesive
Plug in your heat gun or grab your hair dryer. Set it to a medium-high temperature. Hold it about six inches from the edge of the film. Move it back and forth slowly across a small section, roughly the size of a dinner plate.
The heat warms up the adhesive underneath, making it pliable. When the film feels slightly warm to the touch, you are ready to peel. Do not overheat one spot. Excessive heat can damage the paint or warp the film, making it harder to remove in one piece.
Step Three: Lift an Edge and Peel Slowly
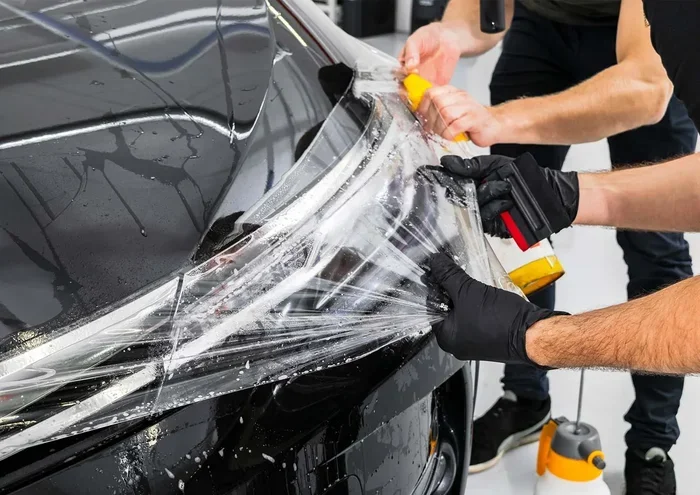
Use your plastic trim removal tool to gently lift a corner of the film. Once you have a good grip, start peeling the film back on itself. Pull it at a low angle, close to the surface of the paint. Pulling straight out creates more tension and increases the risk of damaging your clear coat.
Go slowly. If you feel resistance, stop and apply more heat to that section. The film should come off in long, smooth strips. If it starts to break apart, apply more heat and try again. Patience is the key to a clean removal.
Step Four: Deal with Stubborn Adhesive Residue
Even with careful removal, some adhesive will likely remain on the paint. This is completely normal. Do not panic. There are several effective ways to get rid of it.
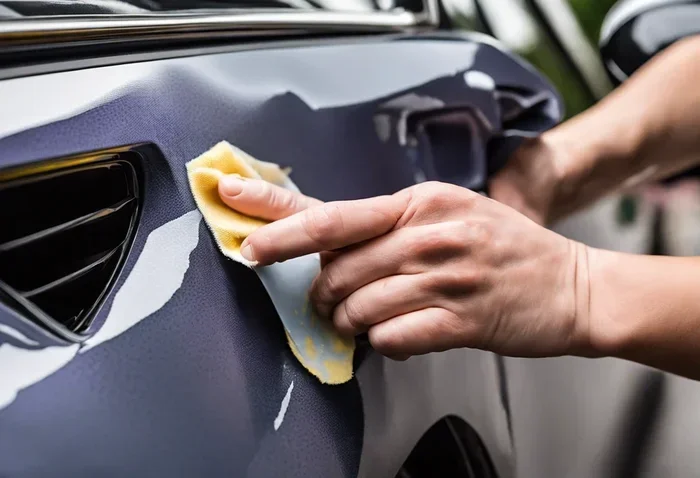
Start by applying isopropyl alcohol to a microfiber cloth and gently rubbing the sticky areas. Alcohol dissolves most automotive adhesives without harming the paint. Work in small sections and wipe frequently with a clean cloth.
For tougher residue, use a clay bar with lubricant. The clay gently lifts the adhesive off the surface without scratching. Move the clay in straight lines, not circles, for the best results.
As a last resort, apply a dedicated tar remover to the stubborn spots. Let it sit for the recommended time on the product label, then wipe it away with a microfiber towel. Always follow up with a thorough wash to remove any chemical residue.
Step Five: Inspect the Paint
Once all the film and adhesive are gone, take a close look at your paint. Run your hand over the surface. You should feel smooth, glass-like clarity. If you feel any bumps, rough patches, or sticky spots, repeat the cleaning process.
Use a clay bar one more time if needed, followed by a light wipe-down with isopropyl alcohol. This gives you a perfectly clean surface ready for your next layer of protection.
Step Six: Apply a Fresh Layer of Protection
Your paint has been under a protective film for months or even years. Now it is exposed to the elements again. Do not leave it bare. Apply a ceramic coating, paint sealant, or quality carnauba wax to seal and protect the freshly exposed paint.
A ceramic coating offers the longest-lasting protection and the best gloss. A paint sealant is a great budget-friendly option. Even a good carnauba wax does a solid job. The key is to act quickly so your paint does not have time to oxidize or collect contaminants.
Common Mistakes People Make When Removing PPF
Learning from other people’s mistakes saves you a lot of headaches. Here are the most common errors I see when people try to remove paint protection film on their own.
Skipping the Heat
This is the number one mistake. Cold film is stiff and brittle. Trying to peel it without heat often causes it to snap and break, leaving behind more residue and making the job much harder. Always use heat. It makes the process faster, cleaner, and safer for your paint.
Pulling the Film Too Fast
Rushing through the removal process is a recipe for disaster. When you pull too quickly, you risk lifting chunks of clear coat along with the film. The adhesive needs time to release from the paint surface. Slow and steady wins this race every time.
Using Metal Tools
It can be tempting to grab a razor blade or a metal scraper to get rid of stubborn adhesive. Please do not do this. Metal tools easily scratch or gouge your paint. Stick to plastic tools, clay bars, and chemical solvents for safe removal.
Not Cleaning the Paint Afterward
Some people remove the film and call it done. They skip the cleaning step entirely. This leaves behind adhesive residue and contaminants that can damage your paint over time. Always clean and inspect the surface after removal, and always apply a fresh protective layer.
Removing Film in Direct Sunlight
Working in direct sunlight causes the adhesive to heat unevenly and can make it cure even harder. Choose a shaded area or work indoors in a garage. A temperature-controlled environment gives you much better control over the removal process.
When Should You Call a Professional?
Most people can handle PPF removal at home with the right tools and patience. However, there are situations where calling a professional makes sense. If your paint protection film has been on the car for more than five to seven years, the adhesive may have bonded too strongly. Attempting removal in this case can lead to paint damage.
Also, if you notice clear coat damage, deep scratches, or paint oxidation underneath the film, a professional detailer or paint correction specialist can assess the situation. They have access to advanced tools like paint depth gauges and machine polishers that can restore your paint to its best condition.
If you are dealing with a large vehicle like an SUV or truck, the sheer amount of surface area can make the job exhausting. Professional installers and detailers work with commercial-grade equipment that speeds up the process significantly. It is worth the investment if you want a flawless result without the effort.
What Happens to the Paint Underneath PPF?
One of the most common questions I get is whether the paint underneath paint protection film looks different after removal. The answer depends on several factors, including how long the film was on and how well the car was maintained.
In most cases, the paint underneath looks fantastic. PPF does an excellent job of shielding your clear coat from UV damage, stone chips, and minor scratches. Many car owners are surprised at how pristine their paint looks once the film comes off. It is almost like unveiling a fresh layer of protection that was always there.
However, if the film was on for a very long time or if it was installed poorly, you might notice some differences. The paint may appear slightly duller in areas where the film edges allowed moisture to seep in. This is why regular inspection of your PPF edges matters. Catching edge lifting early prevents moisture damage to your clear coat.
Can You Reuse Paint Protection Film?
Generally, no. Paint protection film is a one-time-use product. Once you remove it, the adhesive loses its tack and the film itself becomes less conformable. Attempting to reapply old PPF will not provide the same level of protection and may trap dirt or moisture against your paint.
If you want to protect your car again, invest in a fresh roll of high-quality PPF or consider switching to a ceramic coating. Both options offer excellent defense against environmental damage and keep your car looking its best for years to come.
How Long Does the Removal Process Take?
The time it takes to remove paint protection film depends on the size of the vehicle and how well the film adhered over time. For a standard sedan, you can expect the full process to take about two to four hours. This includes washing, heating, peeling, cleaning residue, and applying a new protective layer.
Larger vehicles like trucks and SUVs will take longer, potentially up to six hours or more. If you are doing this for the first time, budget extra time. As you gain experience, the process becomes faster and more efficient. The important thing is not to rush. Taking your time ensures you do not damage the paint or leave behind stubborn residue.
Maintenance Tips After PPF Removal
Once your paint protection film is off and your car is freshly protected, keep it looking great with these simple maintenance habits.
- Wash your car regularly: Use a pH-neutral car wash soap and a soft microfiber mitt. Avoid harsh chemicals that can strip away your ceramic coating or wax.
- Dry with a clean microfiber towel: Never let your car air dry. Water spots can etch into the clear coat over time.
- Apply a quick detailer spray: Between full washes, a quick detailer spray keeps your paint looking fresh and adds a layer of protection.
- Avoid automatic car washes: The brushes in automatic car washes can create swirl marks and scratches. Stick to hand washing or touchless car wash systems.
- Reapply ceramic coating or wax every few months: Depending on the product, you will need to refresh your protection periodically to maintain the best results.
Final Thoughts
Removing paint protection film does not have to be scary. With the right tools, a little patience, and the approach laid out in this guide, you can do it safely and effectively. The key is to use heat, go slowly, clean up any residue thoroughly, and always finish with a fresh layer of protection for your paint.
Your car has been protected by that film for a reason. Now it is time to give it the care it deserves after removal. Whether you choose to reapply PPF or switch to a ceramic coating, your paint will thank you for it. Take your time, follow the steps, and enjoy that freshly exposed, glossy paint. You have got this.
Frequently Asked Questions
Can I remove paint protection film without a heat gun?
Yes, you can use a regular hair dryer on its highest heat setting as a substitute for a heat gun. It takes a bit longer, but it works just as well for softening the adhesive. Just make sure you apply steady, even heat and do not hold it too close to the film or paint surface.
Will removing paint protection film damage my car’s paint?
If you follow the proper steps, removal should not damage your paint. The biggest risks come from skipping heat, pulling too fast, or using metal tools. Take your time, use plastic tools, and be gentle. Most cars come out of the removal process with paint that looks just as good as before.
How do I get sticky adhesive off after removing PPF?
Isopropyl alcohol is the most effective and safest solvent for adhesive residue. Apply it to a microfiber cloth and rub gently. For stubborn spots, use a detailing clay bar with lubricant. Tar removers also work well on tough adhesive. Always wash the area afterward to remove any chemical residue.
How long should I wait before applying a new protective coating after removing PPF?
You should apply a new protective coating as soon as possible after removal. Ideally, do it on the same day. Freshly exposed paint is vulnerable to oxidation, UV damage, and environmental contaminants. The sooner you seal it with a ceramic coating, sealant, or wax, the better protected your paint will be.
Is it better to remove PPF in a garage or outdoors?
A garage or shaded indoor space is always better. Direct sunlight causes the adhesive to heat unevenly and can make it harder to remove cleanly. A temperature-controlled environment also prevents the film from cooling too quickly, which can cause it to snap and break during removal.
Can paint protection film be removed from a leased vehicle?
Yes, paint protection film can be removed from a leased vehicle. In fact, many lease-end inspections look more favorably on cars with clean, undamaged paint underneath where the film was. Just make sure you remove it carefully and address any adhesive residue so the vehicle returns in excellent condition.
=== CONCLUSION ===
Removing paint protection film from your car is a straightforward process when you know what you are doing. Start by gathering your tools, wash the car, apply heat, peel slowly, clean up any residue, and finish with a fresh protective layer. Avoid the common mistakes like skipping heat, using metal tools, or rushing through the job. Your paint will look great, and your car will be ready for its next layer of defense. Take it step by step, stay patient, and enjoy the satisfying result of a clean, freshly protected vehicle.