How to Reset Your Check Engine Light After an Oil Change
A check engine light after an oil change is common and usually easy to fix. Whether the light came on because of a loose oil cap, a sensor glitch, or a forgotten reset, this guide walks you through every method to turn it off. You will learn simple DIY tricks, OBD-II scanner steps, and when it is time to visit a mechanic. Resetting your check engine light after an oil change takes just minutes in most cases.
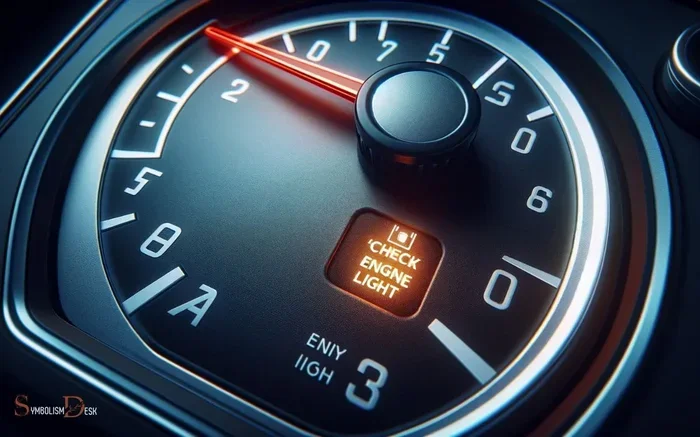
You just got your oil changed. You feel great. Your car should be running smooth. Then you glance at the dashboard and see it — a bright yellow or red check engine light staring right back at you. Your heart sinks. Did the mechanic do something wrong? Is your engine in trouble? Take a deep breath. In most cases, a check engine light after oil change is nothing to panic about.
This happens more often than you might think. Loose caps, sensor resets, and minor glitches can all trigger the light. The good news? Resetting the check engine light after an oil change is usually simple and fast. In this guide, we will walk you through every method, explain why the light comes on, and tell you exactly when to call for help. Let us get into it.
Key Takeaways
- A loose oil cap is the #1 reason the check engine light turns on after an oil change.
- Resetting the light can be done with an OBD-II scanner, a key cycle, or by disconnecting the battery.
- Dashboard warning lights are your car’s way of communicating a problem — never ignore them.
- Most resets take less than 10 minutes and cost nothing.
- Persistent lights may signal a real issue that needs professional diagnosis.
- Regular car maintenance keeps warning lights away and your engine healthy.
📑 Table of Contents
- Why Does the Check Engine Light Come On After an Oil Change?
- How to Reset Check Engine Light After Oil Change
- When to See a Mechanic Instead of Resetting It Yourself
- How to Prevent the Check Engine Light After Future Oil Changes
- Understanding Dashboard Warning Lights
- Frequently Asked Questions
- Final Thoughts
Why Does the Check Engine Light Come On After an Oil Change?
Your car is full of sensors. These tiny devices monitor everything from fuel mix to exhaust levels. After an oil change, something as small as a loose cap can send a signal to your car’s computer. The computer then triggers the engine warning light on your dashboard.
Here is the thing — the check engine light does not always mean something is broken. Sometimes it just means the system detected a temporary hiccup. Think of it like your phone showing a notification for no real reason. The alert pops up, but the problem might be nothing at all.
Understanding this helps you stay calm. It also helps you figure out the right fix quickly. Let us look at the most common reasons the light shows up after an oil change.
Loose or Missing Oil Cap
This is the number one culprit. The oil cap seals the engine bay. If it is not tight, the system detects a pressure leak. A loose oil cap triggers the diagnostic trouble code P0457, which means “evaporative emission control system leak detected.” Sounds scary. It is not. Just screw the cap back on and the light often goes away on its own.
Sensor Reset Glitch
When the mechanic drains your old oil and adds new oil, the oil pressure sensor can briefly lose its reading. This small interruption tells the car’s computer that something is off. The computer responds by turning on the dashboard warning light. This is a common sensor reset issue and it fixes itself quickly.
Oil Change Reset Not Completed
Many modern cars have a maintenance reminder system. After an oil change, you need to manually reset this system. If the reset is not done, the car keeps showing the maintenance light or the check engine light. This is a simple oversight but it causes a lot of confusion.
Faulty Oil Change Service
In rare cases, the oil change itself causes a problem. Maybe the oil filter was not seated properly. Maybe too much or too little oil was added. These issues can trigger the engine check light for a real reason. We will cover how to spot this below.
How to Reset Check Engine Light After Oil Change
Now for the part you came here for — how to reset check engine light after oil change. There are several methods. Some are super simple. Others need a small tool. Let us go through them one by one.
Method 1: The Key Cycle Method
This is the easiest method. No tools needed. No wires to touch. Here is what you do:
- Turn your ignition key to the “ON” position without starting the engine.
- Wait about 10 seconds.
- Turn the key back to “OFF.”
- Wait another 10 seconds.
- Repeat this cycle three to four times.
- Start the engine. The check engine light should be off.
This method works on many older vehicles and some newer ones too. It essentially tells the car’s computer to recheck all systems. If the issue was minor — like a loose cap — the computer clears the code and the light goes out.
Quick Tip: If the light comes back after a few drives, the problem is not just a glitch. You need to dig deeper.
Method 2: Use an OBD-II Scanner
An OBD-II scanner is the most reliable way to reset a check engine light. OBD stands for “On-Board Diagnostics.” This tool plugs directly into your car’s computer and reads any stored codes.
Here is how to use one:
- Find your OBD port. It is usually under the dashboard on the driver’s side.
- Plug the scanner into the port.
- Turn the ignition to “ON” (do not start the engine).
- Wait for the scanner to connect to your car’s computer.
- Read the diagnostic trouble codes on the screen.
- Note down the codes. You can look them up online or in your car manual.
- Select “Clear Codes” or “Erase” on the scanner.
- The engine light should turn off.
OBD-II scanners cost between $20 and $100. You can buy one at any auto parts store. Some scanners even let you monitor your car’s health in real time. This is a great investment for any car owner.
Expert Insight: Always write down the codes before clearing them. Even if the light goes away, those codes tell you exactly what triggered the alert. This saves time and money if the problem comes back.
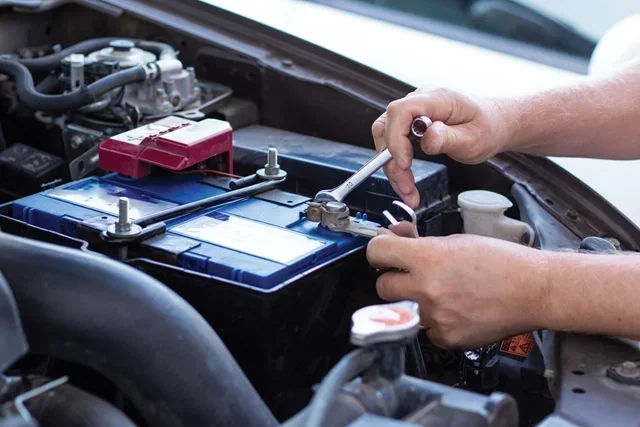
Method 3: Disconnect the Battery
This method resets the entire car computer. It works because cutting power clears all stored codes. Here is the process:
- Turn off the engine and all electronics.
- Open the hood and locate the car battery.
- Use a wrench to loosen the negative (black) battery cable.
- Disconnect the cable and let it sit for 10 to 15 minutes.
- Reconnect the cable and tighten it.
- Start the engine. The check engine light should be off.
This method is effective but it has a downside. Disconnecting the battery resets your radio presets, clock, and sometimes even your power window settings. It can also erase learned driving patterns in some newer cars. Use this method as a last resort.
Quick Tip: If your car has a security system, disconnecting the battery might trigger an alarm. Make sure you have your key handy.
Method 4: Drive Cycle Reset
Some cars clear the check engine light on their own after a series of driving cycles. A driving cycle means starting the car, driving a certain distance, and then turning it off. The car’s computer monitors all systems during this process.
To try this method:
- Make sure the oil cap is tight.
- Start the engine and let it idle for 30 seconds.
- Drive at moderate speed for about 10 minutes.
- Let the car idle again for 30 seconds.
- Repeat this cycle two to three times.
Many cars will turn off the engine light after a clean driving cycle. This method works best when the trigger was minor — like a loose cap or a brief sensor hiccup.
When to See a Mechanic Instead of Resetting It Yourself
Resetting the light feels great. But sometimes, the light comes right back. When that happens, it is time to stop DIY-ing and see a professional. Here are the signs you should not ignore:
- The light flashes instead of staying solid. A flashing check engine light usually means a serious problem like engine misfire. Pull over safely and get your car towed.
- You notice poor engine performance. If your car feels sluggish, jerky, or makes unusual noises, do not just reset the light. Something is wrong.
- The light keeps coming back. If you clear the code and it returns within a few days, there is an underlying issue. A mechanic can read the codes and find the root cause.
- You see other warning lights too. If the oil pressure light, temperature light, or battery light also comes on, stop driving and get help immediately.
- You suspect a real oil change problem. If the mechanic used the wrong oil, overfilled or underfilled the engine, or damaged a sensor during service, you need professional help.
A good mechanic will plug in an OBD-II scanner, read the fault code, and tell you exactly what needs fixing. Many auto parts stores like AutoZone or O’Reilly offer free code reading too. This is a great first step before paying for a full diagnosis.
Common Oil Change Mistakes That Trigger the Light
Sometimes the problem starts at the oil change itself. Here are mistakes that can cause the check engine light to appear:
- Using the wrong oil type. Every car needs a specific oil weight (like 5W-30 or 10W-40). Using the wrong one can confuse the oil pressure sensor.
- Overfilling the oil. Too much oil creates excess pressure in the crankcase. This can damage seals and trigger warning lights.
- Underfilling the oil. Too little oil means poor lubrication. The engine works harder and sensors detect the change.
- Forgetting to replace the oil filter. A clogged filter restricts oil flow and causes pressure issues.
- Not resetting the maintenance counter. As mentioned earlier, this keeps the reminder light on.
If you suspect any of these mistakes, have the oil level and quality checked right away. Regular car maintenance prevents most of these problems.
How to Prevent the Check Engine Light After Future Oil Changes
Prevention is always better than cure. Here are simple steps to keep the check engine light away after your next oil change:
- Check the oil cap before leaving the shop. Make sure it is tight and seated properly.
- Ask the mechanic to reset the maintenance light. Do not assume they will do it automatically.
- Use the correct oil type. Check your owner’s manual or ask the service advisor.
- Keep an OBD-II scanner in your glove box. This lets you check codes at any time.
- Drive gently for the first 20 minutes after an oil change. Give the new oil time to circulate and settle.
- Keep a maintenance log. Write down every oil change date, oil type, and mileage. This helps you spot patterns.
These small habits go a long way. They keep your engine health in check and save you from unnecessary trips to the mechanic.
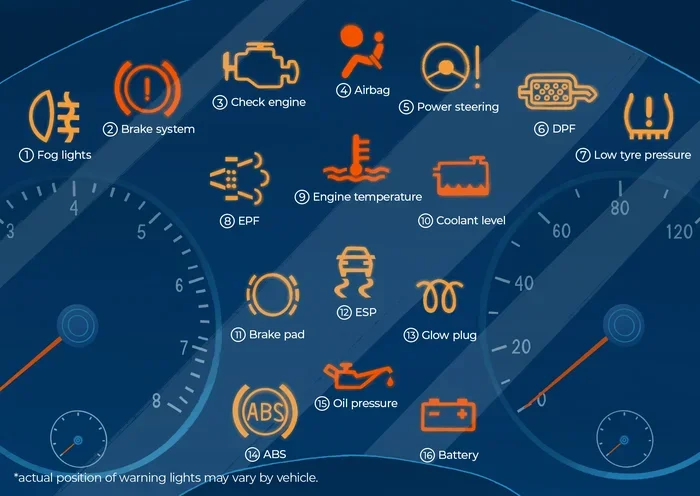
Understanding Dashboard Warning Lights
Your car’s dashboard is like a control panel. Each light tells you something different. Here is a quick guide to the most common dashboard lights you might see:
- Check Engine Light (yellow): A general warning. Could be minor or serious. Get it checked.
- Oil Pressure Light (red): Low oil pressure. Stop driving immediately.
- Battery Light (red): Charging system issue. Get the battery and alternator checked.
- Temperature Light (red): Engine overheating. Pull over and let the car cool down.
- Maintenance Light (yellow): Service reminder. Not urgent but should be addressed soon.
Knowing what each light means helps you respond appropriately. A yellow engine check light is usually not an emergency. A red oil or temperature light is.
What Do Diagnostic Trouble Codes Mean?
When your car’s computer detects a problem, it stores a diagnostic trouble code or DTC. These codes follow a standard format across all vehicles. Here are some codes you might see after an oil change:
- P0457: Evaporative emission control system leak detected (usually a loose oil cap).
- P0520: Oil pressure sensor/switch malfunction.
- P0300: Random/multiple cylinder misfire (could indicate wrong oil type).
- P000A: Oil control valve performance issue.
You can look up any code online or through your car’s manual. The code gives you a starting point for fixing the problem.
Frequently Asked Questions
Will the check engine light reset itself after an oil change?
In some cases, yes. If the light was triggered by a loose oil cap or a brief sensor glitch, the light may turn off on its own after a few drives. However, if the underlying issue is not fixed, the light will come back. Using an OBD-II scanner to clear the code is the fastest way to reset it.
How long should I wait before resetting the check engine light after an oil change?
There is no set waiting period. If you notice the light right after the oil change, you can try resetting it immediately. If the light stays off for a few days, the issue was minor. If it returns, have the car inspected by a professional.
Can overfilling oil cause the check engine light to come on?
Yes. Overfilling oil creates excess pressure inside the crankcase. This can cause oil to leak into places it should not be, like the spark plug wells or the emissions system. The car’s sensors detect this and trigger the check engine light.
Is it safe to drive with the check engine light on after an oil change?
If the light is solid (not flashing) and the car drives normally, it is generally safe for a short distance. However, you should get the issue checked as soon as possible. A flashing light means stop driving and seek help immediately.
Do I need a special tool to reset the check engine light?
Not necessarily. Simple methods like the key cycle or battery disconnect work without any tools. However, an OBD-II scanner gives you much more control and lets you read the specific codes that triggered the light. It is a worthwhile investment for any car owner.
How much does it cost to reset a check engine light at a shop?
Many auto parts stores offer free code reading and resetting. If you go to a dealership or independent mechanic, the cost typically ranges from $50 to $150 for the diagnosis and reset. Clearing a simple code is usually included in the service.
Final Thoughts
A check engine light after oil change is almost always fixable. Most of the time, it is a simple issue like a loose oil cap or a sensor reset that needs a quick fix. Whether you use the key cycle method, an OBD-II scanner, or a battery disconnect, resetting the light is something you can do at home in minutes.
Always pay attention to what your car is telling you. The dashboard warning lights are not just annoying beeps. They are your car’s way of communicating its engine health. Take them seriously, investigate the cause, and fix the problem at its root.
Keep this guide handy for your next oil change. Share it with a friend who might need it. And remember — a little knowledge goes a long way in keeping your car running smoothly for years to come. Reset your check engine light with confidence and enjoy the peace of mind that comes with a well-maintained vehicle.