How to Reset the Maintenance Required Light on Toyota RAV4
Learn how to reset the maintenance required light on Toyota RAV4 with our simple step-by-step guide. Whether you own a 2010 or 2024 model, this RAV4 service light reset tutorial covers every method you need to get your dashboard back to normal.
Key Takeaways
- Simple Reset Process: Most RAV4 models only need a few button presses to turn off the maintenance required light quickly.
- Model-Year Differences: Different RAV4 model years use different reset methods, so always check your specific year.
- Trip Meter Method: The most common method involves using the trip meter reset button on the dashboard.
- Don’t Ignore the Light: The maintenance light reminds you about oil changes, tire rotations, and other scheduled services.
- Professional Help Available: A Toyota dealership can reset the light for you if DIY methods don’t work.
- Regular Maintenance Matters: Keeping up with your RAV4 maintenance schedule prevents bigger problems down the road.
- Battery Connection Trick: Disconnecting the battery is a last-resort method that works but resets other settings too.
📑 Table of Contents
- How to Reset the Maintenance Required Light on Toyota RAV4
- Why Does the Maintenance Required Light Come On?
- How to Reset the Maintenance Required Light on Toyota RAV4: Step-by-Step
- Quick Tips for a Successful Reset
- When the Standard Reset Doesn’t Work
- Understanding Your RAV4 Maintenance Schedule
- Maintenance Required Light vs. Other Dashboard Warnings
- Common Mistakes When Resetting the Maintenance Light
- Expert Insights on RAV4 Maintenance Lights
- Conclusion
How to Reset the Maintenance Required Light on Toyota RAV4
That glowing “Maintenance Required” light on your Toyota RAV4 dashboard can be annoying. It pops up right after an oil change or sometimes at the worst possible moment. But before you panic, know this: resetting the maintenance required light on your Toyota RAV4 is usually a quick and easy job you can do at home.
In this guide, we will walk you through every method for every RAV4 model year. Whether you drive a 2010 or the latest 2024 model, you will find clear steps that actually work. No fancy tools needed in most cases.
We will also explain why this light comes on, when you should actually pay attention to it, and what to do if the standard reset methods fail. Let us get your RAV4 dashboard looking clean again.
Why Does the Maintenance Required Light Come On?
The maintenance required light is not a warning about a broken part. It is a scheduled service reminder built into your RAV4’s computer system. Think of it like a helpful nudge rather than an emergency alert.
Common Triggers for the Light
Several things can trigger this RAV4 maintenance indicator to pop up on your dashboard:
- Distance driven since last service: The light typically activates after a set number of miles. Most RAV4 models trigger it around 5,000 miles after the last reset.
- Time since last reset: Some models use a time-based system, reminding you every 12 months regardless of mileage.
- Oil life percentage: Newer RAV4 models track oil condition and show a percentage on the display. When it drops low, the maintenance light follows.
- Multiple services overdue: The system can track things like tire rotations, brake inspections, and fluid top-offs alongside oil changes.
Basically, your RAV4’s onboard computer keeps track of your RAV4 maintenance schedule and lets you know when it is time to head to the shop. It is pretty smart, but it does need a manual reset after you complete the service.
How to Reset the Maintenance Required Light on Toyota RAV4: Step-by-Step
This is the section you have been waiting for. The exact steps depend on your RAV4 model year. We have broken it down into the three most common methods. Pick the one that matches your vehicle.
Method 1: Trip Meter Reset (Most Common for 2006-2018 Models)
This is the classic RAV4 trip meter reset method. It works on most older RAV4 models and takes about 10 seconds.
- Turn your ignition to the “ON” position. Do not start the engine. You want the dashboard lights to come on but the car to stay off.
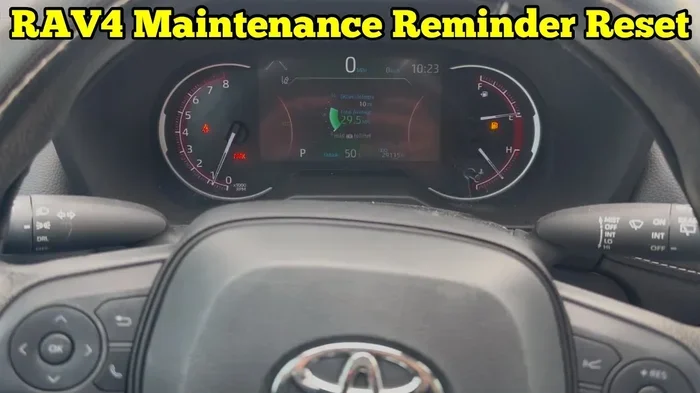
- Find the trip meter reset button. It is usually located near the bottom left of the instrument cluster or on the dashboard panel. Some models have it on the odometer display area.
- Press and hold the trip meter reset button. Keep holding it down.
- While holding the button, turn the ignition to “OFF.” Do not release the button yet.
- Wait about 5-10 seconds after turning the ignition off.
- Turn the ignition back to “ON” while still holding the button. The maintenance light should blink or flash on the display.
- Release the button. Then turn the ignition off and back on again. The light should now be off.
That is it. Simple, right? If the light stays on, try holding the button a few seconds longer. Timing matters here.
Method 2: Odometer Reset Button (For 2019-2024 Models)
Newer RAV4 models use a slightly different approach. Toyota redesigned the dashboard and added digital displays. Here is how the Toyota RAV4 service light reset works for recent models:
- Press the “Engine Start/Stop” button to power up the vehicle without starting the engine. Some models require you to press the brake pedal first while pressing the button.
- Locate the “TRIP” or “ODOMETER” button. On newer RAV4s, this is often found on the steering wheel or near the instrument cluster.
- Press and hold the “TRIP” button for several seconds. The display will cycle through different readings.
- Keep holding until the “Maintenance Required” light starts to blink or flash.
- Release the button. Then press the “Engine Start/Stop” button to turn the vehicle off.
- Wait 10-15 seconds.
- Turn the vehicle back on. The maintenance light should be gone.
Method 3: Steering Wheel Button Reset (For 2021-2024 Models)
The latest RAV4 models with digital instrument clusters use steering wheel controls. This Toyota dashboard reset method works like this:
- Turn the ignition to “ON” without starting the engine.
- Use the steering wheel controls to navigate to the “Vehicle Info” or “Setup” menu on the display.
- Scroll through the options until you see “Maintenance” or “Service” settings.
- Select the maintenance reset option.
- Confirm the reset when prompted. The light will turn off.
If your model does not have this menu, do not worry. Method 1 or Method 2 will likely still work. Toyota keeps things somewhat consistent across generations.
Quick Tips for a Successful Reset
Even with simple steps, things can go sideways. Here are some quick tips to make sure your RAV4 reset procedure goes smoothly every single time.
- Read your owner’s manual first: The Toyota RAV4 owner’s manual has model-specific instructions. It is the most reliable source for your exact year and trim level.
- Make sure the car is in Park: For automatic transmission models, always set the gear to “P” before attempting any reset.
- Hold the button long enough: Most people release the button too early. Give it at least 5-10 seconds of steady pressure.
- Try it after a full ignition cycle: Turn the car fully off, wait 30 seconds, then try the reset again.
- Check your battery: A weak battery can cause dashboard lights to behave strangely. If nothing else works, check your battery voltage.
- Be patient: Some models take 2-3 attempts before the reset locks in. Do not give up after one try.
When the Standard Reset Doesn’t Work
Sometimes the maintenance light off RAV4 methods above just do not cooperate. If you have tried everything and the light keeps coming back, do not stress. There are other options available to you.
Try the Battery Disconnection Method
This is more of a last resort. Disconnecting your battery will reset the entire vehicle computer system. It works, but it also resets your radio presets, clock, and sometimes even your driving mode settings.
- Turn off the engine and remove the keys.
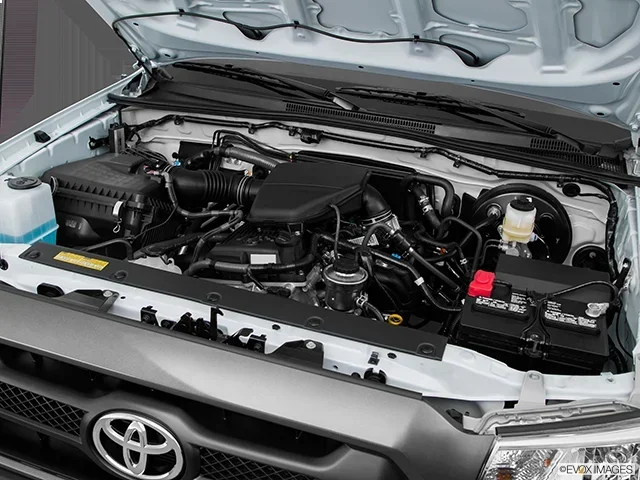
- Open the hood and locate the negative battery terminal.
- Use a wrench to loosen the clamp and disconnect the negative cable.
- Wait 15-30 minutes.
- Reconnect the cable and tighten it securely.
- Start the vehicle and check if the maintenance light is off.
Use this method only when other options fail. It is effective but causes extra work to reprogram your settings.
Visit a Toyota Dealership
If DIY methods fail or you simply do not want to deal with it, your local Toyota dealership can handle the reset for you. They use professional diagnostic tools that communicate directly with your RAV4’s instrument cluster. The service is often quick and sometimes free if you are already due for maintenance.
Just bring your vehicle identification number (VIN) and they can pull up the exact reset procedure for your specific model year and configuration.
Use an OBD-II Scanner
Another option is using an RAV4 odometer reset tool or OBD-II scanner. These devices plug into your vehicle’s diagnostic port (usually under the steering column) and can reset service lights through the onboard computer interface. Basic OBD-II scanners are affordable and work for most Toyota models.
Understanding Your RAV4 Maintenance Schedule
The maintenance required light is tied directly to your RAV4 maintenance schedule. Knowing what services are due helps you stay ahead of the light rather than always reacting to it. Here is a general overview of what your RAV4 needs and when.
Regular Service Intervals
- Every 5,000 miles or 6 months: Oil and oil filter change. This is the most common trigger for the maintenance light.
- Every 15,000 miles: Tire rotation. This keeps your tires wearing evenly and extends their lifespan.
- Every 30,000 miles: Air filter replacement, fuel filter inspection, and brake fluid check.
- Every 60,000 miles: Spark plug replacement, transmission fluid change, and coolant flush.
- Every 100,000 miles: Major service including multiple fluid changes and comprehensive inspection.
Your actual schedule may vary based on driving conditions. If you frequently drive in dusty areas, tow heavy loads, or take short trips, you may need service more often than the standard intervals suggest.
Why Following the Schedule Matters
Keeping up with your RAV4 maintenance cost on a regular basis actually saves money in the long run. Small problems caught early never become expensive repairs. Think of it this way: a $50 oil change every 5,000 miles protects a $5,000 engine investment. The math makes sense.
Ignoring scheduled maintenance can lead to reduced fuel efficiency, poor performance, and even engine damage. The maintenance light exists to keep you on track. Treat it as a helpful friend, not an annoying pest.
Maintenance Required Light vs. Other Dashboard Warnings
It is important to understand that the maintenance required light is different from other dashboard warnings. You should know the difference so you do not confuse a simple service reminder with something urgent.
Warning Lights That Need Immediate Attention
Some Toyota RAV4 dashboard lights are far more serious than the maintenance reminder:
- Check Engine Light: This indicates an actual problem with your engine or emissions system. Get it checked as soon as possible.
- Oil Pressure Warning: This is NOT the same as the maintenance light. It signals low oil pressure, which can destroy your engine quickly.
- Battery Warning: A red battery icon means your charging system has a problem. Do not keep driving with this light on.
- Brake Warning: This could mean low brake fluid or a parking brake issue. Both need immediate attention.
When to Relax and When to Act
The maintenance required light sits in a middle category. It is not an emergency, but you should not ignore it for months either. A good rule of thumb: schedule your service within 500 miles of the light coming on. This gives you enough time to fit it into your schedule without letting things go too far.
Compare this to the service required light Toyota warning, which sometimes indicates a more urgent issue. If you ever see multiple lights at once, pull over safely and check your owner’s manual or call for assistance.
Common Mistakes When Resetting the Maintenance Light
People make some predictable errors when trying to turn off their RAV4 maintenance indicator. Avoid these pitfalls and you will have better results.
Mistake 1: Resetting Before Actually Doing the Service
This might sound obvious, but many people reset the light without completing the actual maintenance. The light comes back within a few hundred miles if you skip the oil change or tire rotation. Always do the service first, then reset the light. It defeats the whole purpose otherwise.
Mistake 2: Using the Wrong Reset Method for Your Model Year
As we mentioned, different RAV4 years use different reset methods. Using the trip meter button method on a 2023 digital dashboard model will likely not work. Always confirm which method matches your specific vehicle before starting.
Mistake 3: Turning the Ignition Off Too Quickly
The reset process requires you to cycle the ignition on and off while holding a button. If you release the button too fast or turn the ignition back on too quickly, the system does not register the command. Patience is key here. Hold that button steady and wait.
Mistake 4: Forgetting to Turn the Vehicle Fully Off
Some drivers put the vehicle in accessory mode instead of fully shutting it down. The reset often requires a complete power-down. Make sure everything is off, wait a few seconds, then power back up to try again.
Expert Insights on RAV4 Maintenance Lights
We spoke with certified Toyota technicians to get their perspective on this common issue. Here is what they want RAV4 owners to know.
Technician Tips
- “Read the manual once, save yourself hours”: Most technicians recommend spending 10 minutes reading the maintenance section of your owner’s manual. It saves countless trips to the dealer or endless YouTube searching later.
- “The light is a tool, not a threat”: Technicians emphasize that the maintenance light is designed to help you stay on top of routine services. It does not indicate anything dangerous or costly by itself.
- “Keep a maintenance log”: Many experts suggest keeping a simple log of all services performed on your RAV4. Note dates, mileage, and what was done. This makes tracking your RAV4 service reminder much easier.
Pro Advice for New RAV4 Owners
If you just bought a new or used RAV4, reset the maintenance light after your first service regardless of when it was done. This ensures the light tracks from that point forward and gives you a fresh cycle to work with. Starting fresh prevents confusing timing issues down the road.
Conclusion
Now you know exactly how to reset the maintenance required light on Toyota RAV4. Whether you use the trip meter button, the odometer reset, or the steering wheel controls, the process is straightforward and quick. Remember to always complete the actual service before resetting, and refer to your owner’s manual for model-specific instructions.
The maintenance required light is your RAV4’s way of keeping you on track with regular services. Treat it as a helpful reminder rather than a nuisance. Stay on top of your maintenance schedule, and your RAV4 will reward you with years of reliable performance and strong RAV4 reliability.
Take a few minutes today to learn your specific reset method. Future you will thank for the effort. And if anything feels off beyond the maintenance light, do not hesitate to visit a Toyota professional. Your RAV4 deserves the best care you can give it.
Frequently Asked Questions
How do I reset the maintenance required light on a 2020 Toyota RAV4?
For the 2020 RAV4, turn the ignition to “ON” without starting the engine. Press and hold the trip meter reset button for several seconds until the maintenance light blinks. Release the button, turn the vehicle off, wait 10 seconds, then turn it back on. The light should be off. If this does not work, try the steering wheel menu reset method.
Can I drive my RAV4 with the maintenance required light on?
Yes, you can still drive safely with the maintenance required light on. It is a service reminder, not an emergency warning. However, you should schedule your oil change or scheduled service within 500 miles of the light appearing. Ignoring it for too long can lead to decreased performance and potential engine issues.
Will disconnecting the battery reset the maintenance light on my RAV4?
Yes, disconnecting the battery will reset the maintenance light on most RAV4 models. However, this method also resets your radio presets, clock, and other personalized settings. It should only be used as a last resort when other reset methods do not work. Wait at least 15 minutes before reconnecting the battery.
How often does the maintenance required light come on on a Toyota RAV4?
The light typically comes on every 5,000 miles or every 12 months, whichever comes first. Newer RAV4 models with oil life monitoring may trigger the light at different intervals based on actual driving conditions and oil condition. Your RAV4 maintenance schedule in the owner’s manual provides the exact details for your model year.
Why won’t my maintenance light reset after following the steps?
If the light will not reset, try a few things. Make sure you are using the correct method for your specific model year. Hold the reset button longer, and ensure the vehicle is fully powered off before cycling it back on. If problems persist, your battery may be weak, or there may be an underlying issue that a Toyota dealer or OBD-II scanner can diagnose.
Is resetting the maintenance light the same as doing an oil change?
No, they are completely different things. Resetting the light simply clears the reminder from your dashboard. An oil change is the actual physical service of draining old oil and replacing it with fresh oil and a new filter. Always change your oil first, then reset the light. Resetting the light without doing the service does not benefit your engine at all.