How to Reset Maintenance Light After an Oil Change
Resetting the maintenance light after an oil change is a quick task that keeps your dashboard clean and your car running smoothly. This guide provides simple, brand-specific steps to clear the oil change reminder in under five minutes. You’ll learn both button-combo methods and scanner-based approaches for any vehicle.
After you drain the old oil and drop in fresh lubricant, one task remains: resetting the maintenance light. This is a key part of the oil change process, and it’s simple to do. In this guide, you’ll learn exactly how to reset maintenance light after an oil change, step by step. We’ll cover the most common methods used by today’s cars and trucks.
Many drivers skip this step and end up with a blinking reminder for weeks. That small light can be annoying, but it’s easy to fix. You don’t need expensive tools or a visit to the dealer. With a few minutes and the right steps, you can clear the indicator and keep your dashboard looking clean.
This guide is written for beginners and experienced DIYers alike. We’ll start with the reasons the light stays on, then move to general reset methods. You’ll find brand-specific instructions for Toyota, Honda, Ford, Chevrolet, BMW, and more. We’ll also explain how to use an OBD2 scanner and what mistakes to avoid. By the end, you’ll feel confident handling this task on your own.
Key Takeaways
- Resetting the light is easy: Most cars need just a few button presses on the dashboard or steering wheel.
- Know your car’s method: Different brands use different sequences, so find your model below.
- Use an OBD2 scanner for stubborn lights: A scanner can clear the light and check for hidden codes.
- Avoid common mistakes: Don’t turn the key while pressing buttons in the wrong order.
- Reset after every oil change: This keeps your maintenance schedule accurate and your mind at ease.
- Professional help is available: If DIY steps fail, a mechanic can reset it quickly.
📑 Table of Contents
Why Does the Maintenance Light Stay On After an Oil Change?
Understanding the Oil Life System
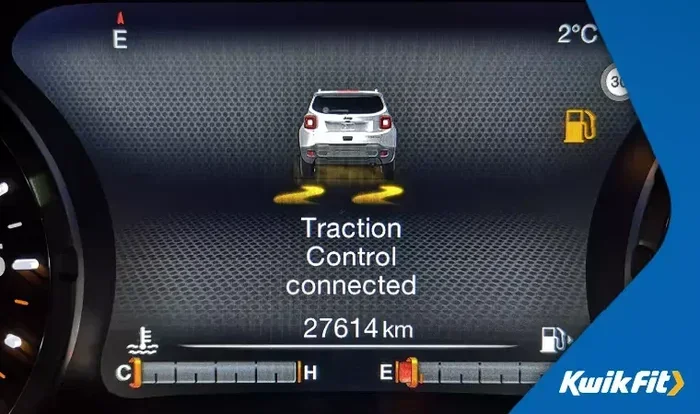
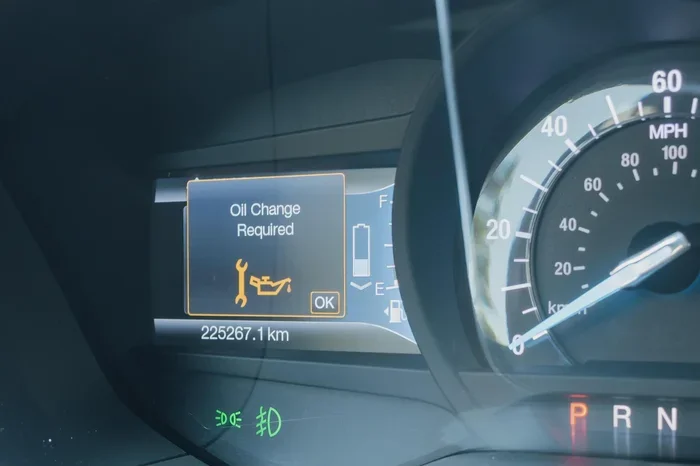
Modern cars use an oil life system instead of a simple mileage timer. This system tracks driving habits, engine temperature, and load. It estimates when the oil is actually worn out. When the system decides the oil is spent, it triggers the maintenance light. The light is a reminder, not a warning of immediate danger. Still, it’s important to reset it after you add fresh oil.
The system doesn’t automatically know you changed the oil. It keeps counting miles and engine hours until you tell it to stop. That’s why resetting is necessary. Every time you complete an oil change, you should clear the reminder. This keeps the system accurate and helps you track your next service.
When the Light Won’t Turn Off
Sometimes the light stays on even after you think you reset it. This can happen if you didn’t follow the exact sequence. It can also occur if the oil life system has a fault. In rare cases, a loose gas cap or another sensor issue triggers the light. Before you panic, double-check the reset steps. If the light still won’t go away, we’ll cover scanner methods later in this guide.
How to Reset Maintenance Light After an Oil Change: General Methods
Most vehicles use one of three reset methods. The exact method depends on your car’s age and model. Here are the general approaches that work for the majority of cars on the road today.
The Button Combination Method
This is the most common method. You’ll use a combination of buttons on the dashboard or steering wheel. The sequence usually involves turning the ignition on and off while pressing a specific button. Many cars use the trip odometer button or a small reset stem near the speedometer. You’ll hold the button, turn the key, and wait for the light to flash or disappear.
This method works for many older and mid-range vehicles. It’s quick and doesn’t require any extra tools. The exact steps vary by brand, which is why we list them below.
The Steering Wheel Control Method
Newer cars often place reset controls on the steering wheel. You might find a small joystick or a set of arrow buttons. To reset the maintenance light, you’ll navigate to the service menu using these controls. Then you select the reset option and hold the button down. The dashboard will display a confirmation message. This method is common in vehicles from the last decade.
Using the Infotainment System
Many modern cars let you reset the maintenance light through the touchscreen infotainment system. You’ll go to the vehicle settings menu, find the service or maintenance section, and select the oil life reset. The system may ask you to confirm the action. This method is very user-friendly and works on cars like Buick, Chevrolet, and many others.
Step-by-Step Reset Instructions for Popular Car Brands
Below you’ll find the exact steps for the most popular car brands. Follow the instructions carefully. The sequence must be done in the right order for the reset to work.
Toyota and Lexus Reset Steps
For most Toyota and Lexus models, start by turning the ignition to the ON position. Do not start the engine. Press and hold the trip odometer reset button. While holding it, turn the ignition off and then back on. Keep holding the button for about 10 seconds. The maintenance light should blink and then turn off. Release the button. If the light stays on, try turning the key off and on again while holding the button.
Quick Tip: On some Toyota models, you can use the steering wheel controls. Navigate to the odometer screen, hold the reset button, and cycle the key to ON. The light will clear once you see the message disappear.
Honda and Acura Reset Steps
Honda and Acura vehicles use a slightly different process. Turn the ignition to the ON position without starting the engine. Locate the small reset button on the trip meter. Press and hold it. While holding the button, turn the ignition to OFF and then back to ON. Continue holding the button for about 10 seconds. The maintenance light should reset. Release the button and check the dashboard.
Quick Tip: If you have an Acura with a navigation system, you can also reset the oil life through the information screen. Go to the vehicle info menu, select maintenance, and choose the oil life reset option.
Ford and Lincoln Reset Steps
Ford and Lincoln models often use the steering wheel controls. With the ignition in the ON position, use the arrow buttons on the steering wheel to scroll to the vehicle information menu. Find the maintenance or oil life option. Press and hold the OK button to enter the reset menu. Select the oil life reset and confirm. The light will turn off once the system resets.
For older Ford models without steering wheel controls, you can use the trip odometer button. Turn the key to ON, press and hold the trip odometer button, then turn the key to OFF and back to ON. Hold the button until the light clears.
Chevrolet and GMC Reset Steps
Chevrolet and GMC trucks and SUVs often use the infotainment system. Press the vehicle information button on the steering wheel until you see the oil life percentage. Then press and hold the set/reset button until the display asks if you want to reset. Confirm the reset. The oil life indicator will return to 100 percent and the maintenance light will turn off.
For older Chevrolet models without a touchscreen, you can use the trip odometer method. Turn the key to ON, press and hold the trip odometer reset button, then turn the key to OFF and back ON. Hold the button until the light goes out.
BMW and Mercedes Reset Steps
BMW and Mercedes vehicles use a combination of the instrument cluster and steering wheel buttons. For BMW, turn the ignition to ON. Use the turn signal stalk to scroll to the service menu. Press the end of the stalk to enter the menu. Scroll to the oil service reset option and confirm. The maintenance light will turn off. For Mercedes, use the steering wheel controls to navigate to the vehicle status menu. Select the service interval reset, confirm, and the light will clear.
Comparison Table: Reset Methods by Car Brand
| Brand | Primary Reset Method | Typical Time |
|---|---|---|
| Toyota / Lexus | Trip odometer button or steering wheel controls | 30 seconds |
| Honda / Acura | Trip meter reset button or infotainment screen | 30 seconds |
| Ford / Lincoln | Steering wheel controls or trip odometer button | 45 seconds |
| Chevrolet / GMC | Infotainment system or trip odometer button | 1 minute |
| BMW / Mercedes | Instrument cluster menu or steering wheel stalk | 1 minute |
Expert Insight: Always consult your owner’s manual before attempting a reset. The manual will list the exact sequence for your specific model year. If you don’t have the manual, a quick online search with your year, make, and model will give you the correct steps.
Using an OBD2 Scanner to Reset the Light
What Is an OBD2 Scanner?
An OBD2 scanner is a small device that connects to your car’s diagnostic port. This port is usually located under the dashboard on the driver’s side. The scanner reads trouble codes and can also reset maintenance lights. It’s a handy tool for anyone who wants to do more than just clear a light. You can check engine codes, monitor sensor data, and reset service intervals.
How to Use It to Clear the Maintenance Light
First, locate your OBD2 port. Plug the scanner into the port. Turn the ignition to the ON position without starting the engine. Follow the scanner’s on-screen prompts to access the maintenance light reset function. Select the oil life or service interval reset. The scanner will communicate with your car’s computer and clear the light. Once the process is complete, disconnect the scanner and start the engine. The maintenance light should be off.
Quick Tip: Basic OBD2 scanners are affordable and work for most reset tasks. If you plan to use one regularly, consider a model that supports all systems, including ABS and airbag codes.
Quick Tips for Scanner Users
- Always turn the ignition to ON before plugging in the scanner.
- Make sure the scanner is fully charged or has fresh batteries.
- Follow the manufacturer’s instructions for your specific scanner model.
- After resetting, start the engine and verify the light is off.
Common Mistakes to Avoid
Turning the Key Too Quickly
One of the most common mistakes is cycling the ignition too fast. The car’s computer needs a few seconds to recognize the reset command. If you turn the key off and on too quickly, the system won’t register the input. Take your time. Wait for the dashboard lights to fully illuminate before moving to the next step.
Forgetting to Check the Oil Level
Resetting the light doesn’t replace the actual oil change. Always check the oil level with the dipstick after you finish the reset. A low oil level can trigger the maintenance light even after you reset it. If the oil is low, top it off before you reset. This ensures the light stays off and your engine stays protected.
Ignoring Underlying Issues
Sometimes the maintenance light comes back after you reset it. This can signal a deeper problem. If the light returns within a few days, don’t ignore it. The oil life system might be detecting an issue. Use an OBD2 scanner to check for codes. Addressing the root cause will prevent the light from returning.
When to Seek Professional Help
Persistent Warning Lights
If you’ve tried all the reset methods and the light still won’t turn off, it’s time to visit a professional. A persistent light could mean the oil life system has a fault or there’s a hidden trouble code. A mechanic can run a full diagnostic and fix the issue. They have the right tools and software to handle stubborn lights.
Complex Dashboard Warnings
Some cars display multiple warnings at once. If you see a maintenance light along with a check engine light or oil pressure warning, don’t guess. Pull over safely and check your oil pressure. If the oil pressure light is on, stop driving immediately. Call a tow truck or a mobile mechanic. Resetting the maintenance light won’t fix a low oil pressure problem, and driving on it can destroy your engine.
Conclusion
Resetting the maintenance light after an oil change is a small but important part of car care. By following the steps in this guide, you can keep your dashboard clean and your maintenance schedule on track. Whether you use a simple button combo or an OBD2 scanner, you now know exactly how to reset maintenance light after an oil change. Give it a try at your next oil change and enjoy the satisfaction of a fully reset system. Your car will thank you with smooth, worry-free driving.
Frequently Asked Questions
Can I drive with the maintenance light on after an oil change?
Yes, you can drive safely with the light on. The light is just a reminder, not a critical warning. However, it’s best to reset it soon so you don’t forget when your next oil change is due. Ignoring it for too long can make you lose track of your service intervals.
What if the maintenance light comes back after I reset it?
If the light returns, it usually means the reset wasn’t successful or the oil life system detected an issue. Try the reset steps again, making sure you follow the exact sequence. If it persists, use an OBD2 scanner to check for codes. A returning light can sometimes indicate low oil pressure or a sensor problem.
Do I need any special tools to reset the maintenance light?
Most cars don’t need special tools. You can use the buttons on your dashboard, steering wheel, or infotainment screen. Only if those methods fail do you need an OBD2 scanner. A basic scanner costs under $30 and works for most vehicles.
How often should I reset the maintenance light?
Reset it every time you complete an oil change. This keeps the oil life system accurate. Some cars also reset the light after other service intervals, like tire rotations or brake inspections. Always reset after any major maintenance task.
Is it safe to use an OBD2 scanner to reset the light?
Yes, it’s completely safe. An OBD2 scanner simply communicates with your car’s computer. It doesn’t alter any engine settings or cause damage. Just make sure you buy a scanner that supports your vehicle’s make and model. Follow the instructions carefully and you’ll clear the light without any risk.
Will resetting the maintenance light void my warranty?
No, resetting the maintenance light does not void your warranty. The light is just an indicator, not a part of the warranty system. However, keep your service records. If you ever need warranty work, having proof of regular oil changes will protect your claim.