How to Change a Car Battery Step by Step Fast and Easy
Learning how to change a car battery step by step is one of the easiest and most useful skills every driver should have. This complete guide walks you through the entire process from safety prep to final testing, so you can save money and avoid roadside waits. With basic tools and about 30 minutes, you can handle your car battery replacement confidently at home.
Have you ever been stranded because your car won’t start on a busy morning? A dead battery is one of the most common problems drivers face every year. The good news is that learning how to change a car battery step by step is easier than you think. With a few basic tools and about 30 minutes, you can handle this simple repair yourself at home. This guide walks you through the entire process so you can save time and money.
Knowing how to swap out your automotive battery is a valuable skill that every driver should have. It keeps you from being stuck waiting for roadside help. It also teaches you more about your vehicle’s electrical system. Whether you are a complete beginner or have some experience, this guide will help you get the job done right.
Car battery replacement does not have to be scary or complicated. Many people pay a mechanic for something they can do in under an hour. By the end of this article, you will feel confident and ready to tackle the job. Let us get started with everything you need to know.
Key Takeaways
- Always disconnect the negative terminal first to prevent short circuits and stay safe while working on your vehicle.
- Gather your tools before starting including a wrench, safety gloves, safety glasses, and a wire brush for cleaning.
- Clean battery terminals and the tray thoroughly to remove corrosion and ensure a strong connection with your new battery.
- Connect the positive terminal first when installing the new battery, then the negative terminal last.
- Choose the right replacement battery by matching group size, cold cranking amps, and your vehicle specifications from the owner manual.
- Recycle your old battery properly at an auto parts store or recycling center to protect the environment.
- Maintain your new battery with regular terminal cleaning and voltage checks to extend its lifespan significantly.
📑 Table of Contents
Why You Should Know How to Change a Car Battery Step by Step
Your automotive battery is the heart of your vehicle’s electrical system. It powers the starter motor, lights, and all electronic components. When the battery dies, your car won’t start, and you are stuck. Understanding how to perform a car battery replacement gives you independence and saves money.
Most batteries last between three and five years. However, extreme weather, short trips, and leaving lights on can shorten battery life. Learning this simple maintenance task means you are always prepared. You never have to wait for a tow truck or pay expensive labor costs.
Vehicle maintenance does not need to be expensive or complicated. A dead battery is one of the most common reasons drivers call for roadside assistance. By knowing how to handle the job yourself, you take control of your car’s health. You also gain confidence that comes from solving real problems on your own.
What You Need Before You Start
Essential Tools and Safety Gear
Before you begin, gather everything you need. Having the right tools makes the process smooth and safe. Here is your checklist:
- Wrench or socket set (usually 10mm)
- Safety gloves to protect your hands from battery acid
- Safety glasses for eye protection
- A wire brush or battery terminal cleaner
- Anti-corrosion spray or petroleum jelly
- A new battery that matches your vehicle specifications
Safety First
Always work in a well-ventilated area. Battery acid can cause burns if it splashes on your skin. Never smoke near a battery because it can produce explosive gases. Make sure your vehicle is turned off and the keys are removed before you start.
Wear your safety gloves and safety glasses throughout the entire process. If you accidentally touch battery acid, rinse the area with water immediately. Keep a box of baking soda nearby to neutralize any spills. These small precautions make a big difference in keeping you safe.
Quick Tip
Keep a pair of rubber gloves and a pair of old towels in your trunk at all times. You never know when you might need to handle a battery issue on the road.
How to Change a Car Battery Step by Step
Now let us walk through the actual process. Follow each step carefully and you will have a new battery installed in no time.
Step 1: Locate the Battery
Open the hood and find the battery compartment. In most vehicles, the battery is located near the front of the engine bay. It is usually a rectangular box with two posts on top. The positive post is marked with a plus sign and often has a red cover.
If you cannot find your battery, check your vehicle owner’s manual. Some cars have the battery under the rear seat or in the trunk. Knowing where it is before you start saves time and frustration. Take a moment to inspect the battery for any visible damage or leaks before you touch anything.
Step 2: Disconnect the Negative Terminal First
This is the most important safety step. Always disconnect the negative battery cable first. The negative terminal is marked with a minus sign and usually has a black cover. Use your wrench to loosen the nut on the clamp.
Once loose, carefully pull the cable off the terminal. Tuck it away from the battery so it cannot accidentally reconnect. This prevents short circuits and keeps you safe during the process. Never let the wrench or any metal tool touch both terminals at the same time.
Step 3: Disconnect the Positive Terminal
Now disconnect the positive battery cable. It is marked with a plus sign and usually has a red cover. Loosen the nut and remove the cable. Place both cables aside in a safe spot where they will not touch any metal parts.
Take note of which cable goes where. This makes installation of the new battery much easier and faster. You can even take a quick photo with your phone before removing anything. This reference will save you from guessing later.
Step 4: Remove the Old Battery
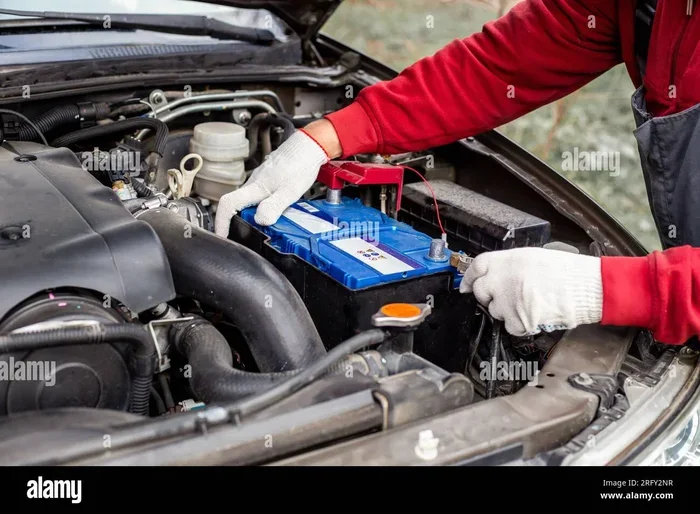
Most batteries are held in place by a metal bracket or clamp. Use your wrench to remove the bracket screws. Once the bracket is off, carefully lift the old battery out of the battery compartment.
Batteries can be heavy, so lift with your legs, not your back. If the battery is stuck, check for any additional hold-down hardware. Some vehicles use a side mount or a top strap that needs to be removed first. Set the old battery on a flat, stable surface away from children and pets.
Step 5: Clean the Battery Tray and Terminals
Inspect the battery tray for any white or blue powdery buildup. This is battery corrosion and it can cause connection problems. Use a wire brush to clean the tray thoroughly.
Also clean the battery cables and the area where the cables connect. Corroded battery terminals can prevent your new battery from charging properly. A clean connection ensures optimal electrical flow and extends your battery life. If the corrosion is heavy, you can use a mixture of baking soda and water to neutralize it before brushing clean.
Quick Tip
Dip an old toothbrush in baking soda water and scrub the terminals gently. This removes corrosion without scratching the metal surfaces.
Step 6: Install the New Battery
Place the new battery into the tray, making sure the positive and negative terminals match the cable positions. The positive terminal should connect to the positive cable, and the negative to the negative cable. Double-check this alignment before securing anything.
Replace the bracket or clamp to secure the battery in place. Make sure the battery does not move around. A loose battery can damage electrical connections and cause vibration problems while driving. Tighten the bracket snugly but avoid over-tightening, which can crack the battery case.
Step 7: Connect the Positive Terminal First
Start by connecting the positive battery cable to the positive terminal. Tighten the nut firmly but do not overtighten. A snug connection is all you need. Applying a thin layer of anti-corrosion grease or petroleum jelly to the terminal helps prevent future buildup.
This simple step protects your connection and makes future maintenance easier. It also ensures a strong electrical path from the battery to the starter motor. A clean, well-greased terminal resists corrosion much better than an unprotected one.
Step 8: Connect the Negative Terminal
Now connect the negative battery cable to the negative terminal. Tighten the nut securely. Double-check that both connections are tight and secure. At this point, your car battery replacement is complete.
Start your vehicle to confirm everything works. The engine should turn over smoothly and all electronics should function normally. Listen for any unusual clicking sounds, which could indicate a loose connection. If the engine starts right away, you have done the job correctly.
Step 9: Test Your New Battery
Turn on the headlights and let them run for a few minutes. Check that the lights are bright and steady. Use a battery charger or have someone check the voltage if you want to be thorough.
A healthy automotive battery should read around 12.6 volts when the engine is off. If the voltage is low, your alternator may need inspection. Most auto parts stores will test your battery for free. This quick check gives you peace of mind that everything is working as it should.
Quick Tip
Keep a portable battery charger in your trunk. It can jump-start your car if your new battery ever gets drained and saves you from needing another vehicle.
Common Mistakes to Avoid
Even simple jobs can go wrong if you skip steps or rush through them. Here are the most common mistakes people make when changing a car battery:
- Disconnecting the positive terminal first – This can cause a short circuit if the wrench touches metal parts of the vehicle.
- Forgetting to clean corrosion – Dirty terminals lead to poor connections and starting problems down the road.
- Overtightening the terminal nuts – This can crack the battery posts or strip the threads, causing leaks.
- Installing the wrong battery size – Always match the group size and cold cranking amps to your vehicle specifications.
- Leaving lights or electronics on – This drains the new battery before it gets a chance to charge properly.
Taking your time and following each step carefully prevents these issues. A little patience goes a long way toward a successful car battery replacement. If something does not feel right, stop and double-check your work before moving forward.
How to Choose the Right Replacement Battery
Not all batteries are the same. Choosing the right new battery is just as important as the installation process. Here is what you need to consider before making your purchase.
Check Your Vehicle Manual
Your owner’s manual lists the recommended battery group size, cold cranking amps, and reserve capacity. These numbers ensure the battery fits properly and delivers the right power for your engine. Using the wrong group size can lead to poor connections or damage to your battery tray.
Consider Your Climate
If you live in a cold climate, you need a battery with higher cold cranking amps. Cold weather makes it harder for batteries to deliver power. In hot climates, look for batteries with strong heat resistance and a solid battery warranty. Extreme temperatures shorten battery life, so choose accordingly.
Brand Matters
Popular brands like Interstate, DieHard, and Optima offer reliable options. Read reviews and compare battery life ratings before purchasing. A slightly higher price often means better performance and longer lasting power. Do not always go for the cheapest option, as quality matters when it comes to your vehicle’s electrical system.
| Battery Type | Pros | Cons |
|---|---|---|
| Standard Lead-Acid | Affordable, widely available | Heavier, shorter lifespan |
| AGM (Absorbed Glass Mat) | Longer life, vibration resistant | More expensive |
| Enhanced Flooded Battery | Good balance of cost and performance | Moderate price point |
Most standard vehicles work well with a quality lead-acid or AGM battery. Check your manual to confirm which type your vehicle supports. When in doubt, ask a store associate for help matching the battery to your vehicle.
Tips for Extending Your New Battery Life
Installing a new battery is only half the battle. Proper care helps your battery last longer and perform better. Follow these simple tips to get the most out of your investment.
- Keep terminals clean – Inspect them every few months and clean any corrosion with a wire brush.
- Drive your vehicle regularly – Short trips do not give the battery charger (alternator) enough time to fully recharge the battery.
- Turn off electronics when parked – Lights, radio, and phone chargers drain power when the engine is off.
- Check the battery voltage regularly – A simple multimeter check takes seconds and catches problems early.
- Secure the battery properly – Vibrations from driving can damage internal components if the battery is loose.
These small habits add up over time. They keep your battery life at its maximum and prevent unexpected breakdowns. Think of battery maintenance the same way you think about oil changes and tire rotations. Regular attention prevents bigger problems later.
Expert Insight: According to automotive professionals, the number one reason batteries fail early is neglect. A quick inspection of the terminals every few months can add years to your battery’s lifespan. Do not wait until your car won’t start to pay attention to your battery health. Set a calendar reminder to check your battery every three months. This simple habit keeps you ahead of potential problems.
What to Do With Your Old Battery
Never throw your old battery in the trash. Recycling old battery units is required by law in most areas. Lead and acid are hazardous materials that can harm the environment if not disposed of properly.
Most auto parts stores will accept your old battery when you buy a new one. Some stores even offer a core charge refund. You can also take it to a local recycling center or hazardous waste facility. This simple step helps protect our planet and keeps harmful materials out of landfills. Recycling also allows valuable materials like lead and plastic to be reused in new products.
When you buy a new battery, ask the store if they offer a battery warranty. Many manufacturers cover defects for up to three years. Registering your battery warranty online ensures you are protected if anything goes wrong. This extra step costs nothing and provides valuable peace of mind.
Conclusion
Learning how to change a car battery step by step is one of the most useful skills you can develop as a driver. It saves you money, time, and the hassle of waiting for roadside assistance. With the right tools and a little patience, anyone can do it.
Remember to follow each step carefully, prioritize safety, and choose the right new battery for your vehicle. Proper maintenance and smart choices will keep your automotive battery running strong for years to come. Now you have the knowledge and confidence to handle this common repair on your own.
Do not let a dead battery ruin your day. Take action today, gather your tools, and give yourself the satisfaction of handling a real car repair. Your future self will thank you the next time your battery needs attention.
Frequently Asked Questions
How often should I change my car battery?
Most automotive batteries last between three and five years depending on driving habits and climate. If you notice slow cranking or dim lights, it is time to test your battery. Regular voltage checks help you catch a failing battery before it leaves you stranded.
Can I change a car battery myself?
Yes, changing a car battery is one of the simplest DIY maintenance tasks. You only need basic tools like a wrench and about 30 minutes of your time. Following the proper safety steps ensures the process is quick and completely safe.
What happens if I connect the battery cables wrong?
Connecting the cables incorrectly can cause a short circuit that damages your vehicle’s electrical system. Always connect the positive terminal first and the negative terminal last. Double-check your cable connections before starting the engine to avoid costly repairs.
How do I know when my battery needs replacing?
Signs include slow engine cranking, dim headlights, a dashboard warning light, and a battery that is more than four years old. Most auto parts stores will test your battery for free. If your car won’t start consistently, your battery is likely the culprit.
Is it safe to change a car battery in the rain?
It is best to wait for dry conditions to change your battery. Water increases the risk of electrical shorts and can damage battery terminals. If you must work in wet conditions, wear rubber gloves and keep all connections dry throughout the process.
How long does a new car battery last?
A quality new battery typically lasts three to five years with proper care. Extreme temperatures, short trips, and leaving electronics on can shorten battery life. Regular maintenance like cleaning terminals and checking voltage helps maximize your battery’s lifespan.